4 - 32
2. Reassembly
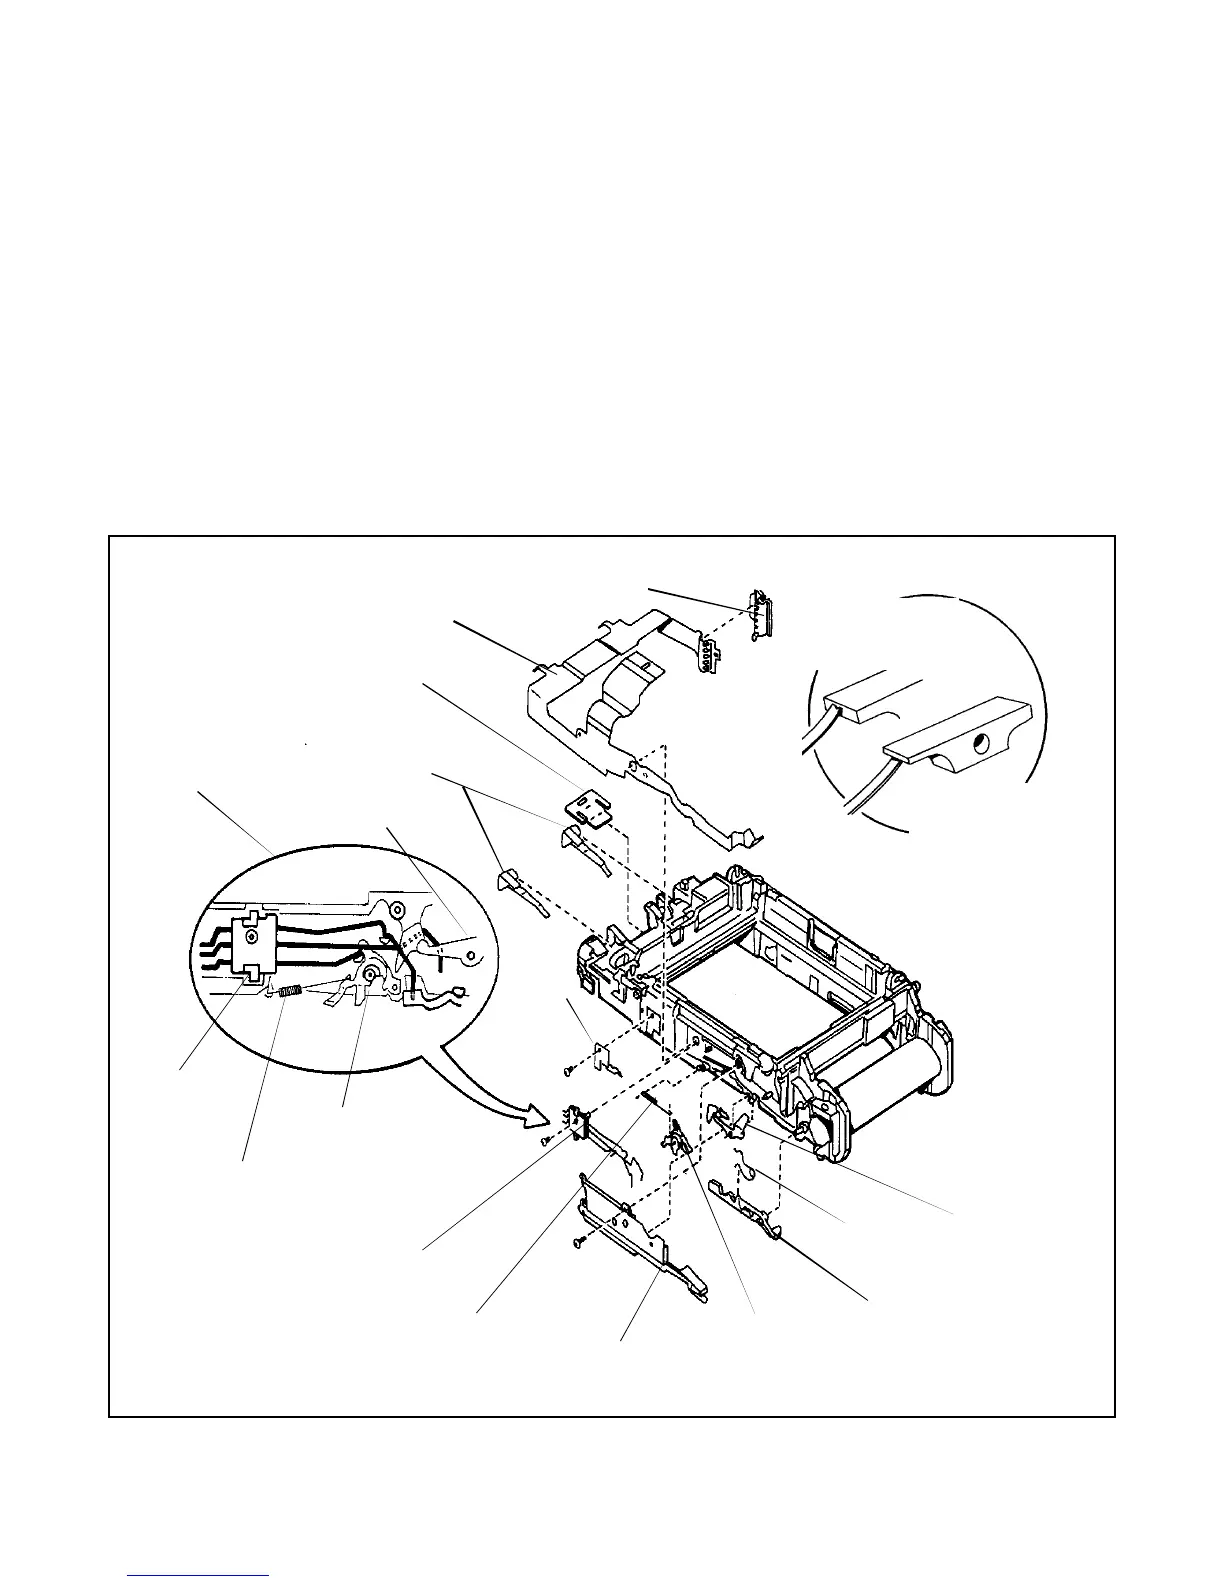
To reassemble the Non-Gear Side of the Main Frame of the camera, follow the disassembly steps in
reverse order.
Note: When re-installing the Erect Switch make sure its contacts are properly positioned with the
applicable Sensor: (Refer to insert in Figure 4-41 for location of contacts.)
• Erect Sensor
• Door Latch Sensor
• Power Actuator
Use the Battery Contact GO/NO GO gauge when installing the Battery Contacts. (Refer to
inset in Figure 4-41.)
Figure 4-41. Disassembly of Main Frame (Non-Gear Side)
(e, f) ERECT
SWITCH
(m)
DOOR
STOP
(j) OVER CENTER
SPRING
(i) BATTERY
CONTACTS
POWER
ACTUATOR
SPRING
LOCKING
TAB
POWER
ACTUATOR
(e, f) ERECT
SWITCH
(a, b) SWITCH
RETAINER
(k, l) INTERCONNECTING
FLEX
(h) FLEX PLUG
SWITCH BLOCK
(c) POWER
ACTUATOR
(c) POWER
ACTUATOR
SPRING
(d) ERECT
SENSOR
SPRING
(g) ERECT
SENSOR
(d) DOOR
LATCH
SENSOR
(g) ERECT
SENSOR
BATTERY CONTACT
GO/NO-GO GAUGE
#13558
UNACCEPTABLE:
contact touches front
of gauge
ACCEPTABLE:
contact touches or is
close to underside of gauge

 Loading...