3 - 10
Adjustments
Ambient Exposure Calibration
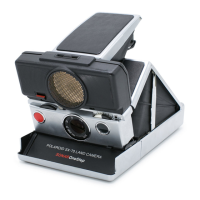
Setup (Figure 3-3)
1. Open the camera door.
2. Using a solder aid tool, manually trip the camera door switch into its down position.
3. Using a solder aid tool, remove the front cover from the camera.
4. Install the Joshua Test Cover in place of the removed front cover.
5. Set the Joshua Test Cover Strobe/Ambient (STB/AMB) switch to its Ambient (AMB) position.
6. Place the camera with the Joshua Test Cover onto the Joshua Horn Assembly.
7. Remove the 640 Nest Assembly from the Star Tester.
8. Install the Alignment Gauge in place of the removed Nest Assembly.
9. Position the Joshua Horn Assembly up against the Star Tester (Figure 3-4). The tab guide on the
Alignment Gauge properly centers the camera in front of the light source window of the Star Tester.
Note: The VIS/IR photocell and the taking lens should be centered on the light source window.
10. Set switch 1 (SW 1) of the Joshua Horn Assembly to its Ambient (AMB) position.
11. Slide the camera trim switch to its center (normal) position.
12. Set the Star Tester selector switch to its Ambient position.
Adjustment Procedure
1. Press the camera shutter button.
2. Record readings shown on the STOP ERROR display of the Star Tester.
3. Repeat steps 1 and 2 two more times, recording all reading shown on the STOP ERROR display of
the Star Tester. (Because of the SLR system there is only one reading for every two cycles of the
camera.)
Note: Ambient Specification Limits -.10 +
0.25 STOP
 Loading...