The system uses preset 0 as the default camera position for all preset camera positions. This default
camera position is zoomed out, panned straight ahead with horizontal tilt.
If your system camera supports pan, tilt, and zoom movement, you can create up to 10 preset camera
positions for the near-end camera. Each preset stores the following information:
▪ Camera number
▪ Camera zoom level
▪ Direction the camera points
If far-end camera control is allowed, you can create 10 presets for the far-end camera as well. These
presets are saved only for the duration of the call. You can also use presets that were created at the far
end to control the far-end camera, if enabled by the administrator.
Keep the following camera control information in mind when using Self View:
▪ When in a call, selecting near camera control pans and zooms the local camera without changing
the layout.
▪ When out of a call, selecting camera control changes the Self View to full screen.
▪ Incoming calls override the full-screen Self View layout.
View Stored Camera Presets
Become familiar with the stored camera presets to get the most out of your system.
Procedure
1. From the Home screen or Call screen, touch Cameras.
2. If you are in a call, touch Near or Far to select either near-end or far-end control.
3. Touch View Presets.
Icons for presets 0-9 are shown on the screen.
4. Touch a number to go to a saved preset.
Store a Camera Preset
You cannot delete a preset, but you can overwrite an existing preset to store a new camera position.
Procedure
1. From the Home screen or Call screen, touch Cameras.
2. If you are in a call, touch Cameras > Near or Far to choose a near-end or far-end camera.
3. Touch Select Camera to choose a camera or other video source.
4. Touch Control Camera to move the camera to the desired position.
5. Touch View Presets, then touch and hold a number to store the preset position.
Any existing preset stored at the number you select is replaced.
Move the Camera to a Stored Preset
After you have your presets stored, move the camera to one of the stored presets.
Procedure
1. From the Home screen or Call screen, touch Cameras.
2. If you are in a call, touch Cameras > Near or Far to select either near-end or far-end control.
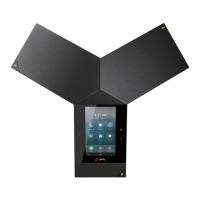
Using a Polycom
®
Touch Control Device
Polycom, Inc. 114