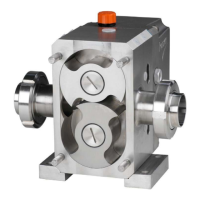
User manual Pomac PLP Lobe pump
CE/PLP (1406) EN-12 31
Gearbox disassembly
Proceed as follows to disassemble the gearbox.
12. Remove the key (22) from the drive shaft (23).
13. Remove the Allen screws (31) and remove the gearbox cover (28) from the rotor case.
14. Remove the gasket (11).
15. Remove the Allen screws (14) and remove both bearing cartridges (15) with shafts (23) and
(30).
16. Remove the shims (12). Mark the shims and their respective positions on the rotor case
with waterproof marker. In case no parts have to be replaced these shims must be
replaced in their original positions!
17. Remove the oil retainer (10).
18. Remove the Allen screws (9) and remove the seal covers (8).
Bearing disassembly
Proceed as follows to disassemble the bearing assembly:
19. Loosen both bearing lock nuts (20) and remove these together with tab washers (19).
20. Remove the gears (17) and (29) from the shafts.
21. Block the bearing cartridge and remove the shaft with the bearings by tapping on the shaft
end at drive side with a plastic hammer.
22. Pull the smaller bearing (16) from the shaft, using a proper puller.
23. Use a proper fitting bush, its bore larger than the shaft shoulder and bearing on the inner ring
of the larger bearing (13), and tap this bearing from the shaft.
24. Remove both bearing shells from the bearing cartridges.
7.8. Disassembly of a safety valve
Disassembly of a safety valve may ONLY be done on a shutdown pump, which is cooled
down and vented!
7.8.1. Disassembly of a spring loaded safety valve
For explanation of the item numbers see the sectional drawing and parts list in paragraph 9.9.
1. Unscrew locknut (12).
2. Turn set screw (11), to set the spring load, with a properly fitting spanner entirely
CLOCKWISE until the spring is completely unloaded!
3. Unscrew the 4 fixation nuts (8) of the safety valve.
4. Remove the safety valve casing (6) with spring (9).
5. Unscrew the cap nuts of the pump cover (1) and remove the pump cover with the plunger (3)
from the pump.
6. Push the plunger out of the opening in the cover.
7. Remove the O-ring (2) from the plunger.