Page 30 of 80 Instruction Manual for AURORA CDD BCG.00613_AA
Part 3 Mounting and Configuration
• Secure networks with a MAC address filter
If a MAC address filter is present on the router, you will first need to enter the passkey as
described above in Secure networks without a MAC address filter.
Once the passkey is entered correctly, it will be necessary to configure it with the same
procedure set out above for Open networks with a MAC address filter (Open).
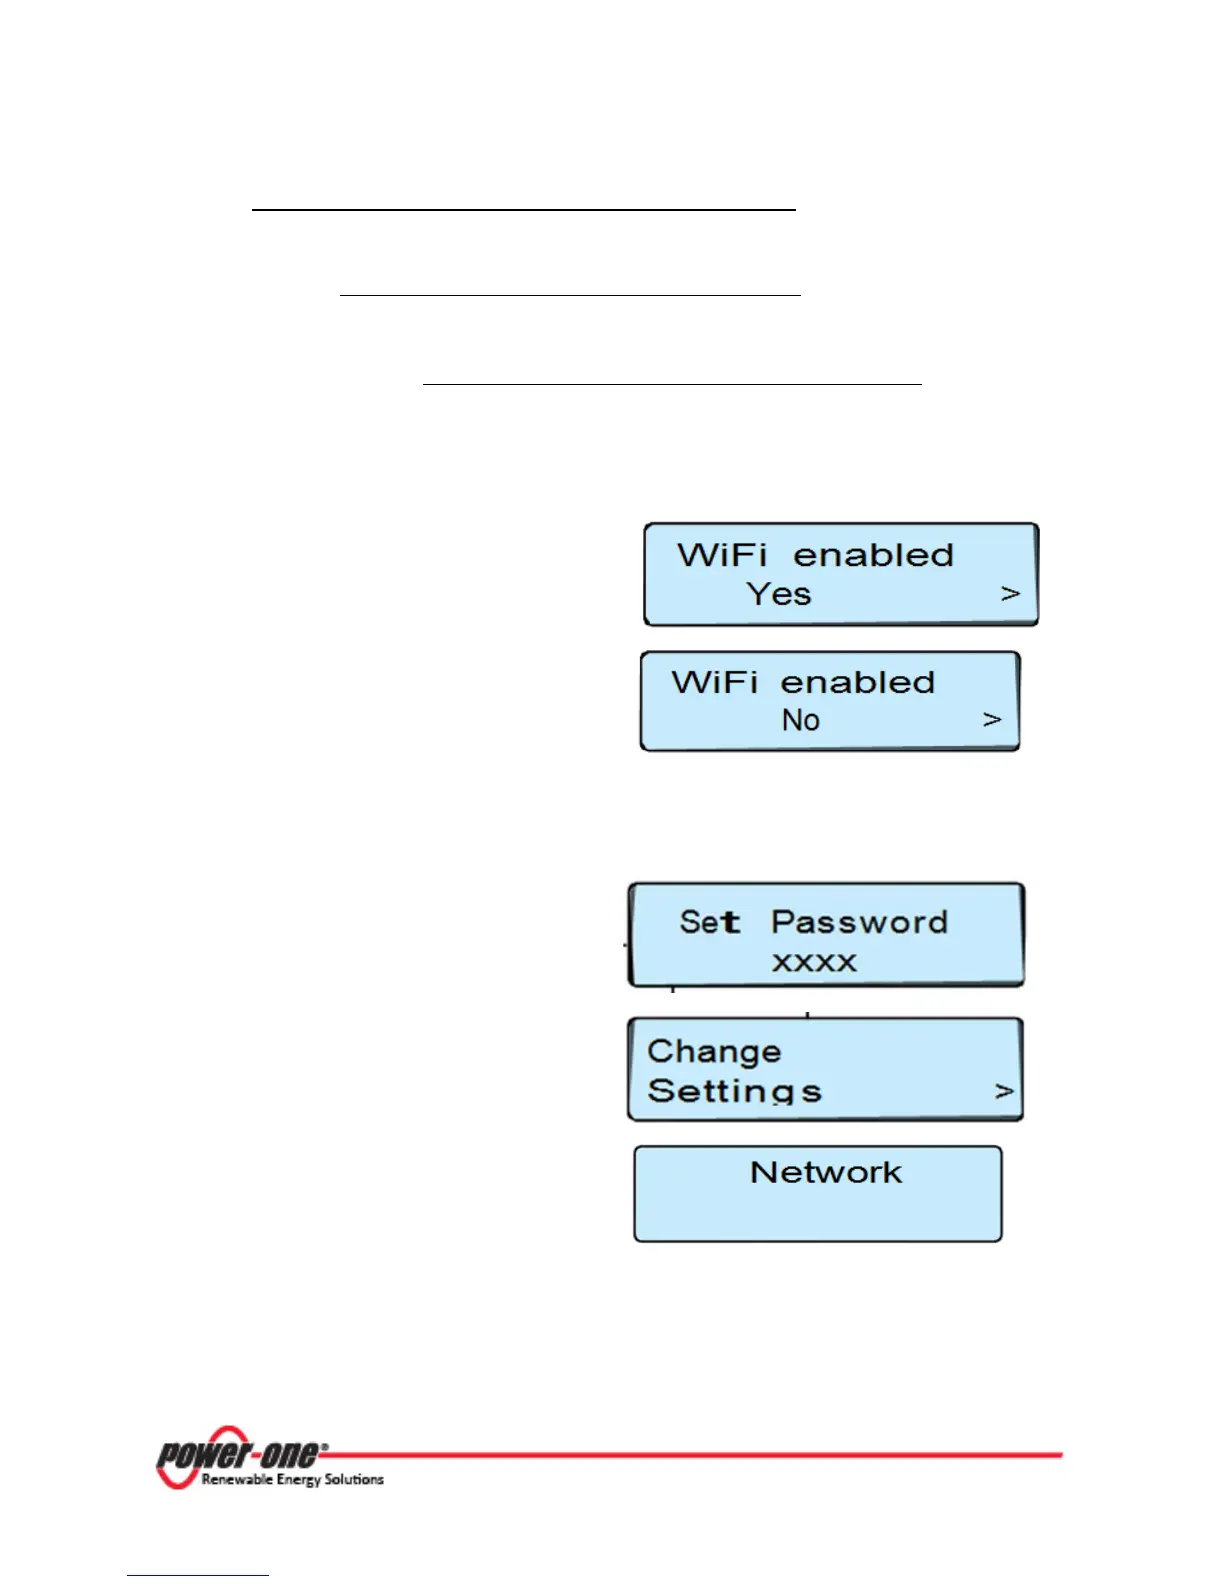
3.4.2 DHCP CONFIGURATION
Step 1 - Press the ESC button to display the
information pages relating to the CDD and
subsequently press UP or DOWN until the “WiFi
enabled Yes” screen is shown.
Press ENTER to remove the > (arrow) next to
“Yes” then use the
UP
DOWN
choose the option “No”.
Step 2 – Press and hold (for a few seconds) the UP and DOWN buttons together in order enter the
“Change Settings” menu. The first screen will display the message “Set Password”.
Input the default password (9999) using the UP
or
DOWN
buttons to change the number.
Press ENTER to confirm each number; and press
ENTER when complete.
(Use ESC to return to the previous character).
After the password is entered, use the
UP
DOWN
buttons locate the “Change Settings”;
menu and press ENTER.
Using UP or DOWN scroll to the submenu
“Network”.
ENTER
UP
DOWN