Field Replaceable Units AR Standard Repeater
4-10 044-05250 Rev B
PSU
To replace a PSU, proceed as described in the Table 4-4.
Table 4-4 PSU Replacement Procedure
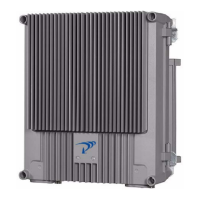
Repeater
To replace an AR repeater, proceed as described in the Table 4-5.
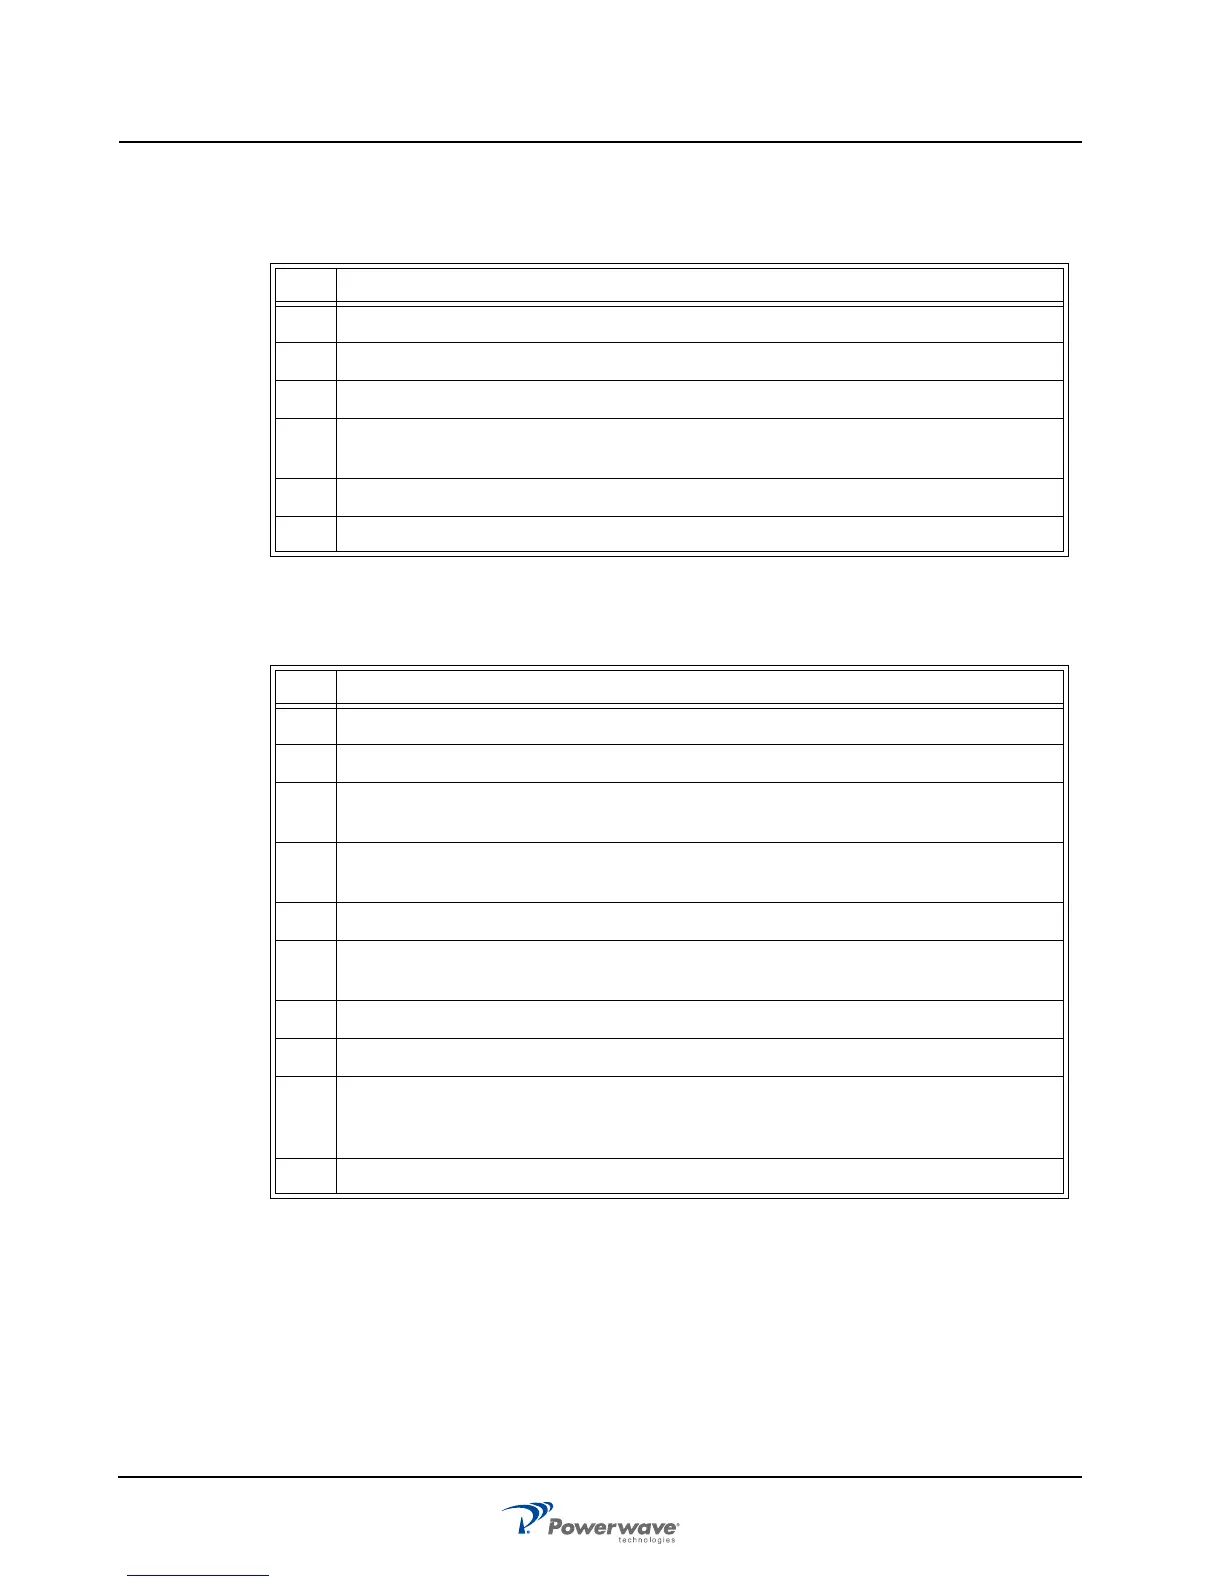
Table 4-5 Repeater Replacement Procedure
Step Action
1 Open repeater door and secure
2 Disconnect main power plug from PSU
3 Disconnect power cable bundle from PSU
4 Loosen screws securing PSU using a 5mm Allen key and remove.
NOTE: screws are designed to not be removed completely from PSU.
5 Replace PSU in reverse order and apply power
6 Close repeater door and secure
Step Action
1 Open repeater door and secure
2 Disconnect main power plug from PSU
3 Verify all cables connected to repeater are labeled before disconnecting, then disconnect
all cables
4 Remove mounting screws from bottom legs of repeater and loosen mounting screws in
top legs
5 Close and secure door
WARNING: A fully loaded AR Repeater can weigh 75lbs. Lifting of the repeater should be
done by two people. Do not attempt to carry the repeater up a ladder.
6 Lift the repeater off the mount hinges
7 Replace repeater in reverse order
8 Connect PC to OM Online port and verify configuration. For Fiber Optic installations, ver-
ify IP address. NOTE: Make sure ‘Repeater On’ classmark in the BSEL Status window is
checked, otherwise the repeater will not be operational.
9 Close repeater door and secure