C842, C842i, C846, C846i Upright and Recumbent Cycle
Page 30
14. If the voltage reading in step 13 was normal, replace the lower PCA. If the lower PCA did not
correct the problem, continue with step 15.
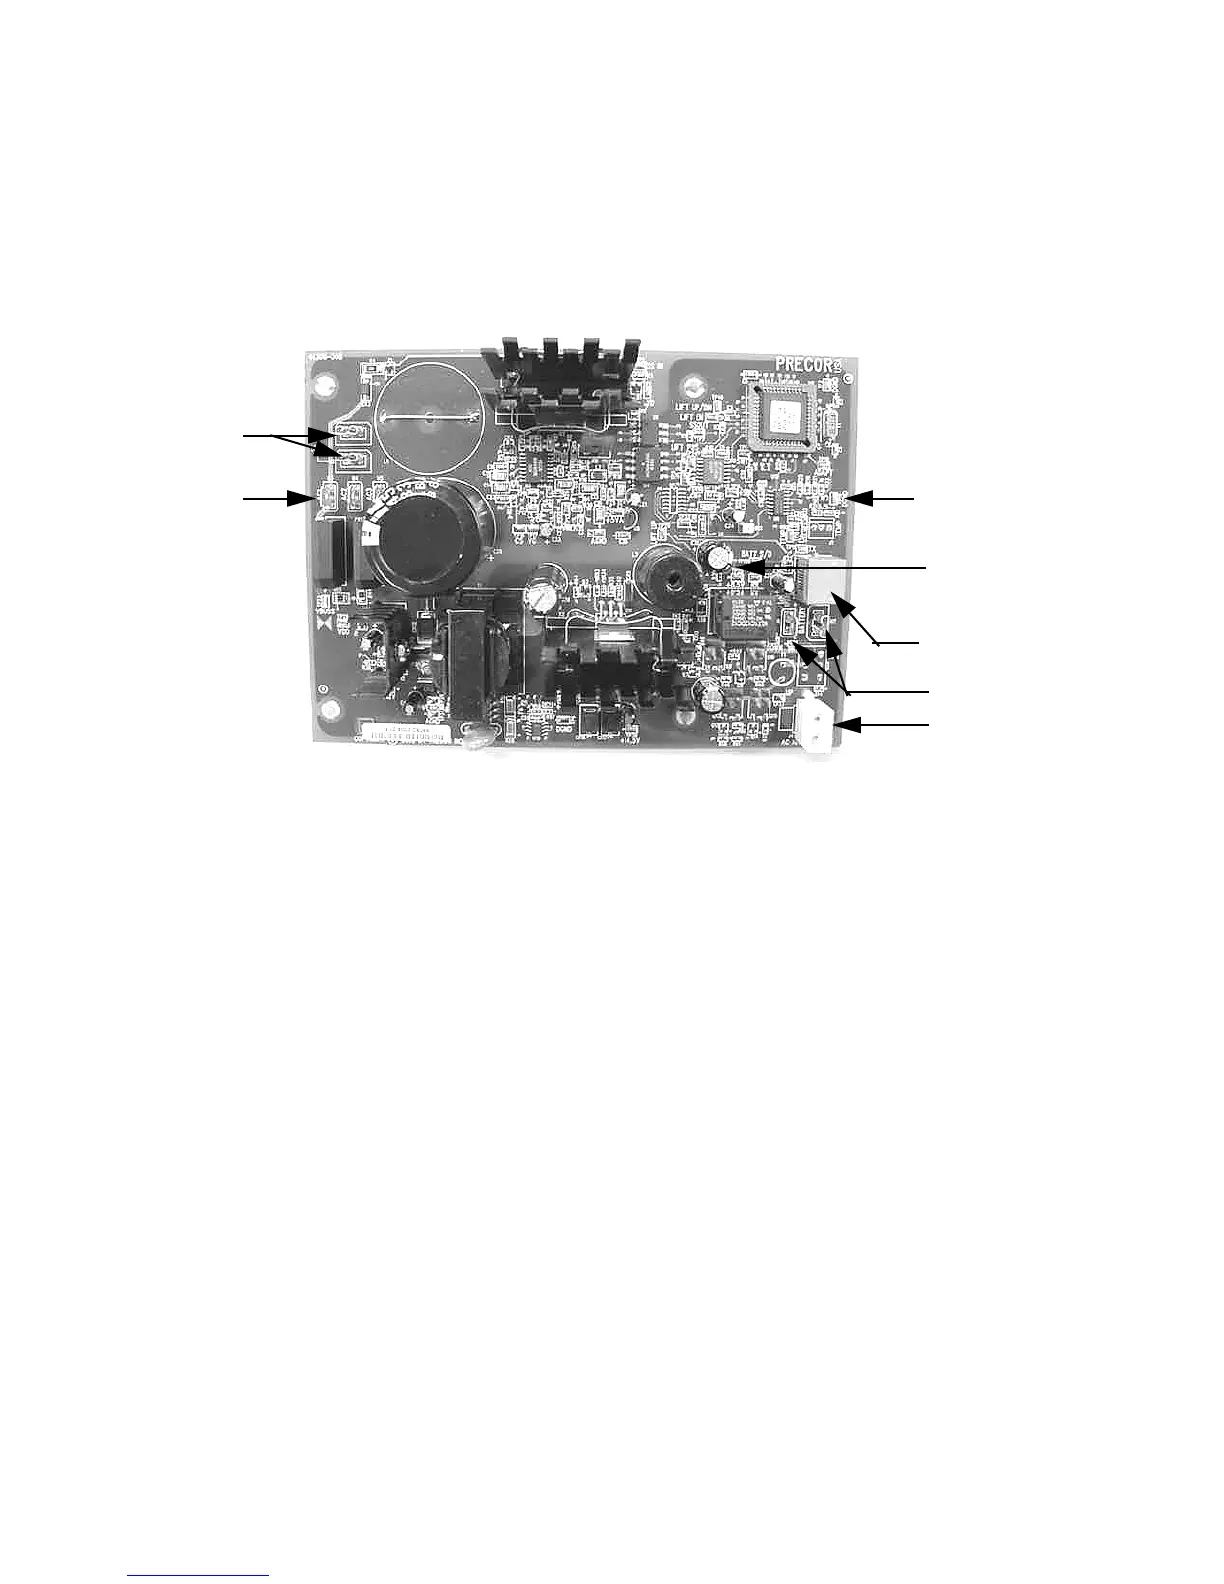
15. With the unit powered up, measure between test point 19 and test point 20 for
approximately 8.5 Vdc. See Diagram 6.6. If the measurement is correct, skip to step 18.
Diagram 6.6 - Lower PCA, C842 and C846 version 2
16. If the measurement in step 12 is significantly low or high, disconnect the interconnect cable
from the J2 connector and repeat the measurement in step 15.
17. If the measurement in step 12 is still significantly low or high, replace the lower PCA. If
replacing the lower PCA does correct the problem, skip to step 20.
18. Remove the upper display panel and disconnect the interconnect cable from the upper
PCA. With the unit powered up, check the voltage between the outer two pins of the
interconnect cable for DC volts. It should read approximately 8.5 Vdc. If the voltage is
absent or significantly low, troubleshoot the interconnect cable and junction block per
Procedure 6.1.
19. If the voltage measurement in step 15 is correct, replace the upper PCA.I
20. f you have performed all of the previous tests and have not been able to locate the trouble,
call Precor customer support.
TP19
TP20
J2
M1, M2
M3, M4, M5
M6, M7
J4