8787
Owner’s Manual
Quick Start:
Level
Setting
OverviewHookupControlsConnecting
to a
Computer
TutorialsTechnical
Information
Trouble-
shooting
and Warranty
Scenes, Presets,
and System Menu
Software: Universal Control, SL Remote, Capture, Studio One Artist 7
Software: Universal Control,
SL Remote, Capture,
and Studio One Artist
4. Under “Change your networking settings,” click
“Set up a new connection or network.”
5. Select “Set up a wireless ad hoc (computer-to-computer) network.”
6. Click on “Next” twice.
7. Enter the network name such as “StudioLive.”
8. Select the Security WAP (or WEP).
9. Enter the Security key or password. For the best security,
include letters, numbers, and punctuation. Then click OK.
10. Check “Save this network.”
11. Click “Turn on Internet connection sharing.”
Mac OS X 10.6
1. On the Menu bar, click on the Wireless Status Icon.
2. From the pull-down menu select “Create Network….”
3. Give your Network a name, such as “StudioLive.”
4. If you would like set up a password (recommended),
check “Require Password.”
5. Create your password within the guidelines and click “OK.”
6. Once your network has been successfully created,
you will see it in your list of available networks.
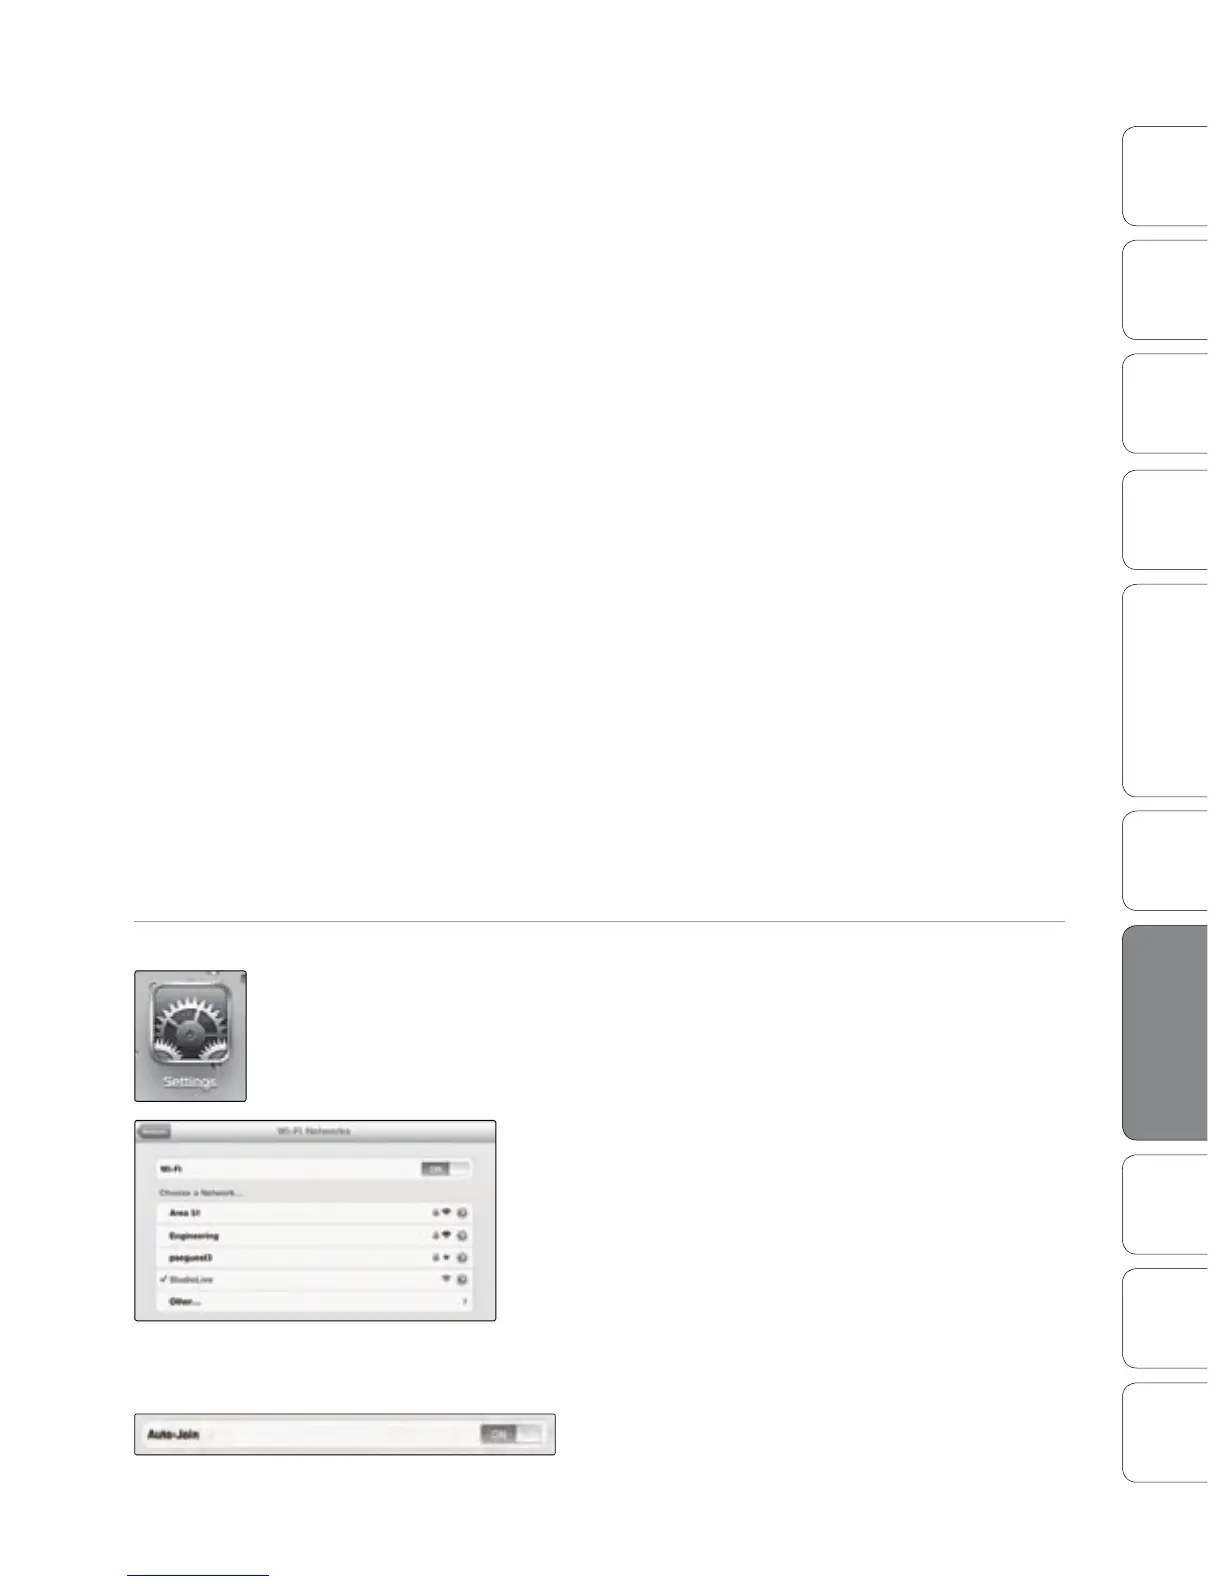
STEP 2: Connect your iPad to your Ad Hoc Network
1. Tap on the Settings icon in your iPad.
2. Tap on “Network.”
3. Tap on “Wi-Fi.”
4. Under “Choose a Network,” you should now see your ad
hoc network in the list.
5. Tap on your newly created network to select it.
6. If you secured your network with a password,
you will prompted to enter it.
7. Tap on the menu arrow to the right of your
network name to open its network settings.
8. Turn Auto-Join to “On.” You are now ready to launch
StudioLive Remote and mix on the go!
Using StudioLive Remote for iPad 7.3
 Loading...