Figure 6.1b
Figure 6.1
i4
6 Single-Sided Welding
Single-Sided Welding
Carbon Rod Shrinking
Stitch Welding
Washer Welding
Nail Welding
Bolt and Nut Welding
Rivet Welding
Contact Shrinking
Spot Hammer Dent Pulling
Pro Pull Dent Removal
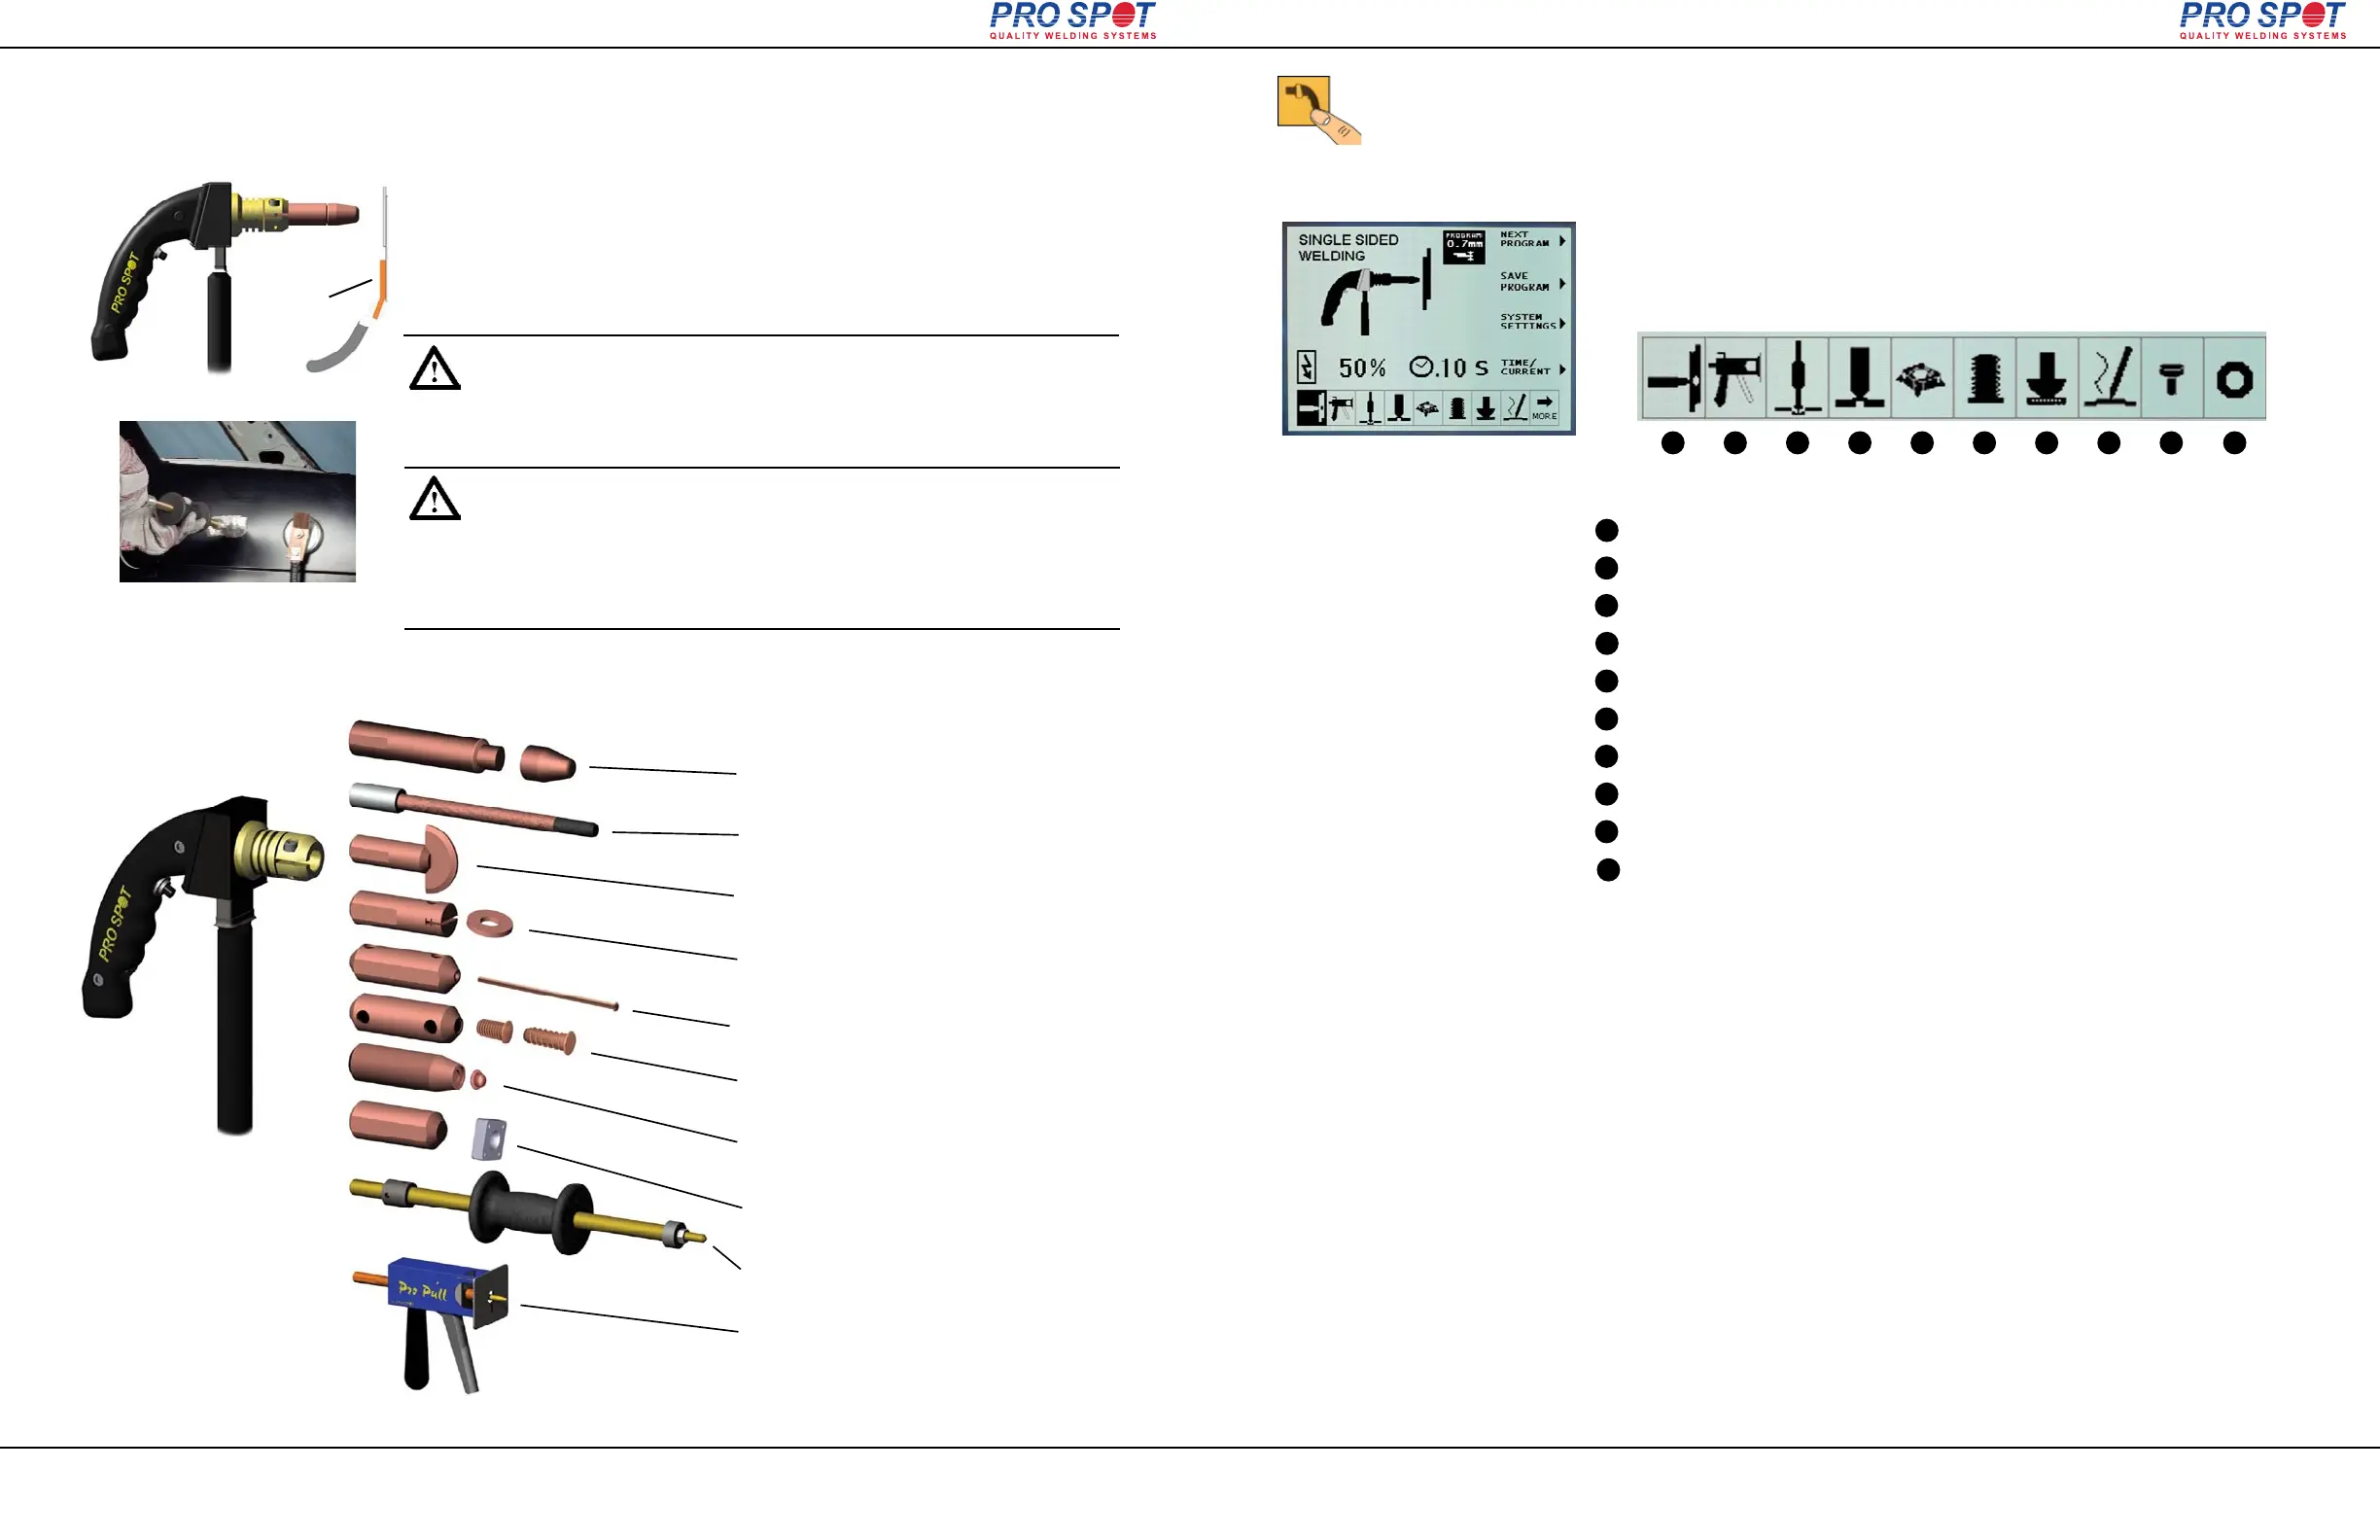
The Single-Sided Weld System allows the operator to carry out
welding tasks using a Single-Sided Weld Gun. The Single-Sided
weld procedure requires contact only from one side compared to
two sides in Two-Sided welding. A ground plate must be connect-
ed to the panel to be welded for it to work (fig. 6.1).
You can also use an optional magnetic ground plate to easily attach the ground
cable to the metal (fig. 6.1b
).
NOTE: Make sure the ground plate is clamped firmly in place on the
inside of a clean metal surface as near as possible to the weld location.
Do not attach the ground to the metal you're about to weld on. When
performing other weld tasks such as dent pulling, etc., the ground
attachment location becomes less critical.
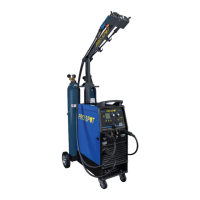
In the Single-Sided weld mode the following weld procedures are available for the
i4:
Page 25
All Info Copyright © Pro Spot International Inc.
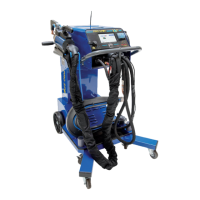
Figure 6.2 Single-Sided applications
ground plate
6.1 Single-Sided Welding Overview
6 Single-Sided Welding
REMARQUE: Assurez-vous que la plaque de terre est serré solide-
ment en place à l'intérieur d'une surface métallique propre aussi près
que possible du lieu de soudure. Ne fixez pas le terre et le métal que
vous êtes sur le point de soudure . En accomplissant d'autres tâches
comme la soudure dent de traction, etc, le lieu de saisie devient
moins critique.
6 Single-Sided Welding
Page 26
All Info Copyright © Pro Spot International Inc.
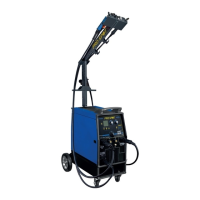
1. Make sure the welder is turned on. Push the Single-Sided weld mode button
(fig 6.3). Single Sided Weld Programs will display on the screen (fig. 6.5).
2. Use the navigation buttons, Left or Right to select desired weld program (refer
to section 4.8 “Setting the default weld program” or fig.4.9). The display screen
shows the currently selected program (fig. 6.4).
Figure 6.3: Selecting Single -Sided
weld mode
Figure 6.4
1
2
3
4
5
6
7
8
9
10
1
2
3
4
5
6
7
8
9
10
Single-Sided spot welding
Pro Pull Dent Removal
Dent Pulling
Contact Shrinking
Nut Welding
Bolt Welding
Stitch Welding
Carbon Rod Shrinking
Rivet Welding
Washer Welding
Figure 6.5 i4 Single Sided Weld Programs
Single-Sided Programs
i4