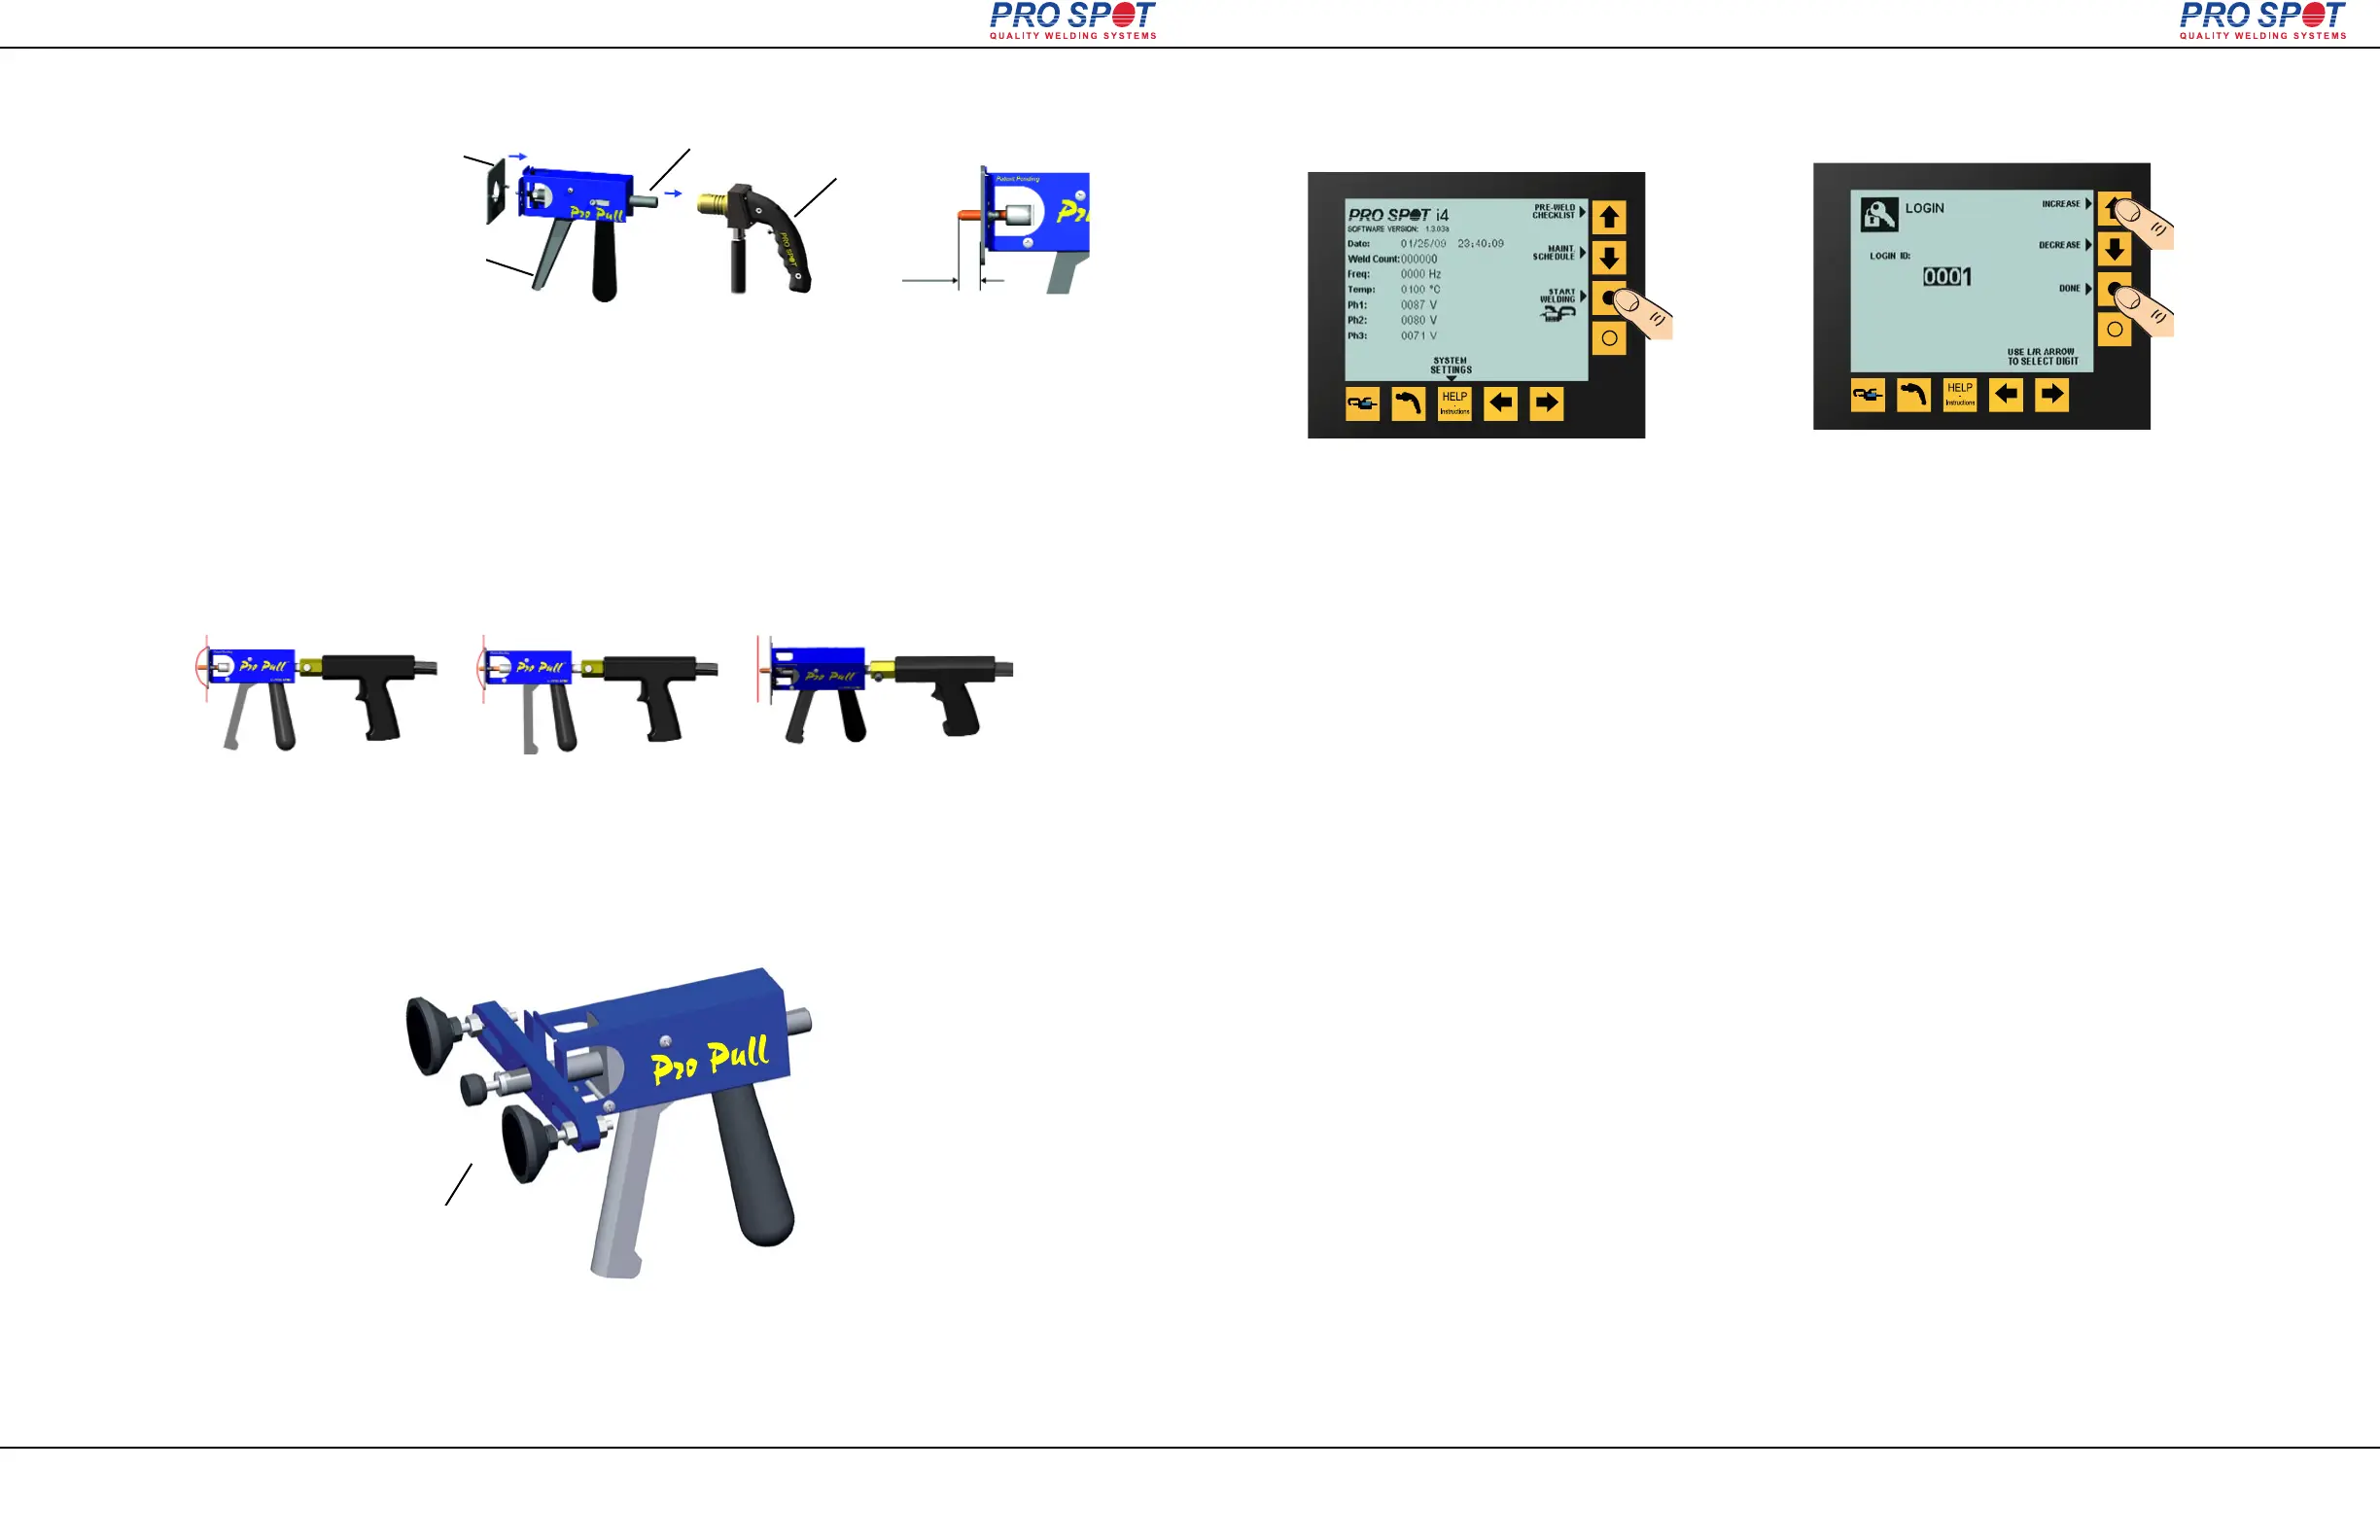
6.11.5 Paintless Dent Pulling With Pro Pull
6 Single-Sided Welding
Page 33
All Info Copyright © Pro Spot International Inc.
A
F
C
E
1. Attach the Weld Gun (D) to Weld Shaft (C). Secure Lock Bolt (G).
2. Slide weld shaft and gun to standard distance (E).
3. Attach desired block plate (A)
4. Position the weld tip in the “bottom” of the dent, weld, then pull the handle (F)
to initiate the pulling action. Use the shortest weld TIME possible to prevent
extensive weld marks.
D
approx.
0.7”(17mm)
Aim, position & fire! Pull dent with Auto
Blocking.
Twist gun to release tip.
6.11.4 Dent Pulling with Pro Pull
6.11.3 Pro Pull Assembly
1 2 3
i4
Glue Adapter for Paintless
Dent Removal
7 i4 Login Feature
Page 34
All Info Copyright © Pro Spot International Inc.
7.1 Overview
7.2 Turning the Login Function Off
7.3 Turning the Login Function On
7 i4 Login Feature
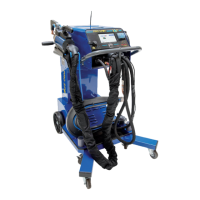
6. When we turn the i4 on it will not prompt for any User password if the Login function is turned off.
7. To turn the Login function on, we have to enter the Factory Password (1234) while booting.
8. Push the Help button while booting at the third screen to access the System Settings menu. The text located
near the Down Arrow button reads WELD SETTING CONTROL MODE: AUTO/MANUAL. Auto is selected by
default. Press the Down Arrow button to enter the Manual mode. In the PASSWORD REQUIRED pop up
window enter 1234 using the arrow keys. Exit by pressing the Open Circle button.
9. In the System Settings menu press Exit (open circle button). The software will reboot and arrive at the first
Status screen. Press the Start Welding button (closed circle) and you will access the weld menu without
being prompted for a User password (Login function is still off).
10. Scroll to Custom B in the Double Sided weld menu. Press System Settings (closed circle button) and you
will arrive in the Login menu. From here we can turn the Login on by pressing LOGIN ON/OFF
(closed circle button). The software will reboot with the preferences stored.
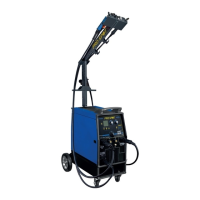
1. The i4 software (versions 1.3.03 and up) utilizes three levels of access: a Factory Password, Login Master
Password, and Login User Passwords.
Login Master Password: 2625
Login User Password: Selectable between 0001-9999
2. Only the Login Master Account has access to the Technician password configuration menu. There are 20
passwords arranged in a 5x4 matrix with initial values of 0001. The displayed 0001 represents an active
password. Selecting any other number (0001 – 9999) will activate it. The Login Master Password can
activate up to 20 Login User Passwords.
3. After startup, press ‘Start Welding’ at the first Status screen (closed circle button).
4. Login with the Manager Account when prompted (2625).
5. Scroll to Custom B in the Double Sided weld menu. Press System Settings (closed circle button) and you
will arrive in the Login menu. From here we can turn the Login off by pressing LOGIN ON/OFF
(closed circle button). The software will reboot with the preferences stored.
i4
After the welder has been turned on and when
the pre-weld screen has appeared, press the
“Start Welding” button (closed circle).
From this screen, enter the desired login. The i4
comes pre-programmed with the login user ID 0001,
0002, 0003, and 0004 available by default. After the
correct ID is entered, press DONE to continue to the
double-sided weld feature.