16. Only the Login Master Password (2625) can set up Login User Passwords from the Login menu.
17. While the i4 is running, with the Login function on, the Factory Password (1234) entered, and the Login Master
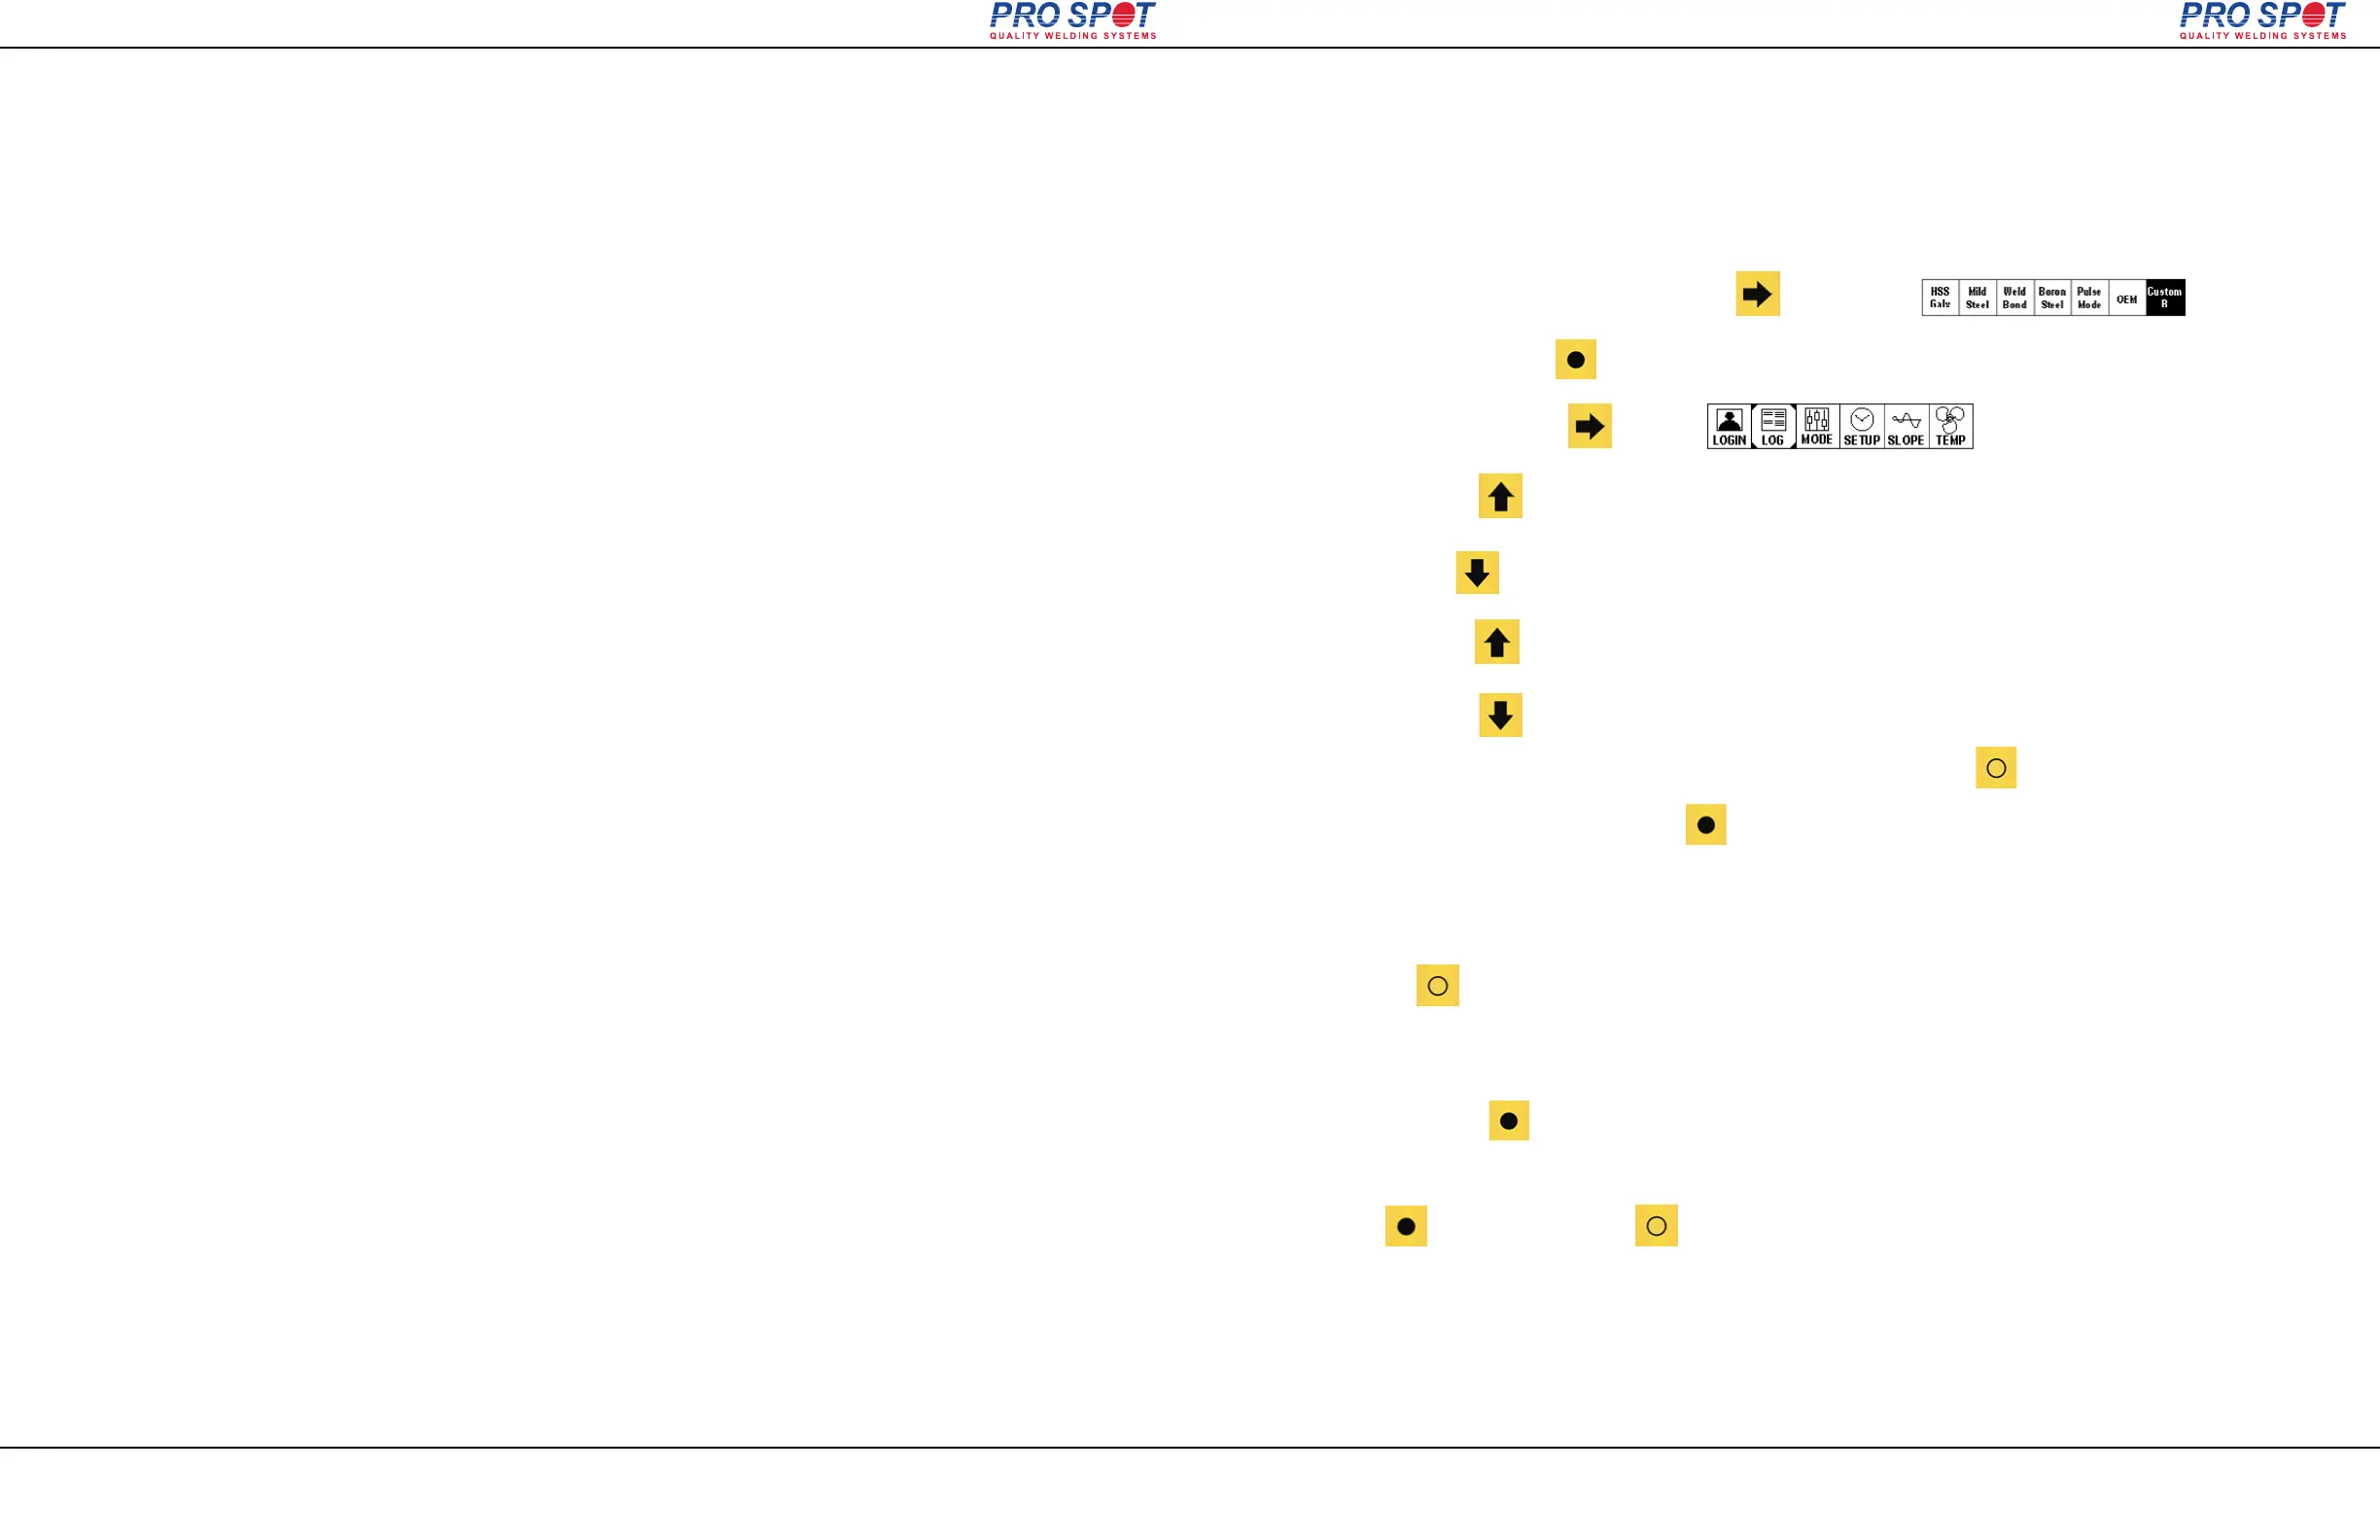
Password (2625) as the present login ID, Scroll to Custom B in the Double Sided weld menu. Press System
Settings (closed circle button) and you will arrive in the Login menu.
18. Press Login ID Settings (down arrow).
19. Navigate with the Left and Right Arrow and Open Circle buttons. Set desired values (ex: 0003) with the Up and
Down Arrow buttons. Once done press the Closed Circle button.
20. Passwords can now be added/changed. There is a maximum of 20 possible Login User Passwords available
to be active.
11. Here we will explain how to switch to another Login User Password without powering the i4 down (on the fly).
12. While the i4 is running, make sure the Login function is on, and the Login User password is set to 0001.
13. Scroll to Custom B in the Double Sided weld menu. Press System Settings (closed circle button) and you
will arrive in the Login menu. Press “Change” (up arrow button) to enter a new password.
14. Enter the desired existing Login Password (ex: 0002).
15. If we enter a wrong number and press Done, a “WARNING! Invalid login ID Try Again” error message window
will appear.
NOTE: It is important that a valid password is entered or the machine will have to be rebooted.
7 i4 Login Feature
Page 35
All Info Copyright © Pro Spot International Inc.
7.4 Switching Passwords
7.5 Setting Up Technician User Passwords
7 i4 Login Feature
i4
8 i4 Log Feature
Page 36
All Info Copyright © Pro Spot International Inc.
8.1 i4 Log Instructions
8 i4 Log Feature
i4
To Clear Log:
To access the LOG menu screen on the welder:
1. In the Welding screens: navigate with side arrow to CUSTOM B
2. Click SYSTEM SETTINGS
3. Move cursor with side arrow to LOG
4. Click LOG MENU The following options are available: SEND LOG TO USB, HEADER, CLEAR LOG, EXIT.
5. Click HEADER to: edit Information that will appear on top of the weld data report
6. Click INCREASE to select a character from A - 0
7. Click DECREASE to select a character from A - 0, click Right side arrow to accept
character and move right. Click Left Arrow to go back. Click NEXT VALUE to move to the next
subject (Vehicle Number) etc. click DONE to proceed. The entered information is now placed in
8. Click EXIT twice go back to the Weld Screens.
9. Click CLEAR LOG from the LOG MENU to: erase previous weld data in the log
and to start a new header with no weld data in the log. Fill out the log (see above) click
DONE to proceed. click EXIT twice go back to the Weld Screens
the LOG as a new heading. The previous logs with previous headings will remain in the log without
being erased. Header info can be edited in MS Excel.