6 Single-Sided Welding
Page 31
All Info Copyright © Pro Spot International Inc.
Figure 6.31
The i4 can also be fitted with a stitch weld adapter enabling the operator to lay
staggered bead type welds. While rolling the tip on the sheet metal edge, the
welder will automatically deliver an intermittent or pulsating current.
1. Push the Single-Sided weld mode button (fig 6.3). Single Sided Weld Programs
will display on the screen (fig. 6.5). The i4 software defaults to Single Spot Weld
Mode (fig. 6.6).
2. Select Stitch Welding Program by pressing the Left or Right Navigatioin
Buttons (fig. 4.9). Make sure that Stitch Welding graphic appears on the screen
(fig. 6.31)
3. Choose weld power level by pressing the “Next Program” button repeatedly.
(refer to section 4.6 "Setting the weld program").
4. Fit Single-Sided gun with the stitch electrode (fig. 6.33).
5. Prepare the surface area by removing paint and primer.
6. Ground the working area (refer to section 6.1 "Single-Sided Welding
Overview").
7. Roll the tip on the sheet metal edge while keeping the trigger depressed. The
welder will automatically deliver an intermittent or pulsating current.
8. Repeat as needed.
This procedure works well on stainless steel, and therefore lends itself well
to rust
repair and patching. It's easy to use and can be manipulated to fit any shape or
form you require.
Figure 6.33
Tip: You can use stitch electrode to weld pulling tabs onto areas that
need to be pulled.
6.10 Stitch Welding
i4
Astuce: vous pouvez utiliser l'électrode de point à souder tirant
des onglets sur des endroits qui ont
besoin d'être tirés.
6 Single-Sided Welding
Page 32
All Info Copyright © Pro Spot International Inc.
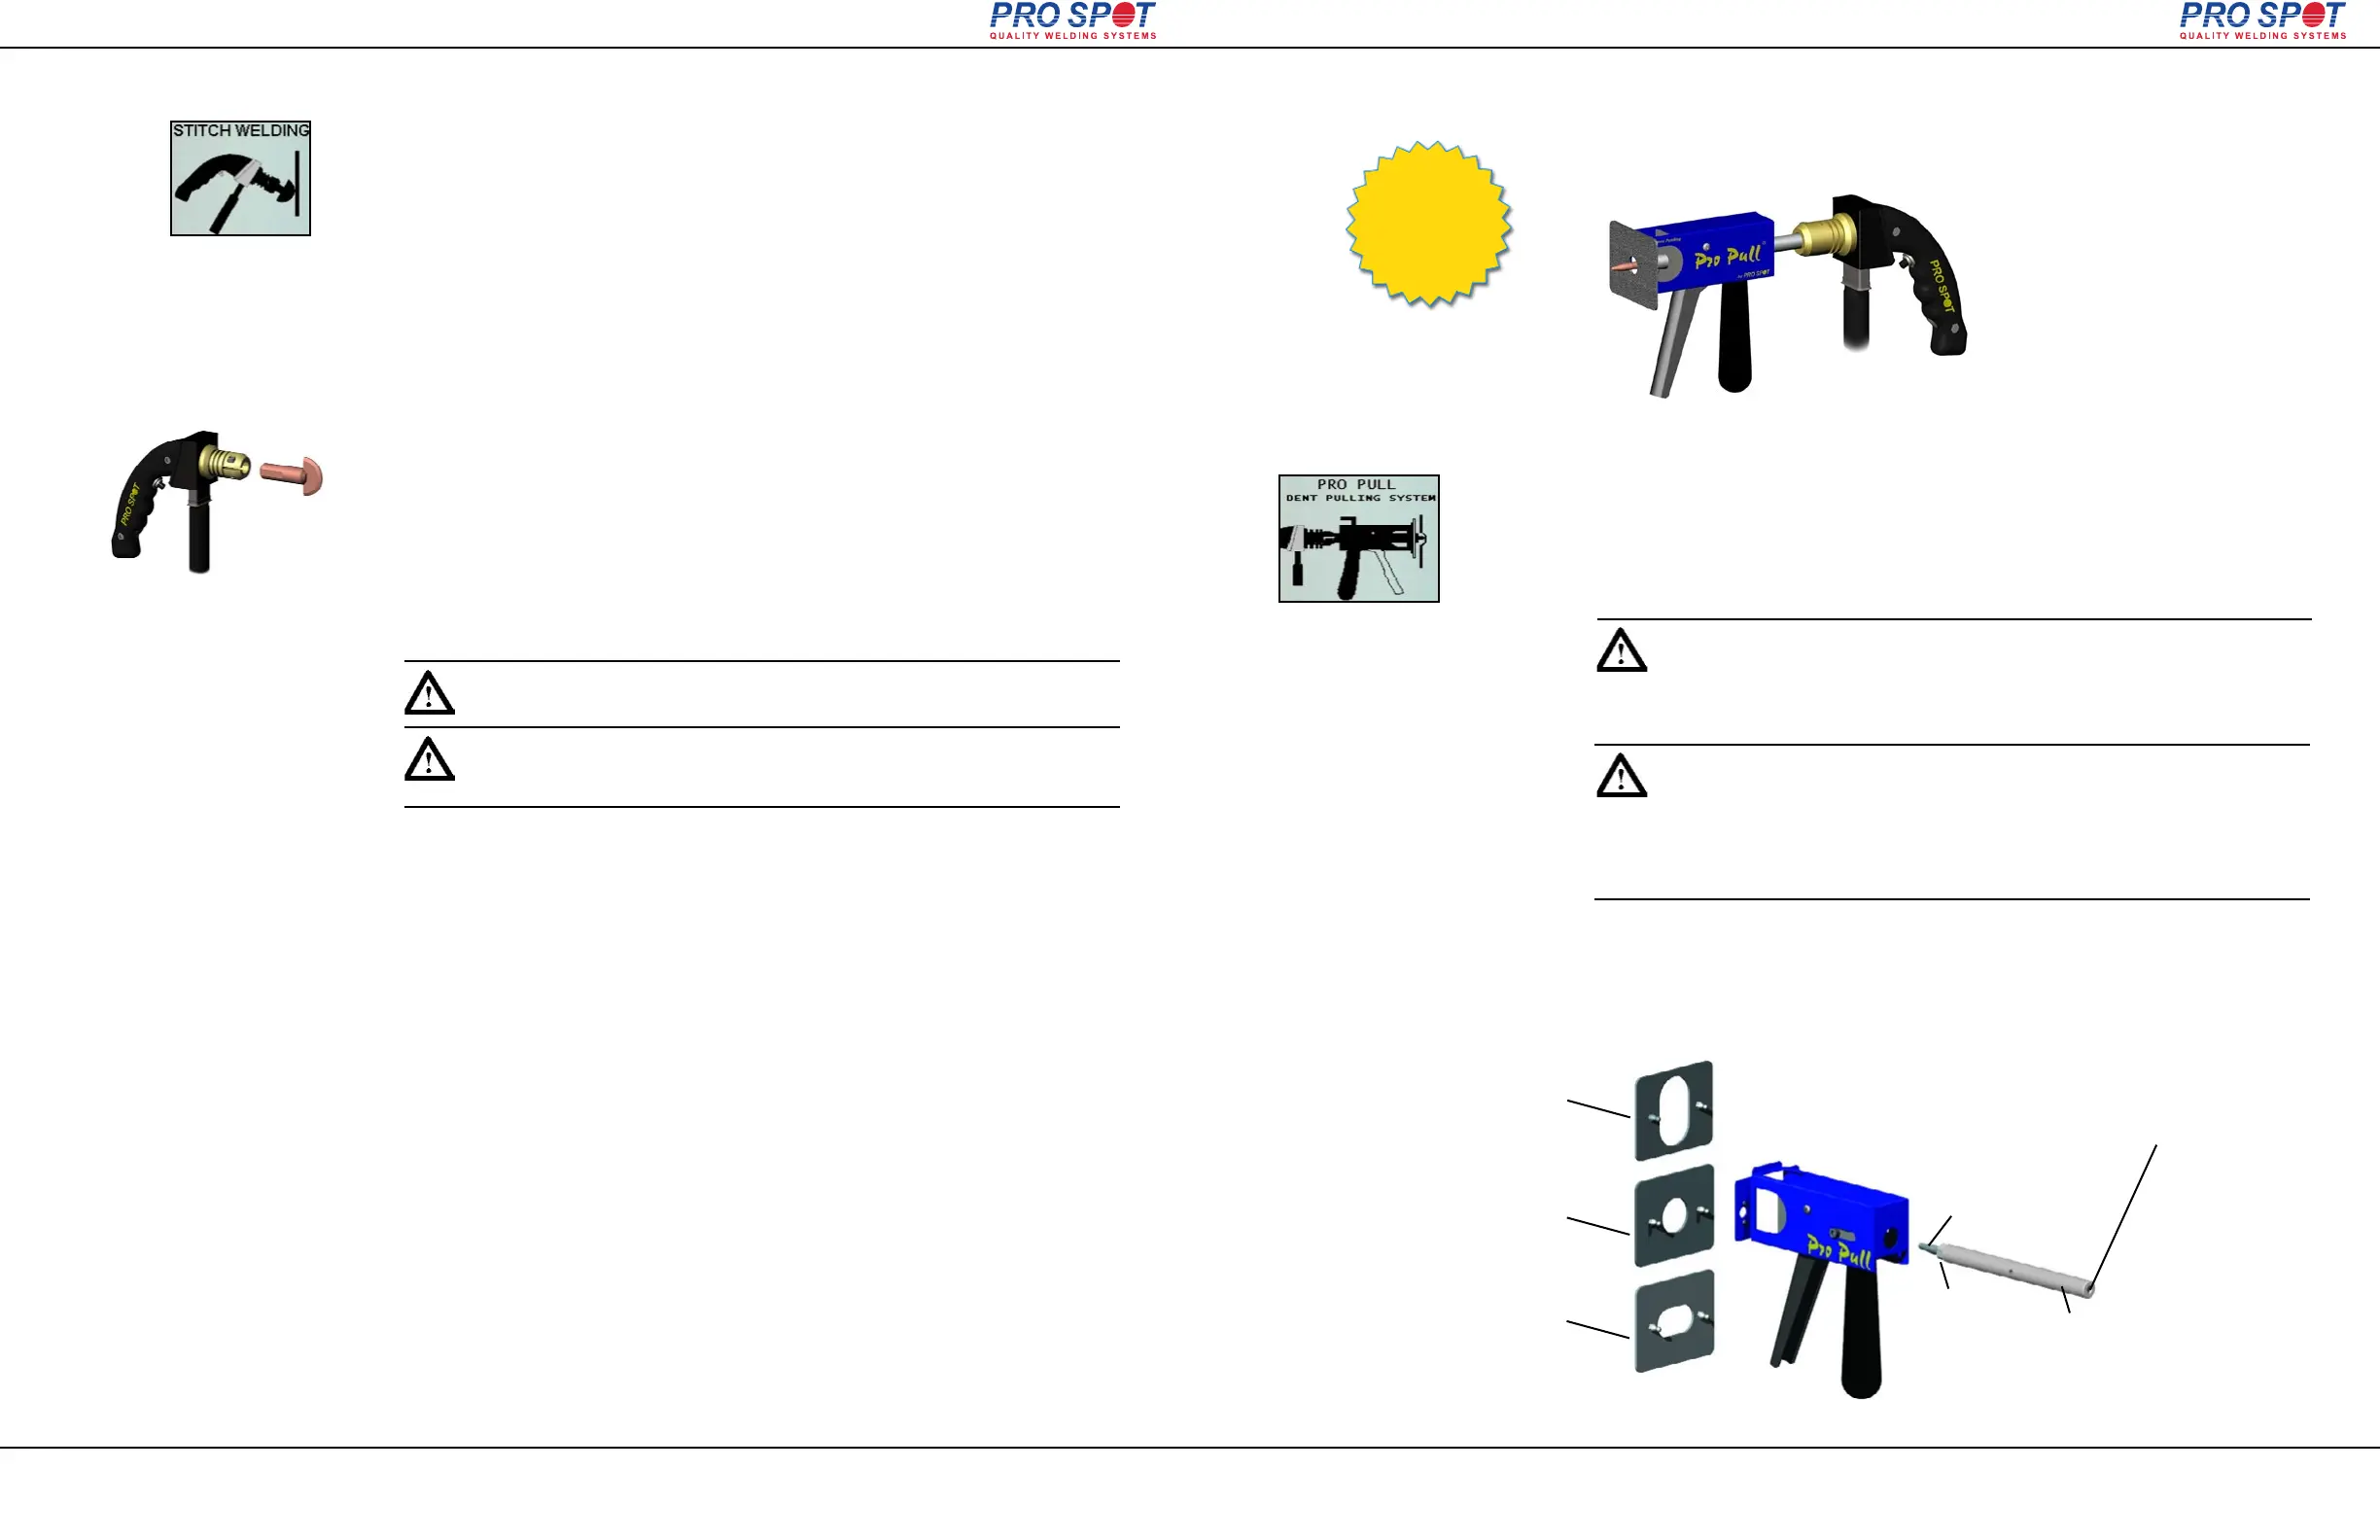
Pro Pull comes with three different
Blocking Plates with Quick-Connect design.
Block window size:
2.5"(63mm) x 1.5"(38mm)
Block window size:
1.75"(44mm) x 1"(25mm)
Block window size:
0.75" (19mm) dia.
PP-10-04
PP-10-03
PP-10-01
Large openings for
great visual control
of the pulling area.
Retrofit point for different end adapters.
Available for most weld guns.
(not included) See prospot.com for more
information.
Removable weld shaft.
The weld current is
transferred through the shaft
and NO CABLE is required
to transfer the current
CLT-55
Electrode
N-38
Nut
CLP-75
1. Push the Single-Sided weld mode button (fig 6.3). Single Sided Weld Programs
will display on the screen (fig. 6.5). The i4 software defaults to Single Spot Weld
Mode (fig. 6.6).
2. Select Pro Pull Welding Program by pressing the Left or Right Navigation
Buttons (fig. 4.9). Make sure that Pro Pull Welding graphic appears on the screen
(fig. 6.6).
Figure 6.6 Selecting Pro Pull
weld mode
Make sure the ground plate is clamped firmly in place on the inside of a
clean metal surface as near as possible to the weld location.
NOTE: Do not attach the ground to the metal you're about to weld on.
When performing other weld tasks such as dent pulling, etc., the ground
attachment location becomes less critical.
Pro Pull can be
fitted to most
resistance spot welders
or dent pullers.
Welder & Adapters
not included.
Pro Pull is a patented, innovative tool for fast and accurate dent pulling. It
features paintless dent removal functionality (see sec. 6.3.5 “Paintless Dent
Pulling With Pro Pull”).
6.11.2 Pro Pull Component Diagram
6.11.1 Selecting Pro Pull Weld Mode
6.11 Pro Pull Dent Pulling (optional)
i4
Assurez-vous que la plaque de terre est serré fermement en place à
l'intérieur d'une surface propre de métal le plus près que possible au lieu
de soudure.
NOTE: Ne fixez pas le terre et le métal que vous êtes sur le point de
soudre. Lors de l'exécution d'autres tâches comme la soudure dent de
traction, etc, le terre du lieu de saisie devient moins critique.