All Info Copyright © Pro Spot International Inc.
Figure 4.3 The i4 Control Panel
4 Operation
When two sided welding is selected, a spot gun graphic appears in the upper-left
corner of the display screen (fig. 4.4).
When single sided welding is selected, a single sided gun graphic appears in the
upper-left corner of the display screen (fig. 4.5).
Figure 4.4
Page 13
4.2.4 Indications on the Control Panel
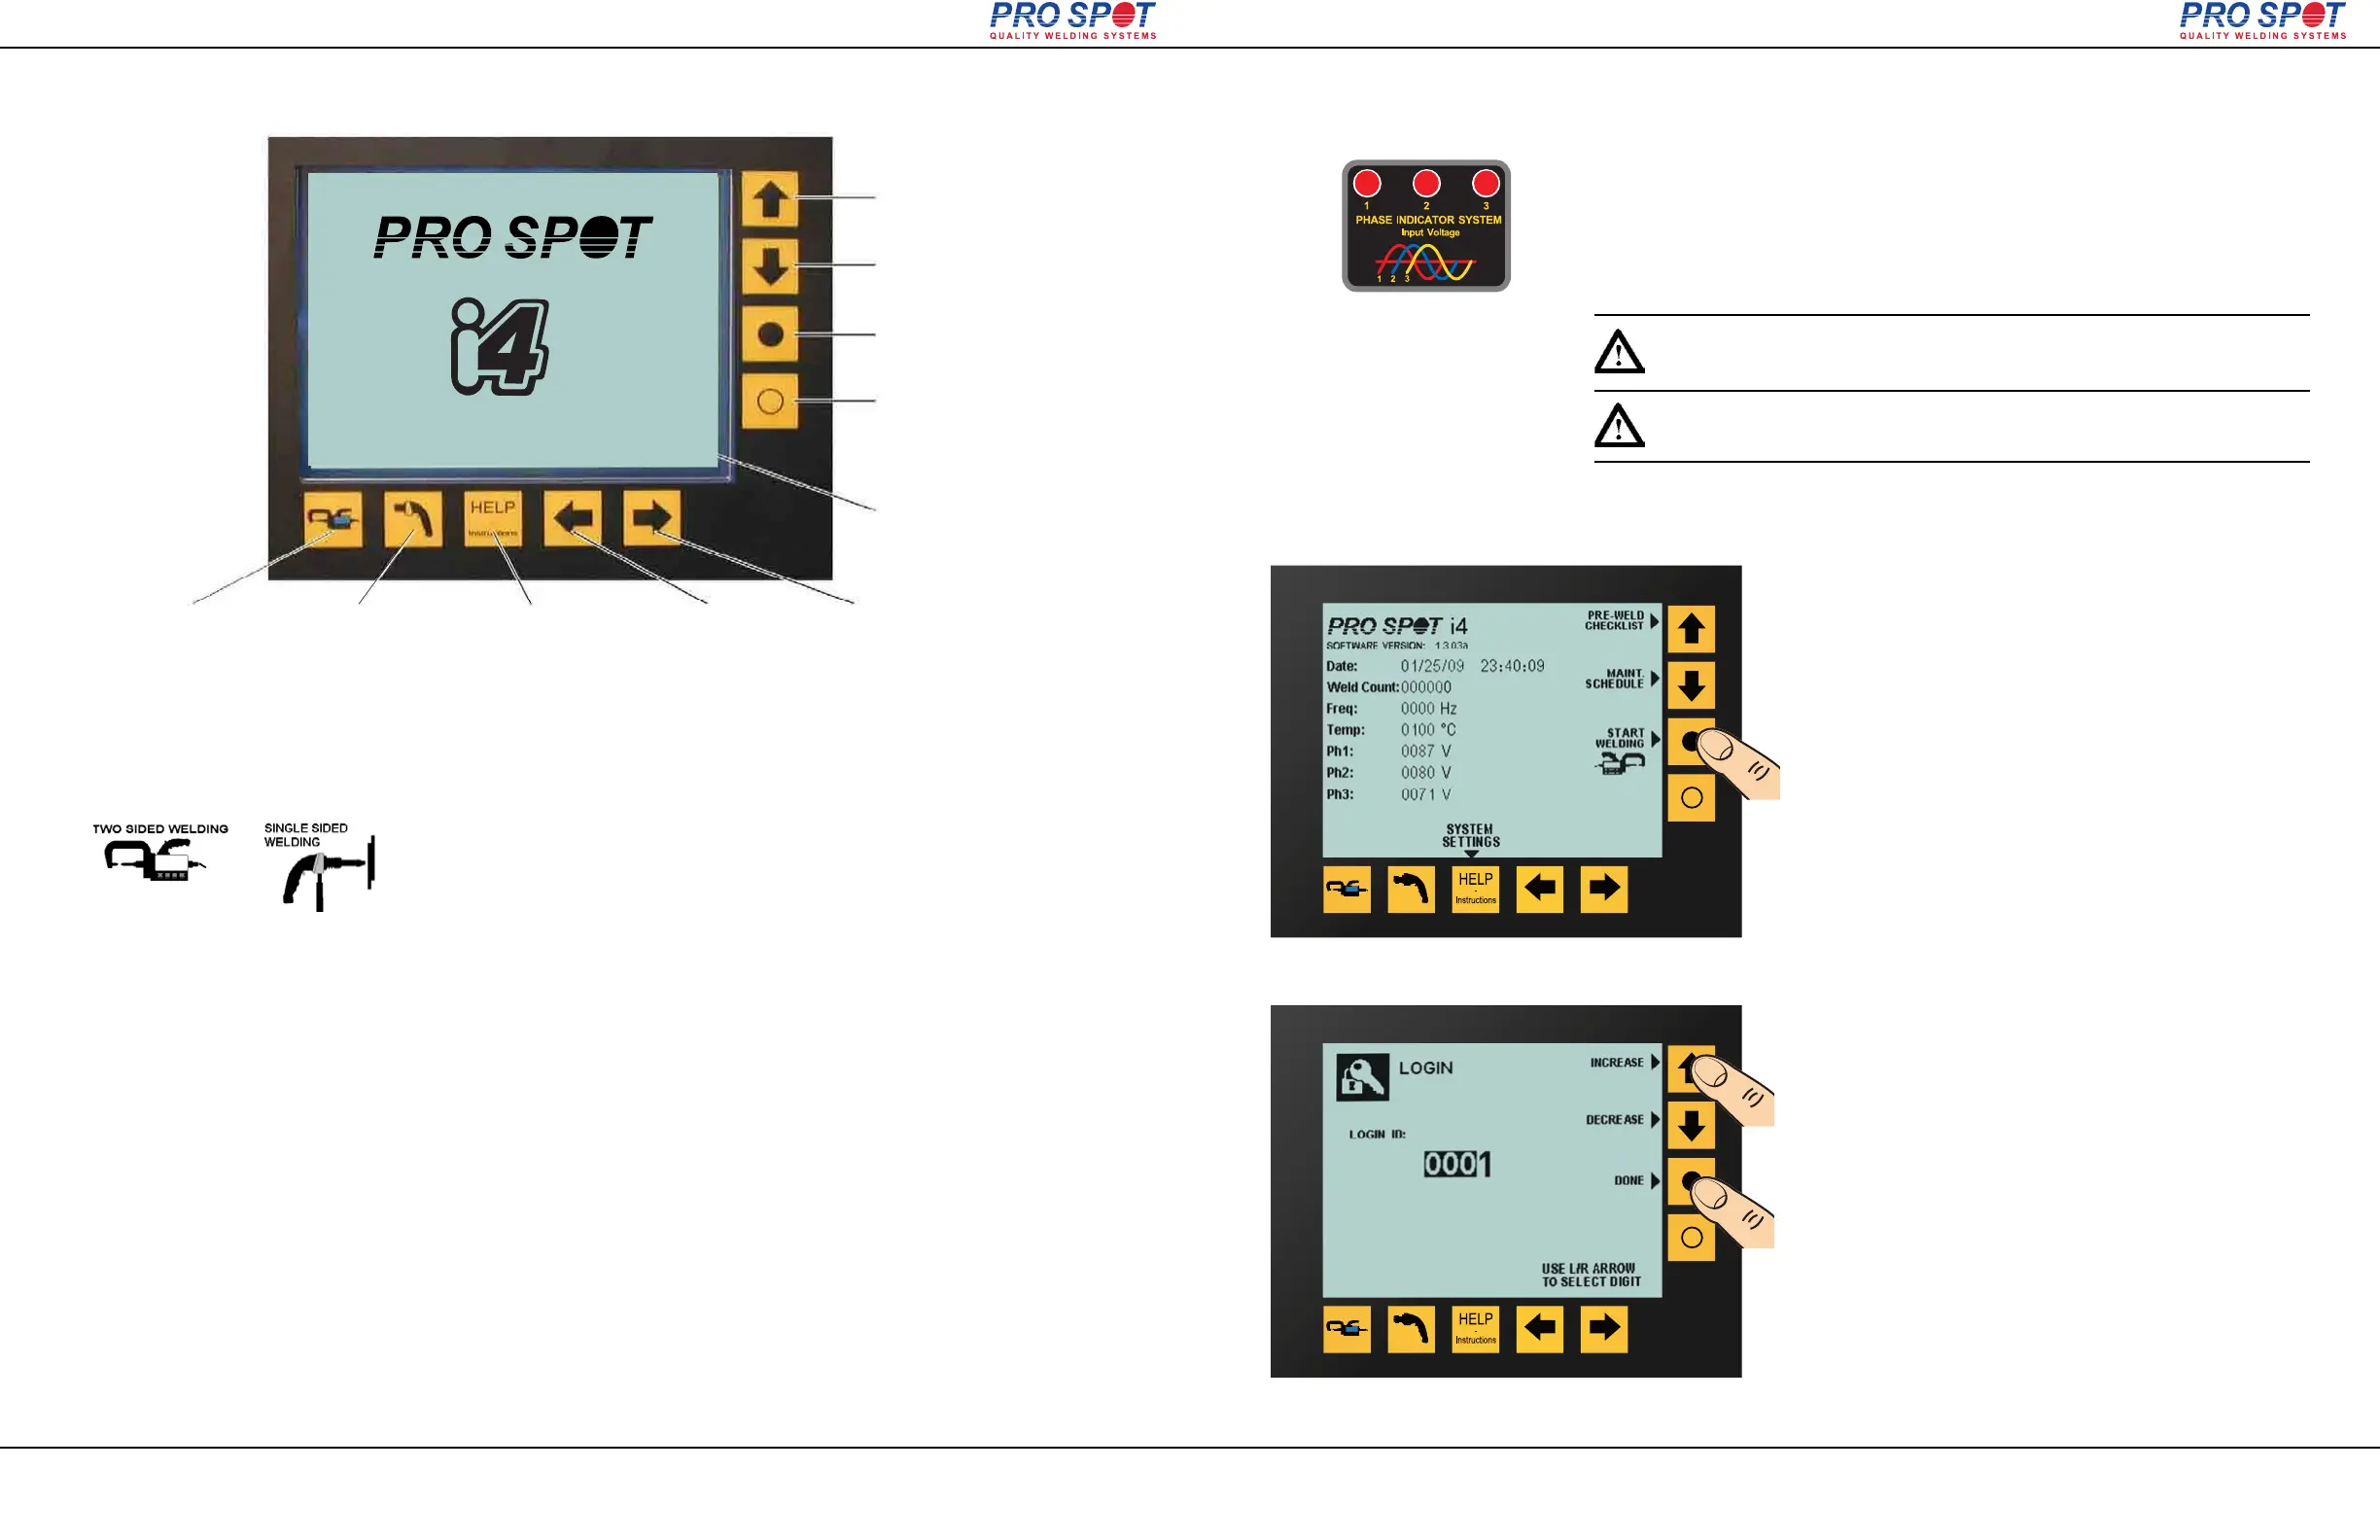
4.2.3 i4 Control Panel
Figure 4.5
i4
Navigation
button Right
Navigation
button Left
Help / Instructions
button Left
Single Sided
button
Two Sided
spot gun button
Navigation button
Up
Navigation button
Down
Navigation button
Closed Circle
Navigation button
Open Circle
Display Screen
All Info Copyright © Pro Spot International Inc.
4 Operation
Page 14
Gun.
Figure 4.5a
Figure 4.5b
4.3.1 Login Procedure
i4
After the welder has been turned on and when
the pre-weld screen has appeared, press the
“Start Welding” button (closed circle).
From this screen, enter the desired login. The i4
comes pre-programmed with the login user ID
0001, 0002, 0003, and 0004 available by default.
After the correct ID is entered, press DONE to
continue to the double-sided weld feature.
1. Toggle the circuit breaker on the front panel to “ON”. Three lights on the
front panel should illuminate indicating 3-phase installation, 2 lights for 1-
phase installation (fig. 4.5.1)
2. The display will go through the start-up procedure.
3. The i4 is now ready to use.
IMPORTANT! Make sure to read the instruction manual before operating
the welder. Only trained personnel should use this welder.
Figure 4.5.1
4.3 Turning on the welder
IMPORTANT! Assurez-vous de lire le Mode d’Emploi avant d'opérer
le soudeur. Seul le personnel qualifié devrait utiliser ce soudeur.