6 Single-Sided Welding
Page 29
All Info Copyright © Pro Spot International Inc.
Figure 6.22
The slide hammer with hook (optional) can be used in conjunction with washers
to repair car body dents.
Washers are held in place during welding with magnetic adapter electrode.
1. Push the Single-Sided weld mode button (fig 6.3). Single Sided Weld Programs
will display on the screen (fig. 6.5). The i4 software defaults to Single Spot Weld
Mode (fig. 6.6).
2. Select Washer Welding Program by pressing the Left or Right Navigatioin
Buttons (fig. 4.9). Make sure that Washer Welding graphic appears on the screen
(fig. 6.22)
3. Choose weld power level by pressing the “Next Program” button repeatedly.
(refer to section 4.6 "Setting the weld program").
4. Fit Single-Sided gun with the magnetic washer adapter (fig. 6.24).
5. Insert washer into the adapter (fig. 6.24).
6. Prepare the dent surface area by removing paint and primer.
When welding on washers, you only need to clean the area where the washer
touches the metal since the grounding system is connected through a separate
cable.
7. Ground the working area (refer to section 6.1 "Single-Sided Welding
Overview").
8. Position the washer at the bottom of the dent and push the trigger to weld the
washer onto the metal.
9. Hook the washer with the slide hammer and pull out the dent.
10. Repeat as needed.
Figure 6.24
Tip: You can purchase a slide hammer with hook from your local Pro Spot
distributor or on the web at Pro Spot online store.
Figure 6.19
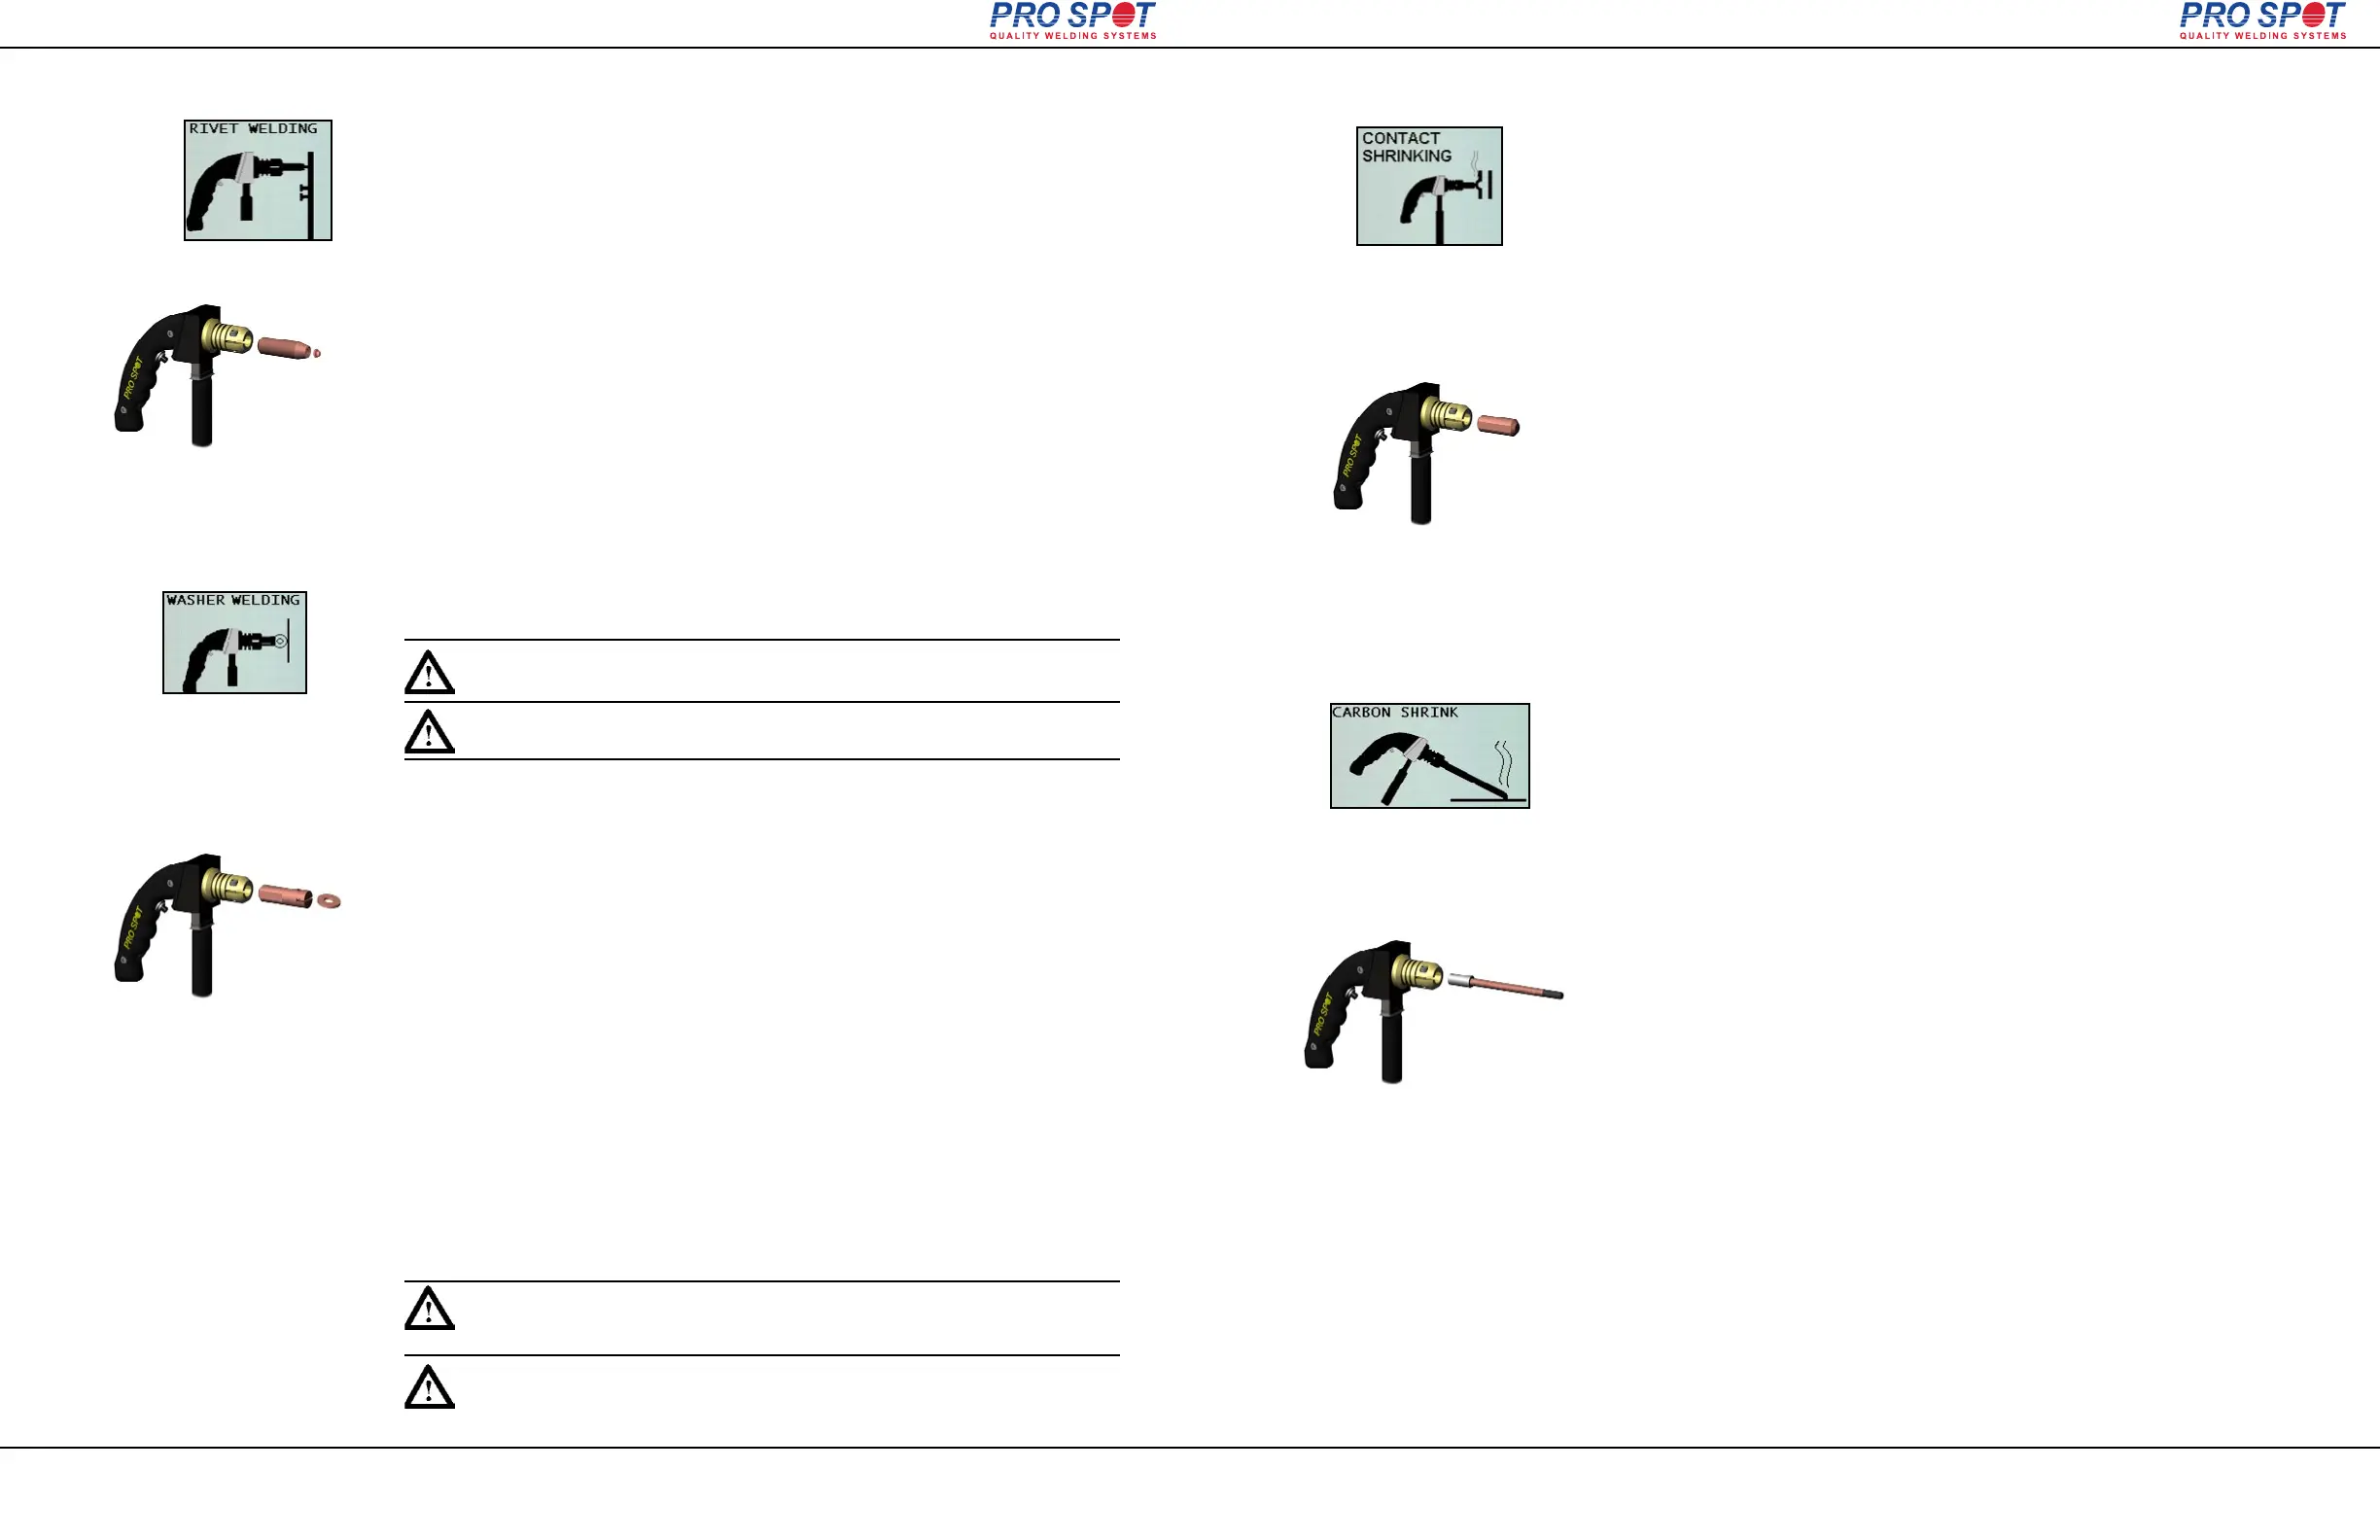
This function will weld on factory type clips for the window moulding. The clips
that hold the moulding do not, usually, come on the replacement parts.
Rivets are held in place during welding with magnetic adapter electrode.
1. Push the Single-Sided weld mode button (fig 6.3). Single Sided Weld Programs
will display on the screen (fig. 6.5). The i4 software defaults to Single Spot Weld
Mode (fig. 6.6).
2. Select Rivet Welding Program by pressing the Left or Right Navigatioin Buttons
(fig. 4.9). Make sure that Rivet Welding graphic appears on the screen (fig. 6.19)
3. Choose weld power level by pressing the “Next Program” button repeatedly.
(refer to section 4.6 "Setting the weld program").
3. Fit Single-Sided gun with the magnetic rivet adapter (fig. 6.21).
4. Insert rivet into the adapter (fig. 6.21).
5. Prepare the surface area by removing paint and primer.
6. Ground the working area (refer to section 6.1 "Single-Sided Welding
Overview").
7. Position Single-Sided gun over work area and push the trigger to weld.
8. Repeat as needed.
Figure 6.21
Tip: You can, also, pull multiple washers by welding on a row of washers
at the bottom of the dent, inserting a rod through the washers and pulling
the rod with the slide hammer with hook.
Astuce: Vous pouvez, également, tirer plusieurs rondelles par soudage sur
une rangée de rondelles au bas de la Dent, insertant une baguette par les
rondelles et en tirant la tige avec le marteau glissqnt avec crochet.
6.7 Dent Pulling with Washers and Slide Hammer with Hook
6.6 Moulding Clip Rivet Welding
i4
Astuce: Vous pouvez acheter un marteau glissant avec crochet de votre
distributeur locale Pro Spot ou sur le web à la boutique Pro Spot en ligne.
6 Single-Sided Welding
Page 30
All Info Copyright © Pro Spot International Inc.
Figure 6.25
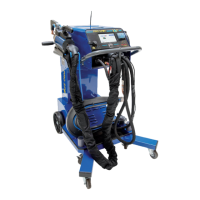
Dent pulling with washers creates high spots in the metal. Until now, the common
practice would have been to grind the surface, resulting in a loss of sheet metal
thickness. With the i4, use the shrinking tip instead of a grinder to remove the
high spots, leaving a smooth and clean surface that's every bit as thick and
strong as before. Shrinking electrode also acts as a nut adapter (refer to section
6.4 "Nut Welding"). With this electrode you get two convenient tools in one.
1. Push the Single-Sided weld mode button (fig 6.3). Single Sided Weld Programs
will display on the screen (fig. 6.5). The i4 software defaults to Single Spot Weld
Mode (fig. 6.6).
2. Select Contact Shrinking Program by pressing the Left or Right Navigatioin
Buttons (fig. 4.9). Make sure that Contact Shrinking graphic appears on the
screen (fig. 6.25)
3. Choose weld power level by pressing the “Next Program” button repeatedly.
(refer to section 4.6 "Setting the weld program").
4. Fit Single-Sided gun with the contact shrinking electrode (fig. 6.27).
5. Prepare the surface area by removing paint and primer.
6. Ground the working area (refer to section 6.1 "Single-Sided Welding
Overview").
7. Position the contact shrinking electrode over the high spot, apply some pres-
sure and push the trigger to weld.
8. Repeat as needed.
Figure 6.27
Figure 6.28
Carbon Rod is used to shrink or stretch metal on a vehicle. The carbon rod can
also be used on sharp dents caused by such things as hail.
1. Push the Single-Sided weld mode button (fig 6.3). Single Sided Weld Programs
will display on the screen (fig. 6.5). The i4 software defaults to Single Spot Weld
Mode (fig. 6.6).
2. Select Carbon Shrink Program by pressing the Left or Right Navigatioin
Buttons (fig. 4.9). Make sure that Carbon Shrink graphic appears on the screen
(fig. 6.28)
3. Choose weld power level by pressing the “Next Program” button repeatedly.
(refer to section 4.6 "Setting the weld program").
4. Fit the Single-Sided Gun with Carbon Electrode (fig. 6.30).
5. Clean the metal surface area.
6. Ground the working area (refer to section 6.1 "Single-Sided Welding
Overview").
7. Position carbon rod over the work area and push the trigger to start welding.
Keep trigger depressed to continue welding. Move the carbon rod in such a way
as to heat up the entire working area to the appropriate temperature. Release the
trigger to stop welding.
8. Cool the surface with a wet rag or compressed air.
Figure 6.30
6.9 Carbon Rod Shrinking / Stretching
6.8 Contact Shrinking
i4