6 Single-Sided Welding
Page 27
All Info Copyright © Pro Spot International Inc.
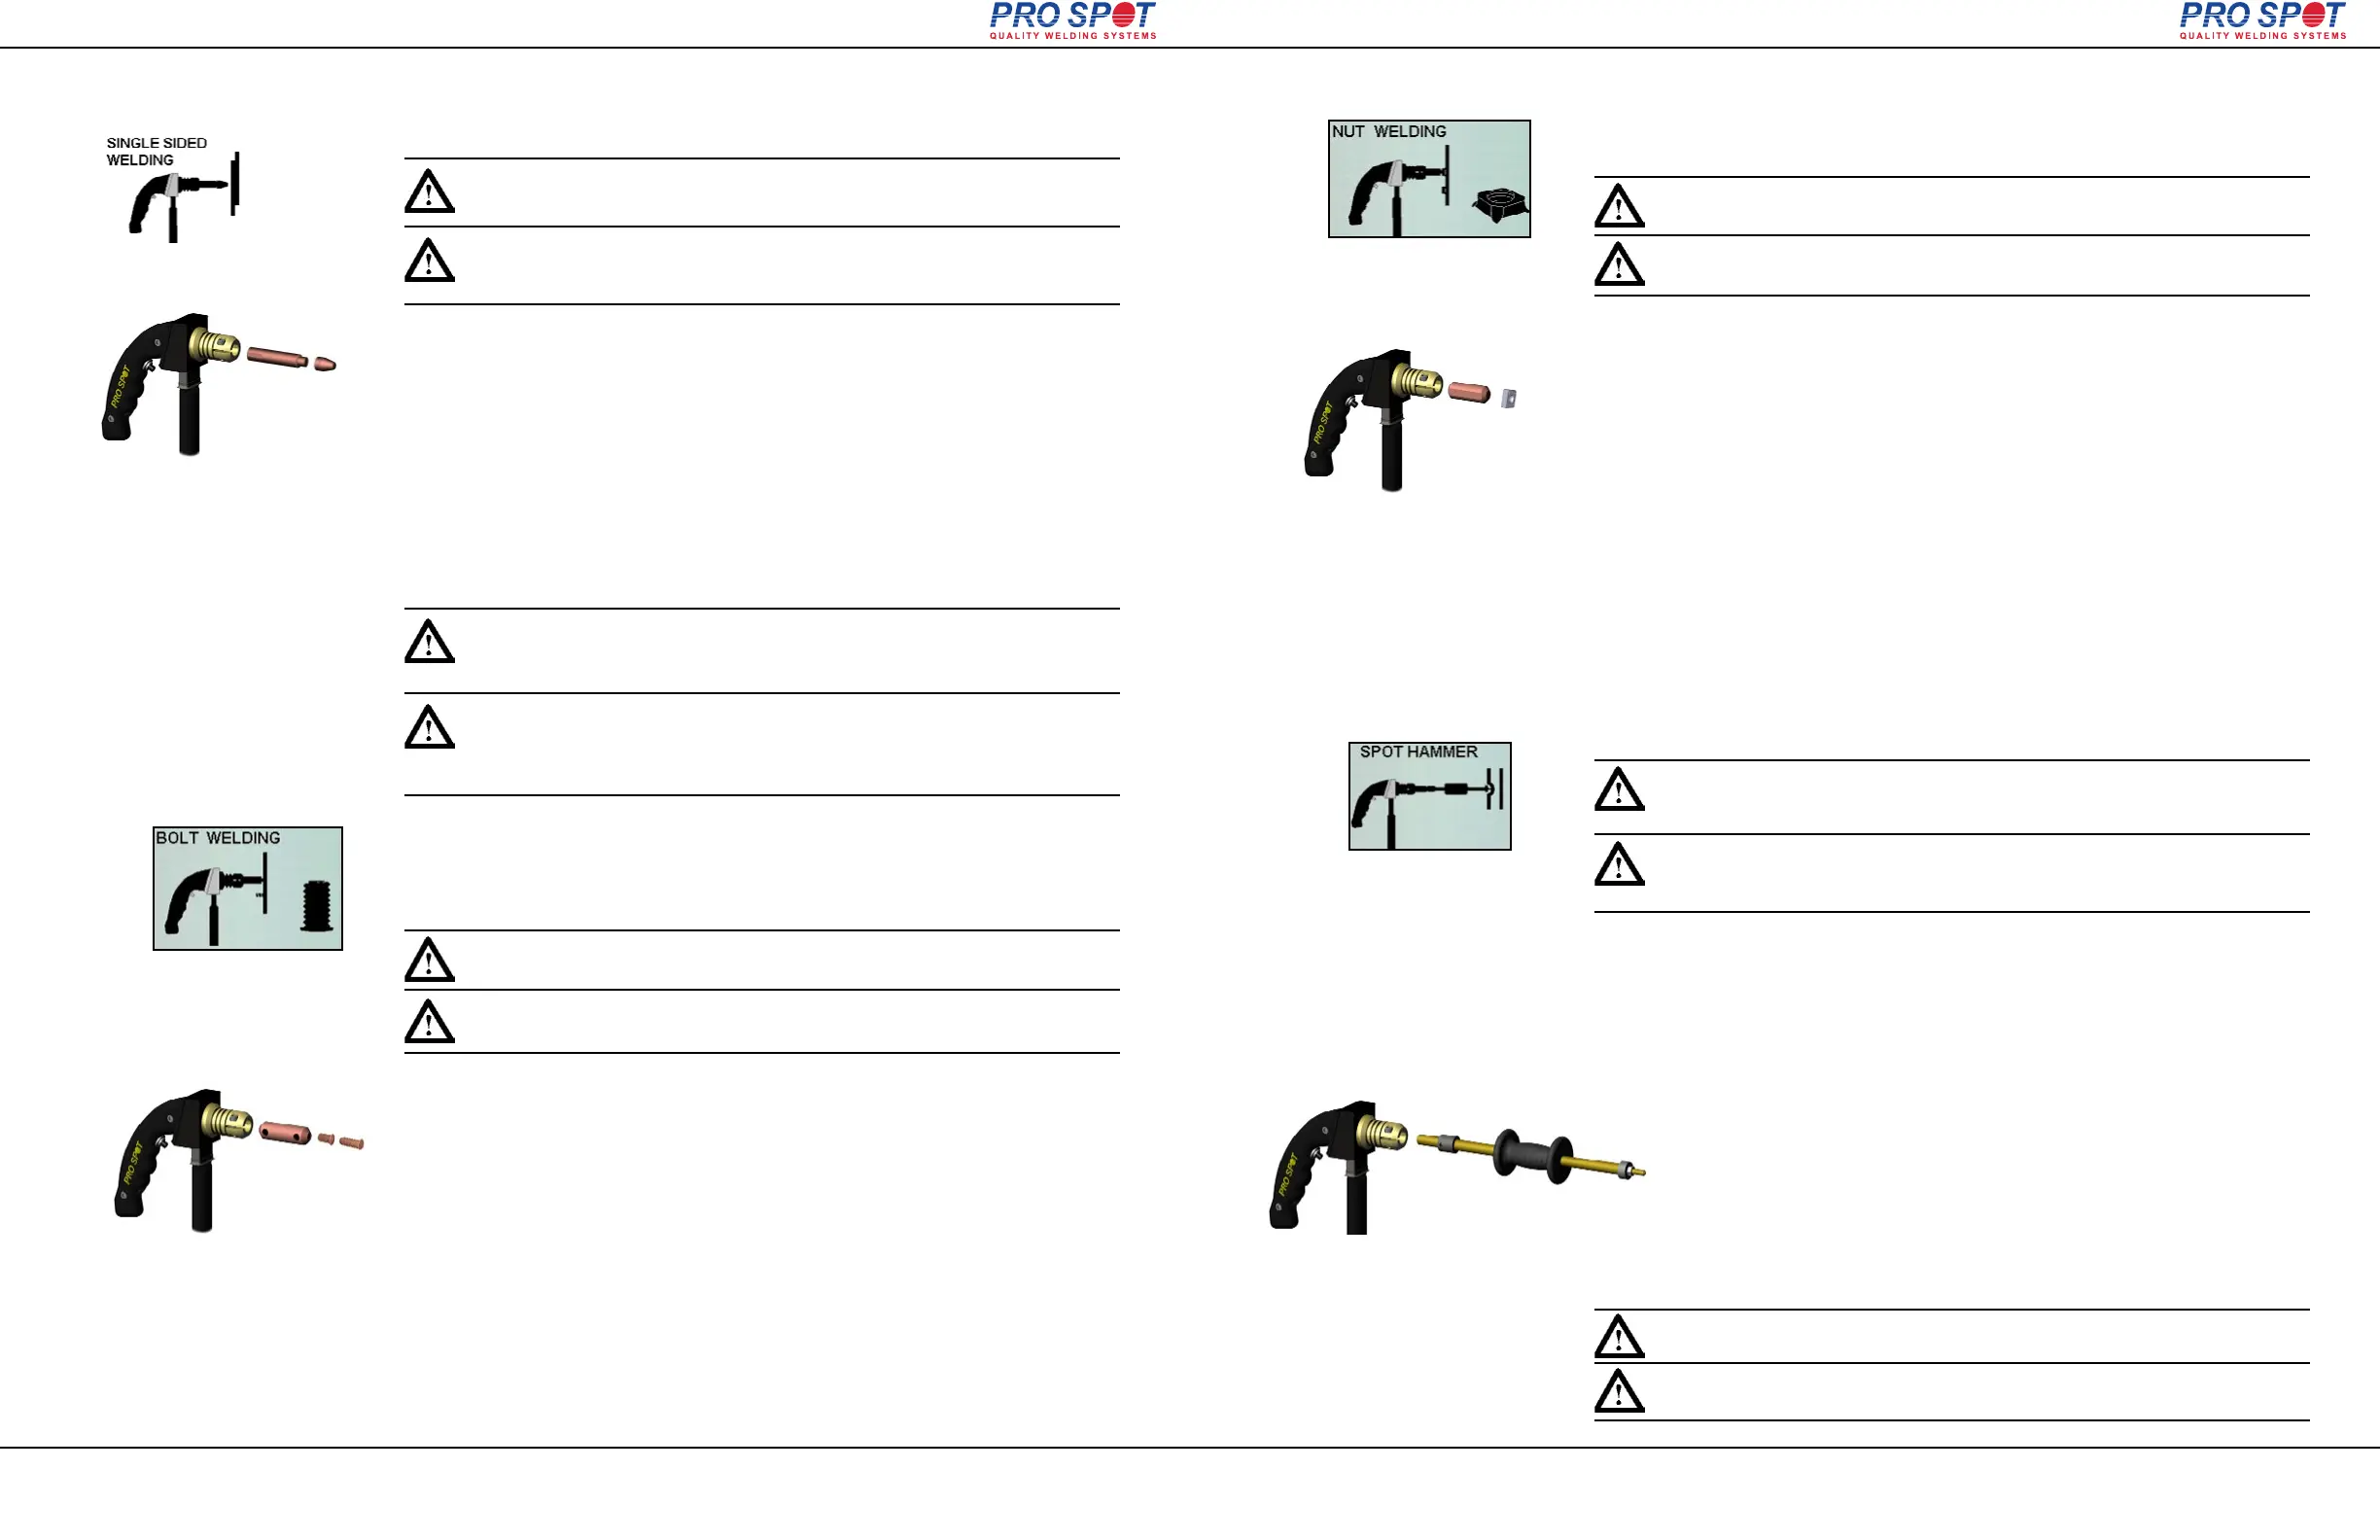
Single-Sided spot welding is used where Two-Sided spot welding cannot be used.
Important: The Single-Sided spot welding is not permitted on supporting
frameworks of a vehicle. It is only permitted for cosmetic purposes.
1. Push the Single-Sided weld mode button (fig 6.3). Single Sided Weld Programs
will display on the screen (fig. 6.5). The i4 software defaults to Single Spot Weld
Mode (fig. 6.6).
2. Choose weld power level by pressing the “Next Program” button repeatedly.
(refer to section 4.6 "Setting the weld program").
3. Fit the Single-Sided Gun with Single-Sided electrode (fig.6.9).
4. Grind between the inner and the outer body sheets to remove paint, primer and
rust. This ensures good electrical contact when performing Single-Sided welding.
5. Ground the working area (refer to section 6.1 "Single-Sided Welding
Overview").
6. Apply about 33-44 lbs of pressure on the Single-Sided gun and push the trigger
to weld. Reposition and weld again.
Figure 6.6
Figure 6.9
Note: Make sure that Single-Sided electrode is clean. If it isn't, use a file
or tip dresser to clean it. If the weld cap shows considerable wear, it
should be replaced (refer to section 5.4 “Removing Welding Electrodes”)
Figure 6.10
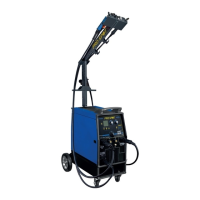
Many of today's car bodies come with factory equipped threaded studs. After a
collision, the studs may be lost or do not accompany the replacement part. With
the i4, threaded studs can be welded-on in factory style. This type of stud is also
common throughout the car body for attachments of interior, tail lights, door mold-
ings, etc.
Studs are held in place during welding with magnetic adapter electrode.
1. Push the Single-Sided weld mode button (fig 6.3). Single Sided Weld Programs
will display on the screen (fig. 6.5). The i4 software defaults to Single Spot Weld
Mode (fig. 6.6).
2. Select Bolt Welding Program by pressing the Left or Right Navigatioin Buttons
(fig. 4.9). Make sure that Bolt Welding graphic appears on the screen (
fig. 6.10)
3. Choose weld power level by pressing the “Next Program” button repeatedly.
(refer to section 4.6 "Setting the weld program").
4. Fit Single Sided gun with the magnetic stud adapter (fig. 6.12
).
5. Insert stud into the adapter (fig. 6.12).
6. Prepare the surface area by removing paint and primer.
7. Ground the working area (refer to
section 6.1 "Single-Sided Welding
Overview").
8. Position single sided gun over work area and push the trigger to weld.
9. Repeat as needed.
Figure 6.12
6.3 Bolt Welding
Tip: A threaded stud can also be used to fasten the ground clamp directly
to the panel, minimizing the area needed for grinding.
Astuce: Un goujon fileté peut également être utilisé pour fixer la pince
directement sur le panneau, ce qui réduit la surface nécessaire au broyage.
6.2 Single-Sided Spot Welding
i4
Important: Le soudage de Côté Unique par points n'est pas autorisée sur
les cadres de soutien d'un véhicule. Il est seulement permis à des fins
cosmétiques.
Remarque: Assurez-vous que l ‘électrode Côté Unique est propre. Si
ce n'est pas, utilisez une lime pour le nettoyer. Si le bouchon de
soudure est considerablement usé, il devrait être remplacé (voir la
section 5.4 "Enlèvement d’Electrodes de soudage»)
6 Single-Sided Welding
Page 28
All Info Copyright © Pro Spot International Inc.
Figure 6.13
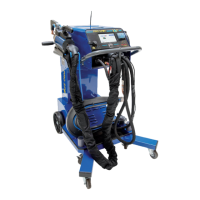
Weld-on nuts are common throughout the car body for attachments of interior, tail
lights, door moldings, etc. and are applied with ease using the i4.
Nuts are held in place during welding with a shrinking electrode.
1. Push the Single-Sided weld mode button (fig 6.3). Single Sided Weld Programs
will display on the screen (fig. 6.5). The i4 software defaults to Single Spot Weld
Mode (fig. 6.6).
2. Select Nut Welding Program by pressing the Left or Right Navigatioin Buttons
(fig. 4.9). Make sure that Nut Welding graphic appears on the screen (fig. 6.13)
3. Choose weld power level by pressing the “Next Program” button repeatedly.
(refer to section 4.6 "Setting the weld program").
4. Fit Single-Sided gun with the Shrink Electrode (fig. 6.15).
5. Prepare the surface area by removing paint and primer.
6. Ground the working area (refer to section 6.1 "Single-Sided Welding
Overview").
7. Press weld-on nut to the metal with Contact Shrinking electrode, apply some
pressure and push the trigger to weld.
8. Repeat as needed.
Figure 6.15
Tip: Different size nuts are available from your local Pro Spot distributor
or on the web at Pro Spot online store.
Figure 6.16
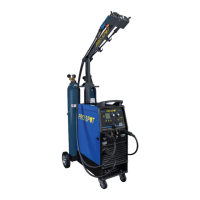
Spot hammer dent pulling is used to repair dents on a vehicle body. The spot
hammer welds directly onto the work area and pulls the dent.
1. Push the Single-Sided weld mode button (fig 6.3). Single Sided Weld Programs
will display on the screen (fig. 6.5). The i4 software defaults to Single Spot Weld
Mode (fig. 6.6).
2. Select Spot Hammer Program by pressing the Left or Right Navigatioin Buttons
(fig. 4.9). Make sure that Spot Hammer graphic appears on the screen (fig. 6.16)
3. Choose weld power level by pressing the “Next Program” button repeatedly.
(refer to section 4.6 "Setting the weld program").
4. Fit Single-Sided gun with the spot hammer (fig. 6.18).
5. Prepare the dent surface area by removing paint and primer.
6. Ground the working area (refer to section 6.1 "Single-Sided Welding
Overview").
7. Position the spot hammer tip at the bottom of the dent and push the
trigger to weld the electrode onto the metal.
8. Pull out a dent then release by twisting the hammer.
9. If needed, reposition, weld, and pull again.
When more pulling power is needed, simply increase the current.
Figure 6.18
Tip: The replaceable welding tip should last for over one thousand welds.
Contact your local distributor to order replacement tips, or order on the
web at Pro Spot online store.
Note: Check spot hammer tip periodically to make sure it is in good
working order. If the tip looks worn, replace it with a new one.
6.5 Dent Pulling with Spot Hammer
6.4 Nut Welding
i4
Astuce: noix de différentes tailles sont disponibles chez votre distribu-
teur local Spot Pro ou sur le web à la boutique Pro Spot en ligne.
Astuce: Le bout de soudage remplaçable devrait durer plus d'un millier
soudures. Contactez votre distributeur local pour commander pointes de
rechange, ou commandez sur la Web Pro Spot au magasin en ligne.
Note: Contrôlez le bout marteau périodiquement pour s'assurer qu'il est en
bon état de marche. Si le bout semble usé, le remplacer par un nouveau.