36
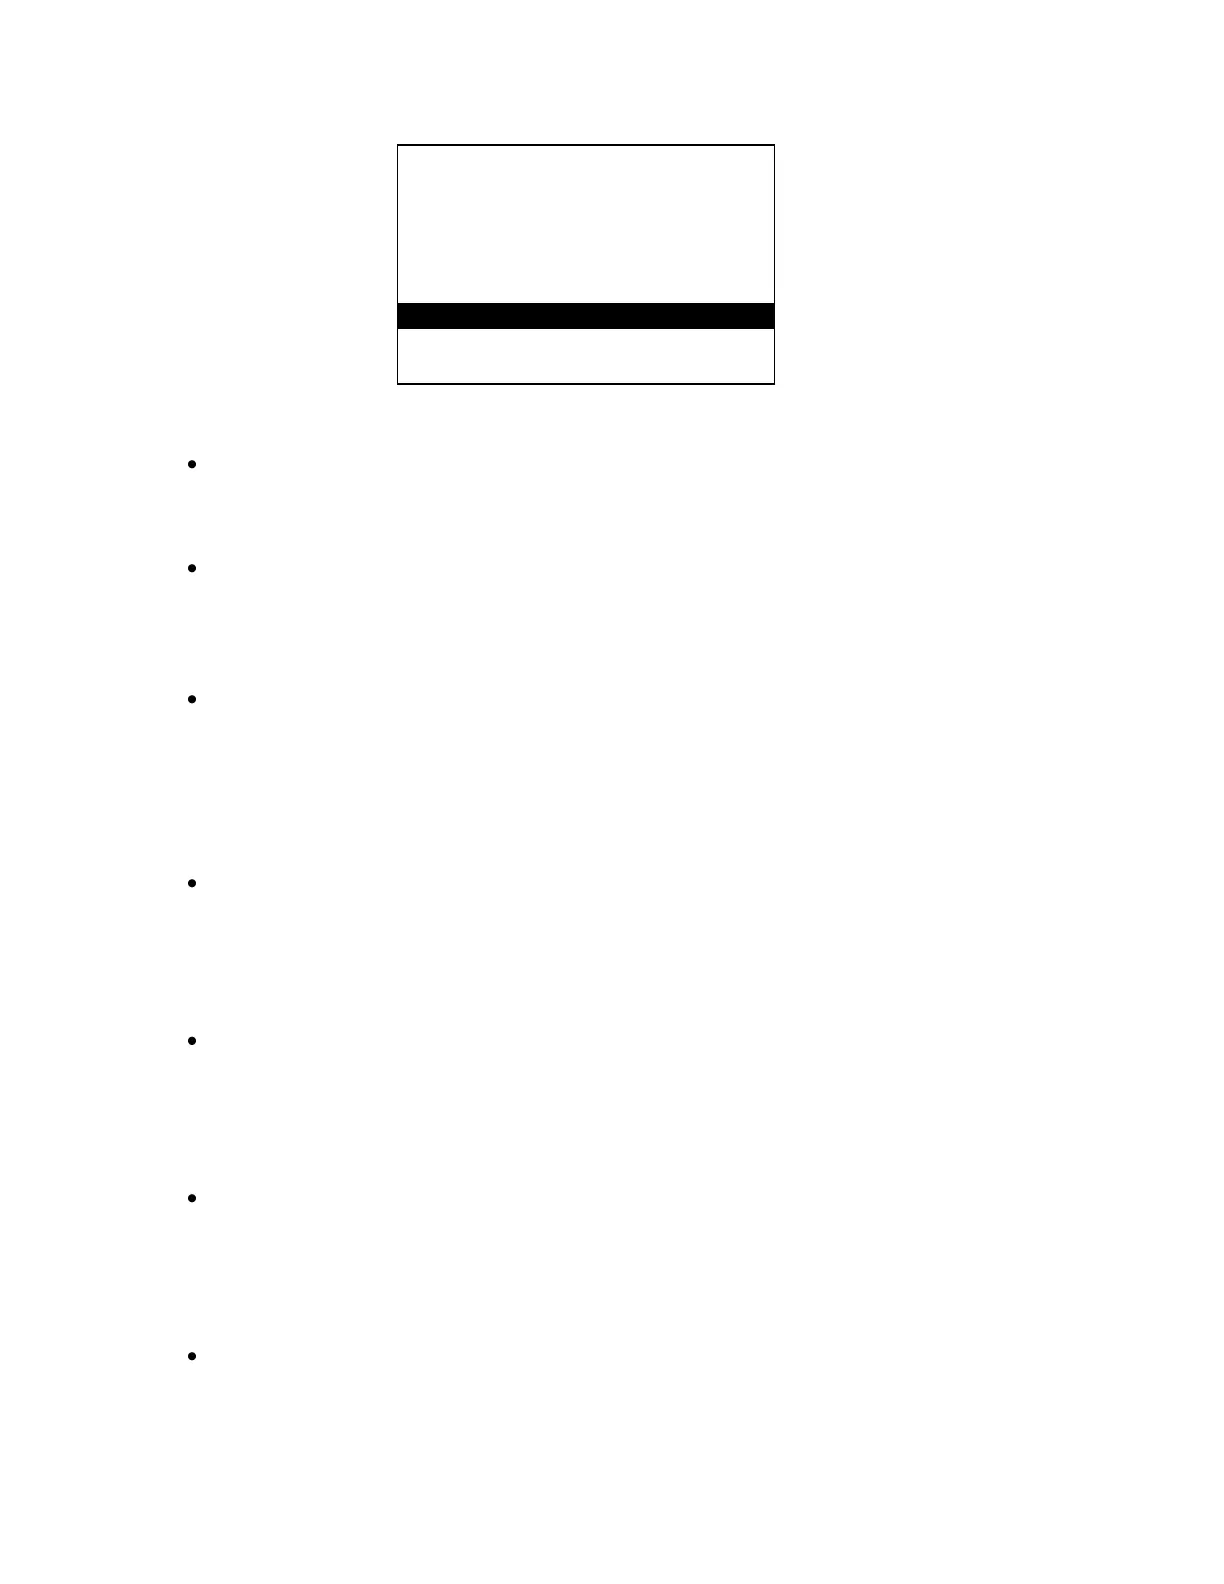
WATER METER TYPES
=================
1 CONTACTING HEAD
2 PADDLE WHEEL
3 DATA INDUSTRIAL
4 SIGNET
5 AUTOTROL TURB 1 IN.
6 AUTOTROL TURB 2 IN.
7 CHANGE MY NAME
Use the keypad to select the type of water meter that you are using.
The next screen is the UNITS OF VOLUME screen.
The water meters can be configured for gallons or liters. Press‖1‖ for GALLONS or press‖2‖
for LITERS.
If CONTACTING HEAD was selected:
You will be taken to the GALLONS OR LITERS PER CONTACT screen. Use the keypad to
enter the number of gallons or liters per contact for your specific meter then press ‖ENT‖.
You will then be asked if you want to reset the total count for that meter to zero. Press‖1‖ for
YES or press‖2‖ for NO.
If PADDLE WHEEL was selected:
You will be taken to the PULSES PER GAL/LITER screen. Use the keypad to enter the
pulses per gal/liter for your particular water meter then press ‖ENT‖. You will then be asked if
you want to reset the total count for that meter to zero. Press‖1‖ for YES or press‖2‖ for NO.
If DATA INDUSTRIAL was selected:
You will be taken to the SLOPE VALUE screen. Use the keypad to enter the K factor and
offset values for your particular water meter then press ‖ENT‖. You will then be asked if you
want to reset the total count for that meter to zero. Press‖1‖ for YES or press‖2‖ for NO.
If SIGNET was selected:
You will be taken to the K-FACTOR screen. Use the keypad to enter the K-factor for your
particular water meter then press ‖ENT‖. You will then be asked if you want to reset the total
count for that meter to zero. Press‖1‖ for YES or press‖2‖ for NO.
If AUTOTROL TURB 1 IN. was selected:
The controller will confirm that the AUTOTROL TURB 1 IN. has been selected and you will
be asked if you want to reset the total count for that meter to zero. Press ‖1‖ for YES or
press ‖2‖ for NO.
 Loading...