Pulsar® Precision Operaon and Installaon Manual (Model PS-1HCE) Rev 2.0 04/2022
18
7.1 Fill the Hopper
1. Put on the appropriate PPE: long sleeved clothing, rubber gloves, apron, dust mask, and safety glasses.
Danger: Use suitable personal protecve equipment (PPE) at all mes to avoid physical
contact with calcium hypochlorite liquid or vapor. Failure to do so may result in death
or serious injury. Please refer to the Safety Data Sheet for addional informaon and
precauons regarding the proper handling of calcium hypochlorite.
Danger: Fireorexplosion could result from contaminaon, or use of any other chlorinang
compound!
Cauon: Use of any briquees or other chemicals other than the Pulsar® Plus Briquees
designed for use with this chlorinator is hazardous, possibly causing re and/or
explosion and will void this warranty.
2. Open the hopper lid.
3. Use a scoop to ll the hopper with Pulsar® Plus Briquees.
Cauon: Do not dump Pulsar® Plus Briquees into the basket. Dumping will cause dust from
calcium hypochlorite and can damage basket from force of load.
Cauon: Use of any briquees or other chemicals other than the Pulsar® Plus Briquees
designed for use with this chlorinator shall void this warranty.
4. Close the hopper lid.
7.2 Fill the Hopper (Dustless Procedure)
Danger: Use suitable personal protecve equipment (PPE) at all mes to avoid physical
contact with calcium hypochlorite liquid or vapor. Failure to do so may result in death
or serious injury. Please refer to the Safety Data Sheet for addional informaon and
precauons regarding the proper handling of calcium hypochlorite.
1. Put on the appropriate PPE: long sleeved clothing, rubber gloves, apron, dust mask, and
safety glasses.
2. Remove the red tamper prevenon tab on the lid of the briquee bucket. The lock release buon is visible.
3. Firmly press the lock release up, then turn the lid counter-clockwise to remove the lid from the bucket.
4. Place the bucket funnel on the bucket opening and turn it clockwise unl the bucket funnel is rmly seated on the bucket. Listen for the
ratcheng sound of the locking mechanism to conrm that the funnel is properly installed.
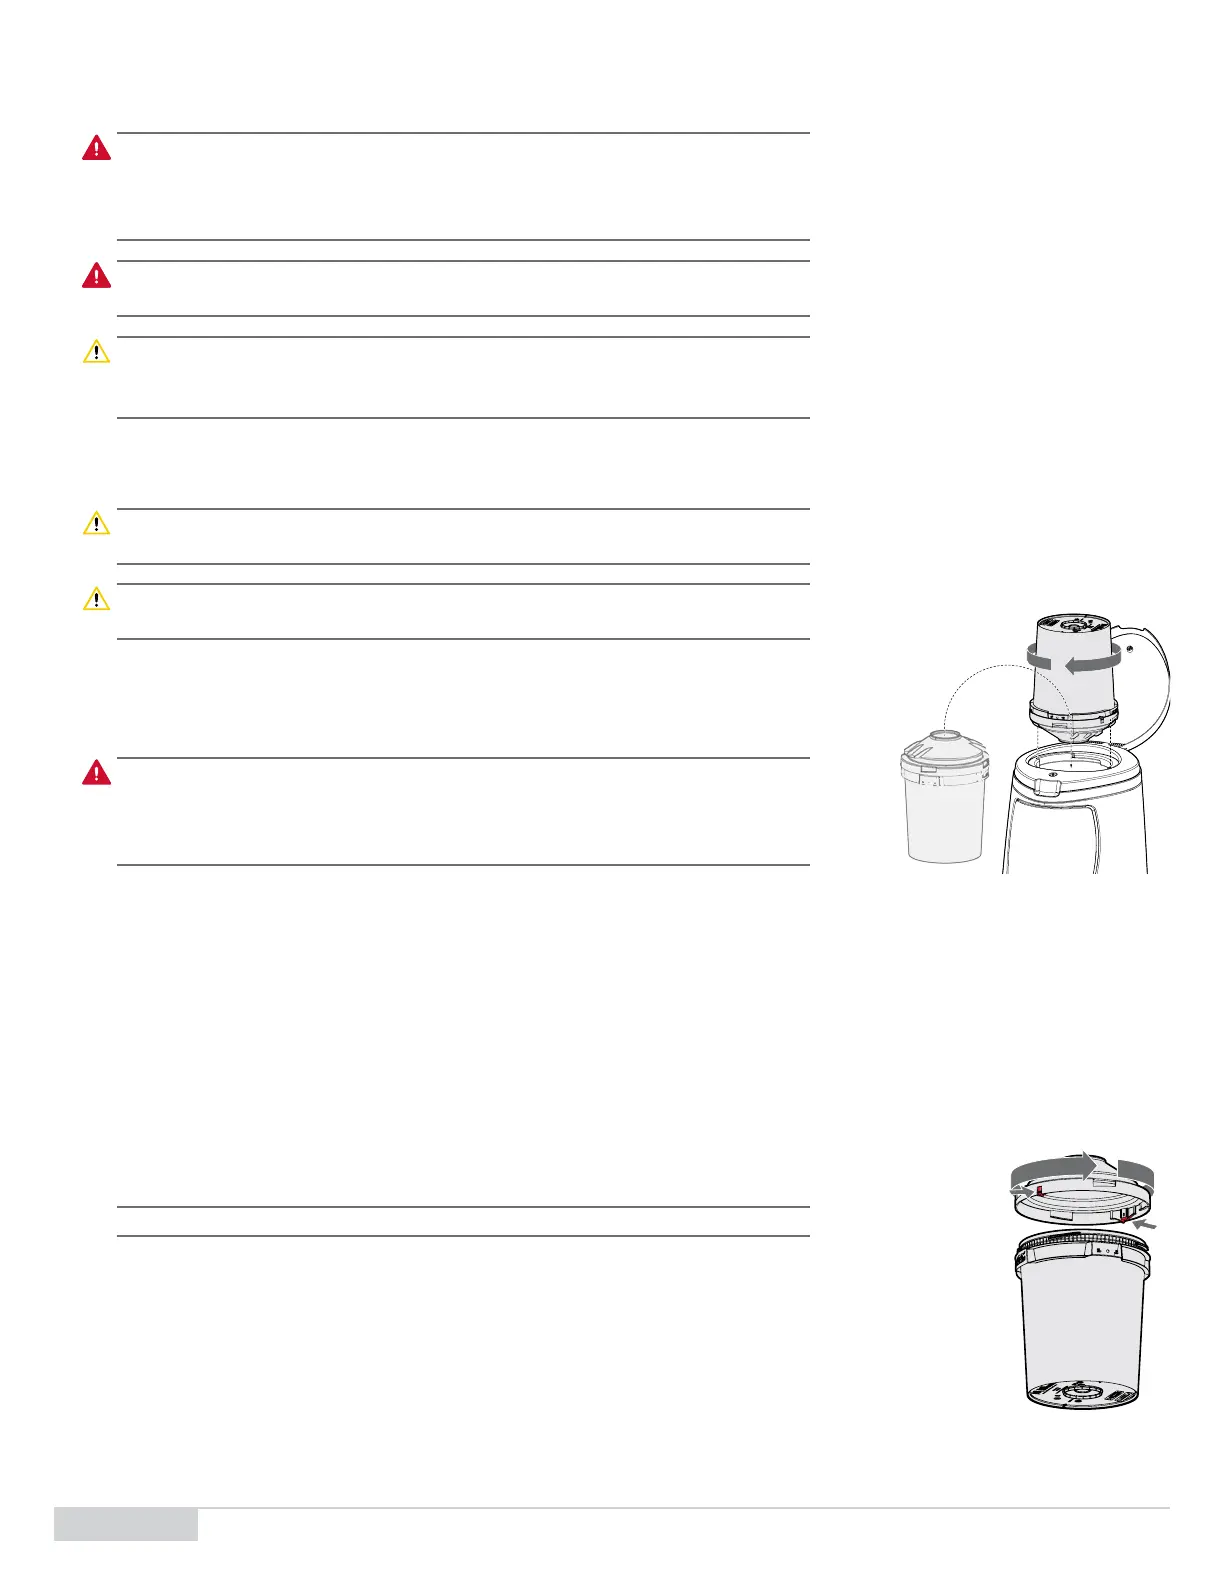
5. In one smooth moon, invert the bucket into the hopper opening while aligning the tabs of the bucket funnel into the slots of the hopper
opening. See Figure 11.
6. Turn the bucket and funnel clockwise to secure the bucket onto the hopper. The Pulsar®
Plus Briquees will deposit into the hopper.
Note: Ensure that the bucket is empty before removing it from the hopper.
To remove the bucket from the hopper:
1. Turn the bucket counter-clockwise to disengage the tabs on the bucket funnel from the
hopper.
2. Li the bucket and funnel up to remove them from the hopper.
3. To remove the bucket funnel from the bucket, rmly press up on the two funnel locking
buons, then turn the bucket funnel counter-clockwise. See Figure 12.
Figure11. Bucket Funnel Installaon
Figure12. Bucket Funnel Removal