Page: 35
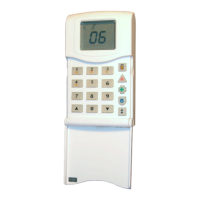
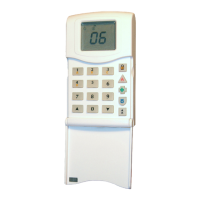
6. Adding External Wired Keypad
The keypads have a small internal menu used mainly for: addressing, changing the key click volume
and changing the brightness of the LCD display.
Entering and Exiting the Keypad Menu
To enter the keypad menu, press and hold the D button until ‘SECURITY CODE:’ is displayed, and
then enter ‘2000’. To exit, press the a key.
Keypad Menu Options
ADDRESS = Used to assign an address to a keypad [00] is the keypad on the panel
LANGUAGE = Allows you to assign a language – used for the keypad menu only
KEYPAD INPUTS READING = Shows the resistor readings on the two inputs located on the keypad
KEY-CLICK VOLUME = Sets the volume of the buttons
TAG VOLUME = Sets the volume when tag used
KEYPAD VOLUME = Sets the general volume of the keypad
ID TAG = Used to read the unique ID number of the tag
RESET KEYPAD = Resets the keypad to factory settings
BACKLIGHT = Sets the backlight intensity of the keypad
DELAY FIRE AND HU BUTTONS = Sets how long the HU and Fire buttons have to be pressed for before
an alarm is created
Testing the Keypad
With the system unset, press and hold the b key for 10 seconds at any keypad. This will cause all
the LEDs on that keypad to illuminate and the LCD screen to scroll a display testing each pixel.
Approximately 10 seconds after the b key is released, the keypad will revert to the normal display.
7. Connecting to InSite Software
The Control Panel can be programmed by the LCD menu or the UDL InSite Software (provided free of
charge). It can be downloaded from http://www.pyronix.com/pyronix-downloads.php. The connection
between the control panel and the UDL software can be done in the following ways:
7.1.1 GPRS Connection (DIGI-GPRS)
On the Panel
1) Enter the Engineer menu (code 1111)
2) Scroll the menu ( button) until on ‘SET UP DOWNLOADING’ – Press ‘’
3) Choose ‘Cloud’ (option 6) in the ‘Download by’ options - Press ‘’
4) Make a note of your System ID (to enter in the Insite Software later) Press ‘’
5) Select the security level – for initial connections we recommend [0] (Normal) - Press ‘’
6) Create/enter a system password and take note of it - Press ‘’
7) Now on the ‘Always Poll Cloud?’ screen – select ‘Yes’ [1] and press ‘’
8) Now on the ‘UDL Password’ screen – optional - can be left blank or entered, then press ‘’
9) Now on the ‘Site Name’ screen – optional – if you enter a site name make sure you take a
note of it (case sensitive) for use later in the Insite software – or leave blank – then press ‘’
10) Finally go out of this menu and then into the ‘Site Options’ main menu and then scroll
through until ‘Cloud Priority’, set this to ‘Normal’ for initial connections and then press ‘'
(ensure that this setting is put back to high for ungraded systems – or leave it as ‘normal’ on
graded systems).
11) IMPORTANT: Make sure that the SIM card in use is enabled for GPRS data and that the
correct APN settings have been entered for your network (see Data Network Setup – page 26).

 Loading...