55
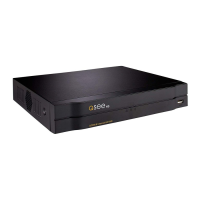
Network Time Protocol–ThisallowsyourDVRtousethesametimeserverthatyourcomputerdoesto
adjust its internal clock.
•Youcanalsouseanotherserverifdesired.Simplyentertheserver’saddressandthecorrectport.
•ClickApply to test your settings.
•ClickSave before exiting this window to preserve your changes.
PICTURE 4.5-2
PICTURE 4.5-3
PICTURE 4.5-4
Date & Time
As the name implies, this window is for setting the
date and time on your system. This is important
to ensure the ability to use your recordings as
evidence.
Date Format–Chooseyourpreferedformat.
Time Format–AM/PMor24-Hourformat.
Date Separator–Period,dashorslash.
System Time/Time Zone–Setthecurrentdate,
time and time zone. Click Save.
Daylight Savings Time–Setthedateorweek
of the month that DST starts and ends
for your area. If you do not have DST,
uncheck the box.
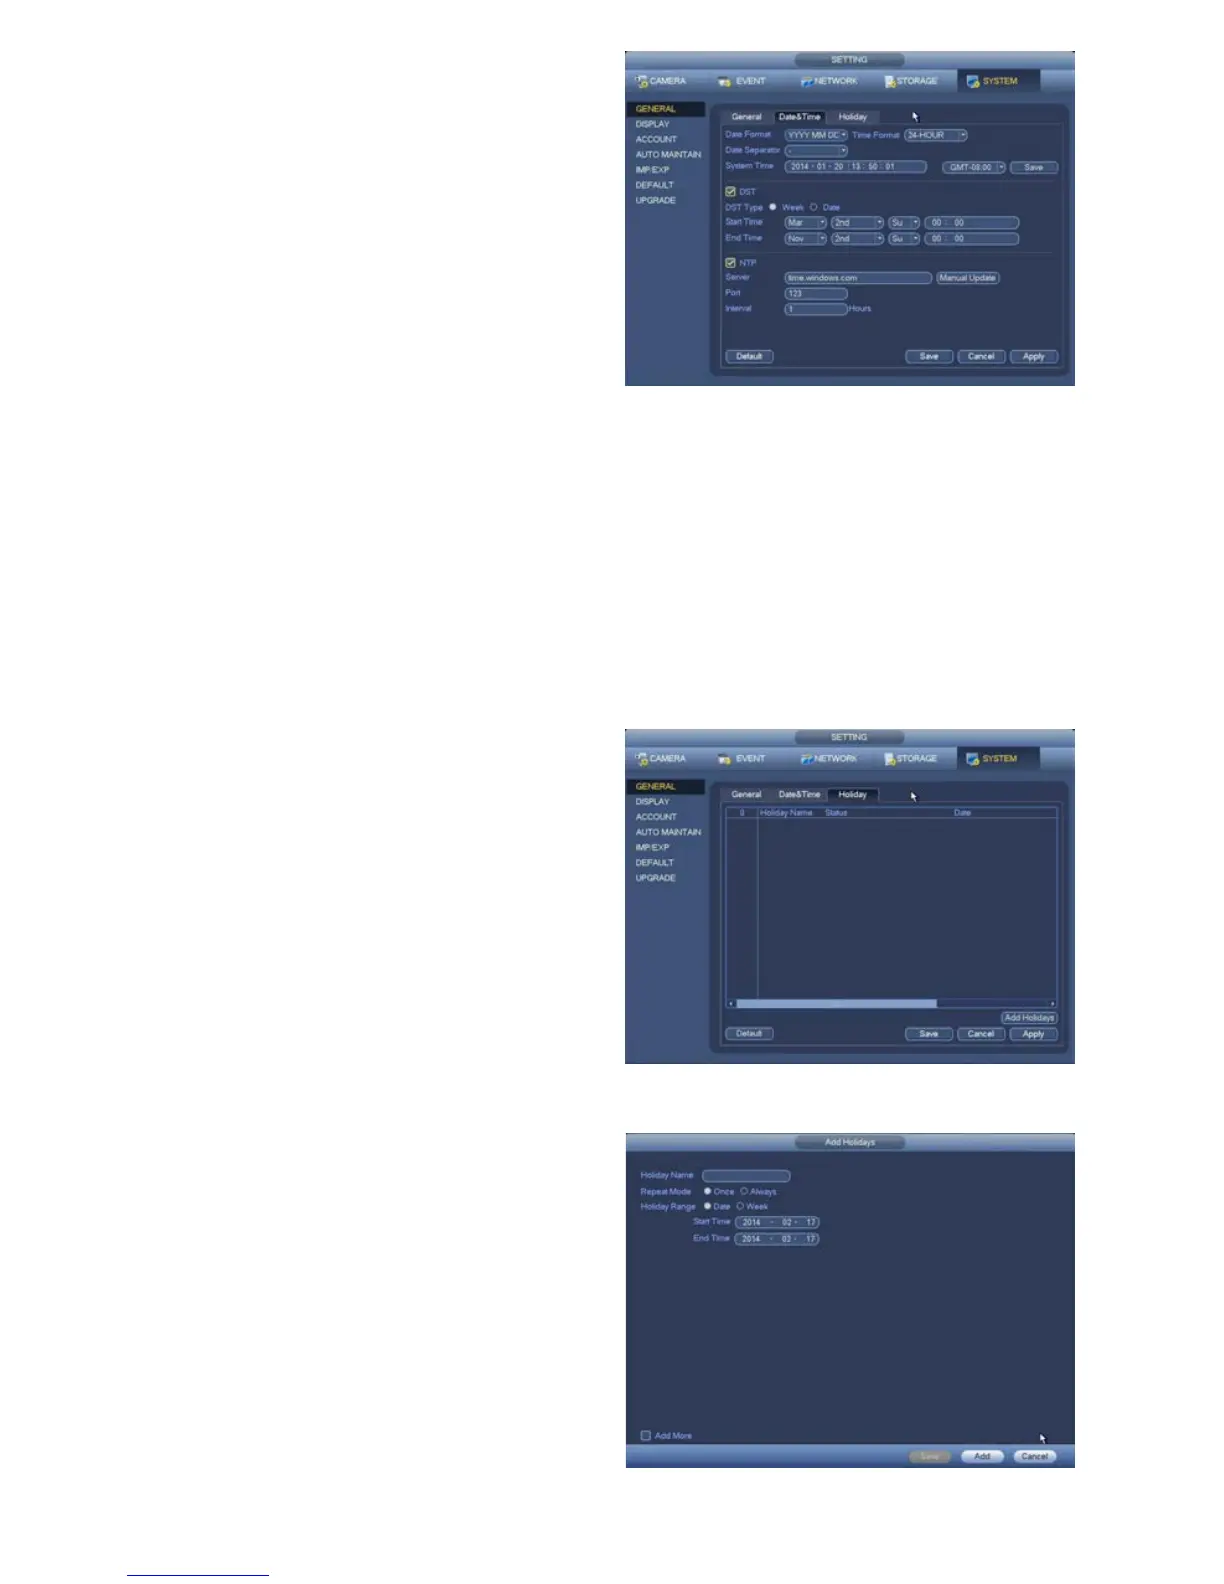
Holiday
•Addingholidaystoyour DVR’s internal calendar
will add a holiday schedule option to the
Camera > Rec Settings window (Section
4.1).
•Holidayrecordscheduleswilloverridethe
normal daily recording schedule.
1. Click on Add Holidays.
2. In the Add Holidays window:
•EntertheHolidayName
•Selectwhetherit’saone-timeeventor
happens every year.
•Selectwhetherit’saspecicdate(like
Christmas) or a specific week of the month
(like Thanksgiving).
•Setthestartandendtimes.
3. If you want to add more than one holiday, check
the box marked Add More.
4. Click Add to add your date to the calendar.
5. Click Save to exit the window.
6. Click Save in the Holiday window before
exiting.
 Loading...
