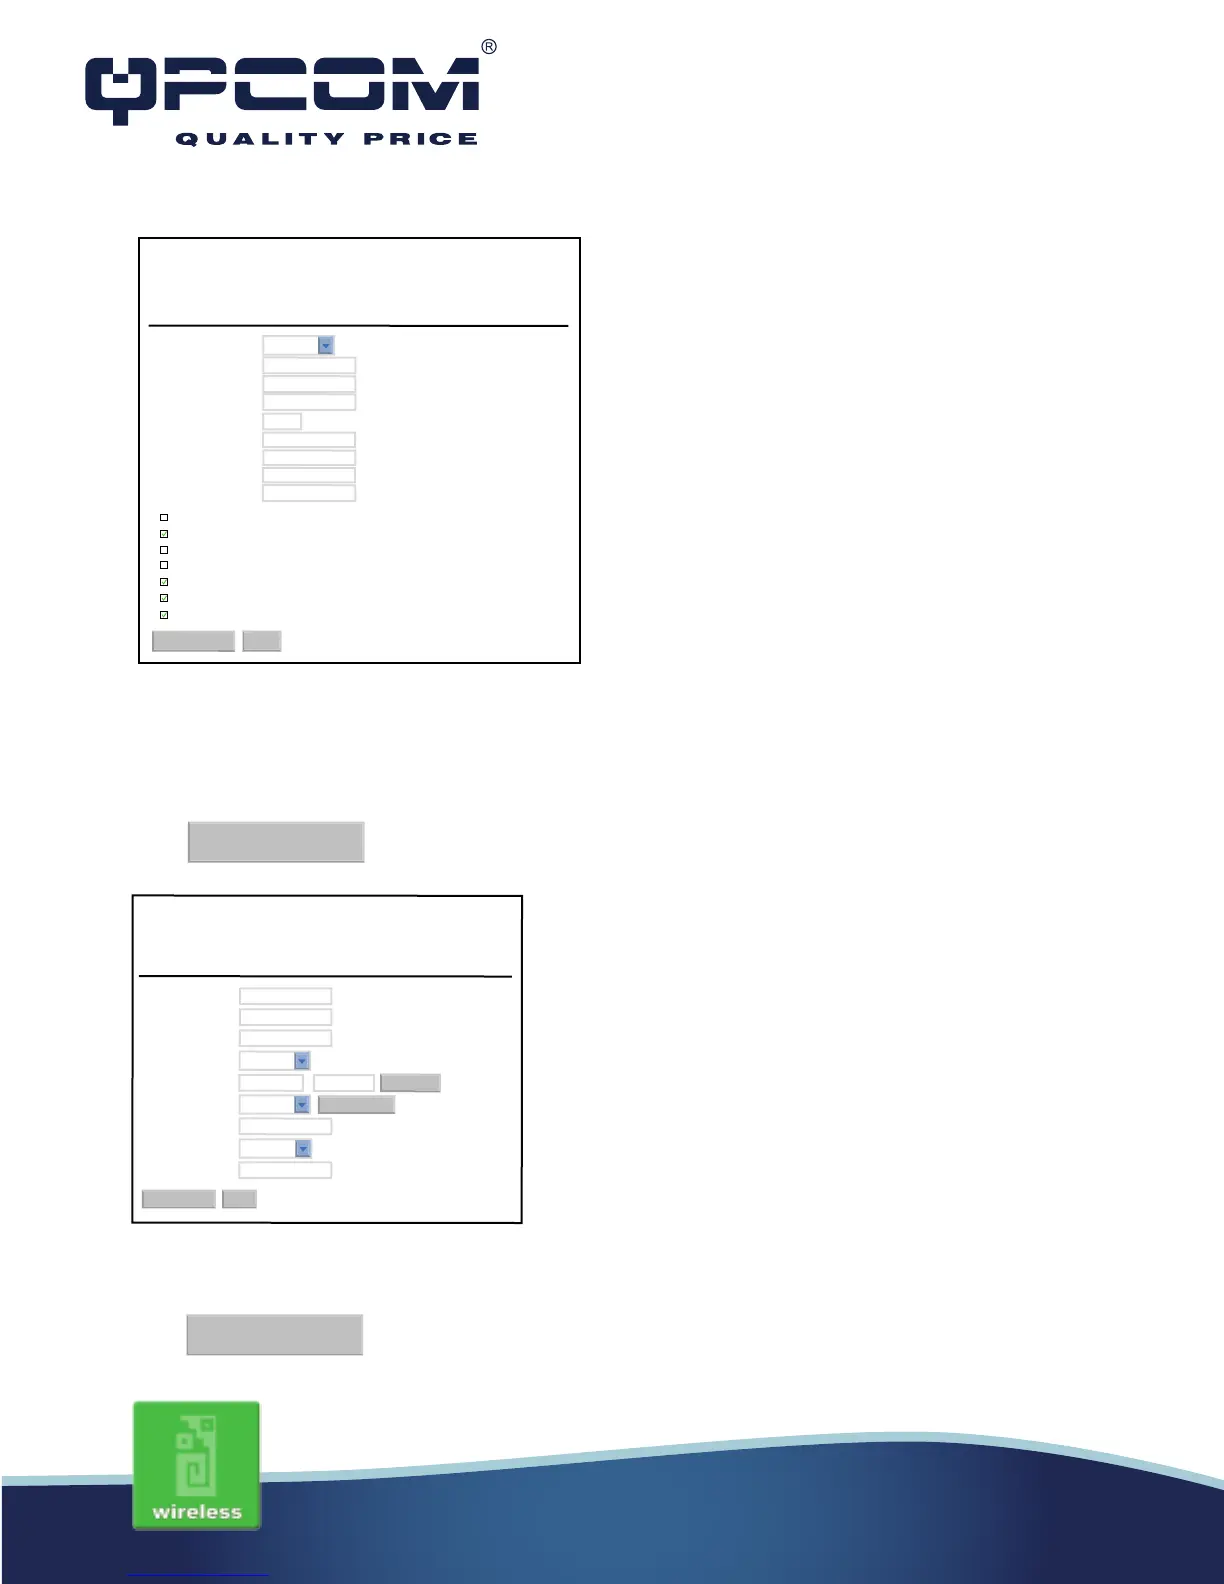
2. Configure the LAN interface:
Open LAN Interface Setup page, enter the IP Address “192.168.1.254”, Subnet Mask “255.255.255.0”,
enable DHCP Server, DHCP client range “192.168.1.100” to “192.168.1.200”.
Press button to confirm the configuration setting.
3. Configure the WLAN interface:
Open WLAN Interface Setup page, enter the SSID “AP”, Channel Number “11”.
Press button to confirm the configuration setting.
www.qpcom.com/www.qpcom.com.co
Apply Changes
Apply Changes
This page is used to configure the parameters for local area network whitch connects to
the LAN port of your Access Point. Here you may change the setting for IP Address,
subnet mask, DHCP, etc,.
IP Address:
Subnet Mask:
Default Getaway:
DHCP:
DHCP Client Range:
Static DHCP:
Domain Name:
802.1Spanning Tree:
Clone MAC Address:
LAN Interface Setup
Diseabled
Enabled
Server
Apply Changes
Set Static DHCP
Show Client
Reset
00000000000
192.168.1.100 - 192.168.1.200
0.0.0.0
255.255.255.0
192.168.1.254
This page is used to configure the parameters for Internet network witch connects to the
WAN por of your Access Point. Here you may change te access method to static IP,
DHCP, PPPoE, PPTP or L2TP by click the item value of WAN Access Type.
WAN Access Type:
IP Address:
Subnet Mask:
Default Gateway:
MTU Size:
DNS1:
DNS2:
DNS3:
Clone MAC Address:
Enable uPNP
Enable IGM Proxy
Enable Ping Access on WAN
Enable Web Server Access on WAN
Enable IPsec pass through on VPN connection
Enable PPT pass through on VPN connection
Enable L2TP pass through on VPN connection
WAN Interface Setup
Static IP
Apply Changes
Reset
00000000000
1500 (1400-1500 bytes)
192.168.1.1
192.168.1.254
255.255.255.0
 Loading...