10
QSC, LLC
Enabling Test Mode using the K.2 Test Mode application
1. Download the latest K.2 Test Mode application (in .zip format) from the QSC website.
2. Extract the contents of the zip file into a new folder on your computer.
3. View the contents of the new folder. Three files (K2TestMode.exe, SLABHIDDEVICE.dll, and SLABHIDtoSMBus.dll)
should exist in the folder.
4. Connect the AC power cord to the power inlet on the K.2 amplifier module.
5. Remove the rotary encoder knob (to the right of the LCD screen).
6. Connect the USB Type A to microUSB cable. The
Type A end connects to your computer’s USB port
and the microUSB end connects to the port above
the rotary encoder part on the K.2.
7. Flip the power switch on the amplifier module to
turn it on.
8. Open K2TestMode.exe by double-clicking on the
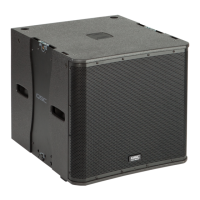
file/icon. The K.2 Test Mode application provides
information about the K.2 device in the table.
9. To enable Test mode, click on the slider button to
move it from Disabled to Enable.
10. Power cycle the amplifier module by turning the
power switch off, waiting at least 2 seconds, and turning the switch back on.
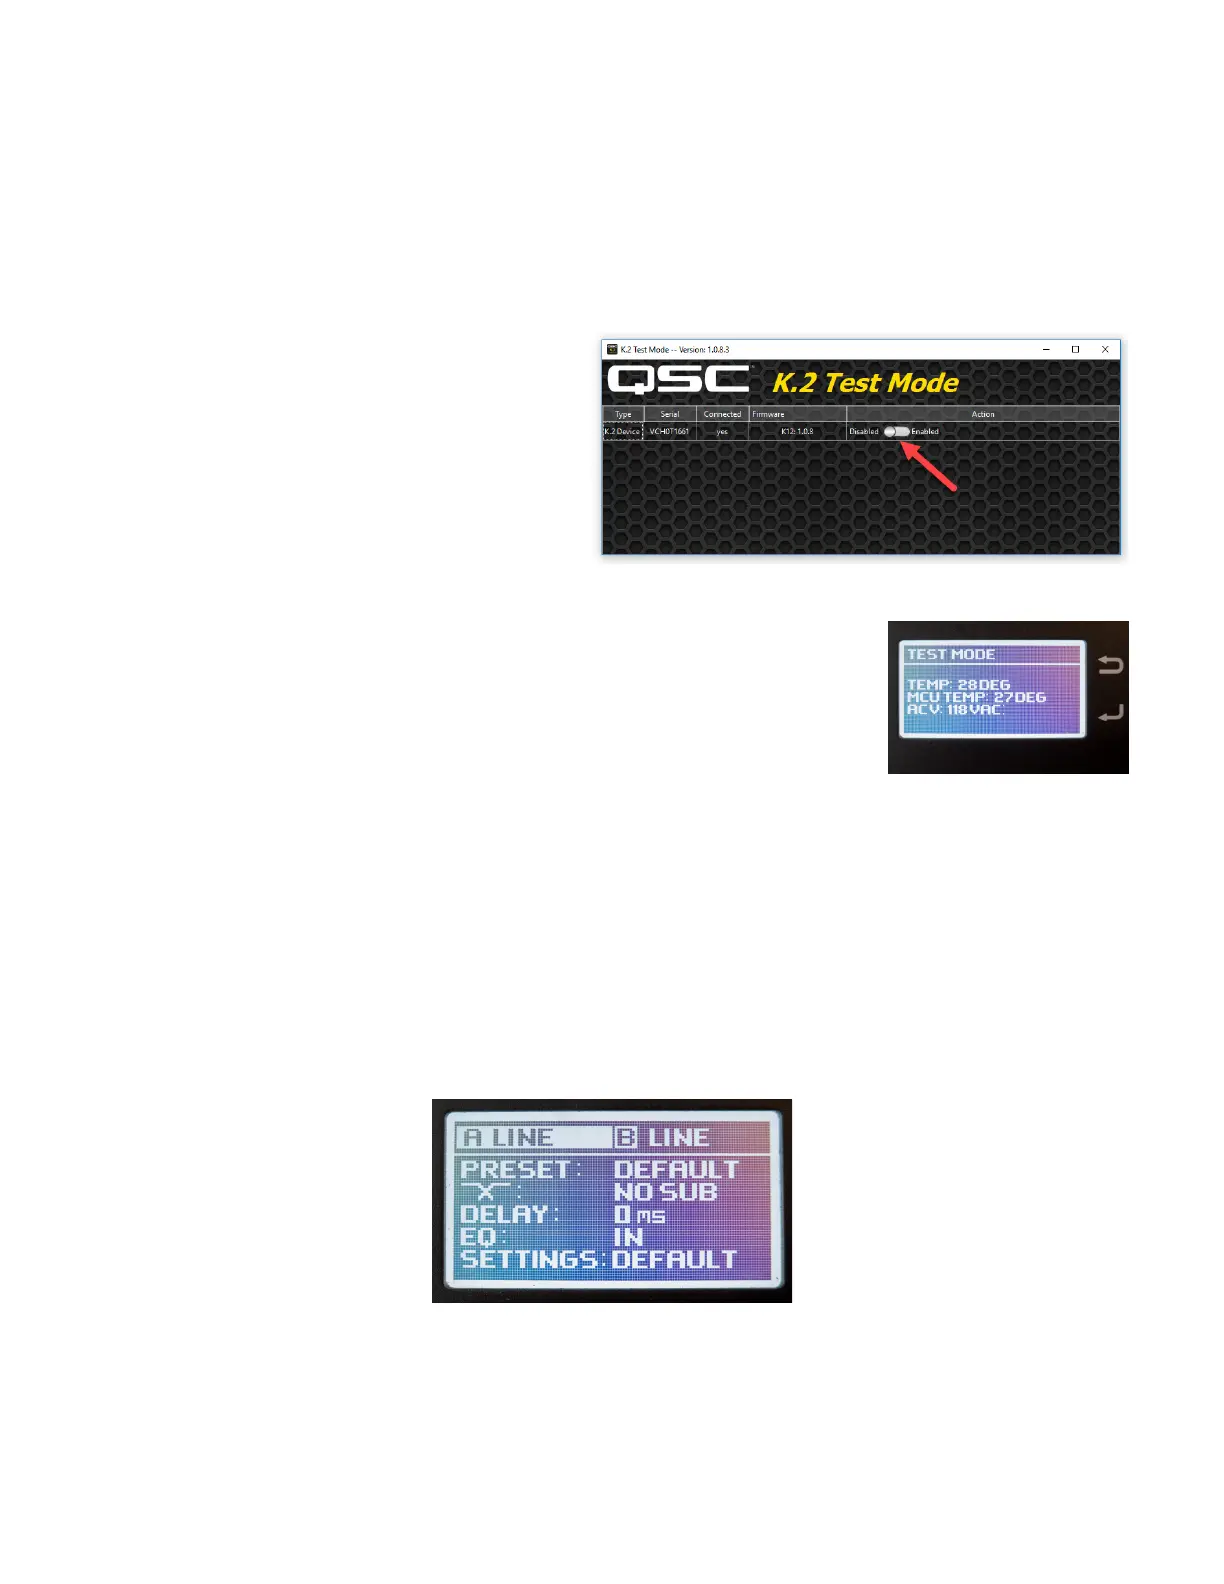
11. If Test Mode was successfully enabled, the LCD screen will show the Test Mode home
screen as shown in Figure 3.3.2 and the amplifier module’s fan running in high speed.
Caution!: Once Test Mode is enabled, do not apply any signal until the amplifier mod-
ule has been disconnected from the speaker loads. Failure to do so could result in
over-driven LF or HF transducers because DSP limiting is disabled. Only use resistive
test loads while in Test Mode.
Disabling Test Mode using the K.2 Test Mode application
Always disable Test Mode before returning the amplifier back to service. Follow the instructions below.
1. Repeat steps 4 through 8 in the section above.
2. To disable Test mode, click on the slider button to move it from Enable to Disabled.
3. Power cycle the amplifier module by turning the power switch off, waiting at least 2 seconds, and turning the switch
back on.
4. If Test Mode was successfully disabled, the LCD screen will show the default K.2 home screen. See Figure 3.3.3.
Figure 3.3.1 - Enabling or disabling Test Mode.
Figure 3.3.2 - Test Mode home
page on LCD.
Figure 3.3.3 - Default home page. Always
disable Test Mode after returning to service.
 Loading...