24
QSC, LLC
6.2 AMP/PSU board
Removal
1. Follow the removal steps in “6.1 Back cover”.
2. Adjust the amplifier module so that the front panel is face down on the work bench.
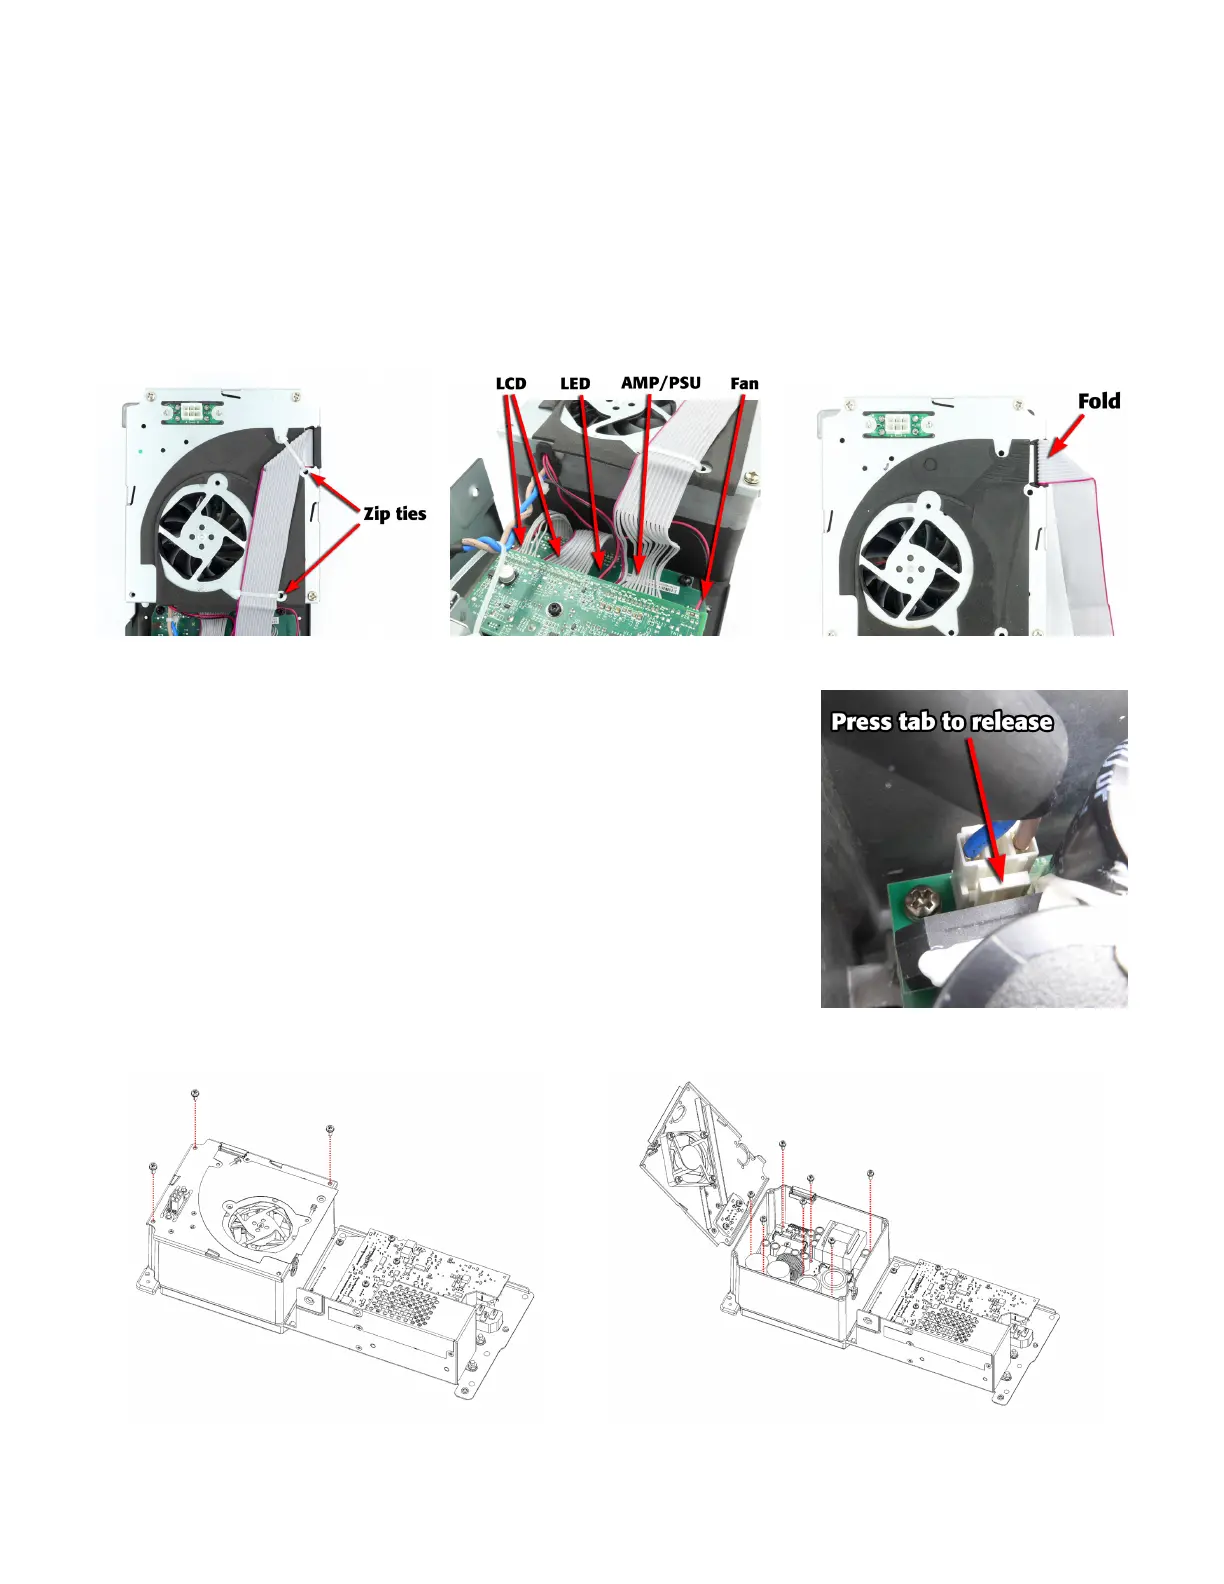
3. Cut and remove 2 zip ties that secure the ribbon cable to the metal cover. See Figure 6.2.1.
4. Disconnect the 3 ribbon connectors (LED, AMP/PSU, and Fan) from the input/DSP board as shown in Figure 6.2.2. The
ribbon cables going to the LCD board can remained connected.
5. Carefully move the large ribbon cable and fold it over the right side of the amplifier module as shown in Figure 6.2.3.
6. Remove the 3 machine screws as shown in Figure 6.2.5.
7. Lift up and rotate the metal cover assembly (which includes the fan and output
connector PCB) to provide access to the AMP/PSU board. See Figure 6.2.6 for
a visual aide.
Troubleshooting tip: Leave the cover up in this position while connected to AC
power/outputting audio to aide in troubleshooting components on the top-
side of the AMP/PSU board.
8. Disconnect the AC wiring harness from AMP/PSU board by putting pressure on
the locking tab and lifting the wiring harness up. See Figure 6.2.4.
9. Remove the 2 machine screws that secure the output connector PCB to the
metal cover. Set the metal cover assembly aside.
10. Remove the 7 short machine screws that secure the PCB to the heatsink
chassis. See Figure 6.2.6.
Figure 6.2.1 - Zip ties for ribbon Figure 6.2.2 - Ribbon connectors. Figure 6.2.3 - Folding AMP/PSU ribbon.
Figure 6.2.4 - AC wiring harness
Figure 6.2.5 - Metal cover removal/installation steps Figure 6.2.6 - Metal cover rotated up for AMP/PSU access
 Loading...