Operation
QUBEVSM-V01-R0 Installation and Operation Manual Intelligent Electric Vehicle Chargepoints
February 2023 Page 36 of 42
1. Make sure the Charge Status Indicator is illuminated Glowing Blue.
2. Connect the charging cable to the vehicle.
x After connecting to the vehicle with a non-tethered charger, the charging cable can be
connected to the QUBEV charger socket.
3. The charging session will start as soon as the charger has checked its systems.
x Also, in accordance with the Smart Charging Regulations, the charger will wait for
a random time of up to 10 minutes before delivering power to the vehicle.
4. The Charge Status Indicator will illuminate Glowing Green when charging is in progress.
x If the Charge Status Indicator Flashes Green, the vehicle battery has reached its full
charge capacity and the vehicle will stop the charging process.
x If the vehicle stops the charging process and it is found that the battery does not
have a full charge, the vehicle has experienced a problem and has stopped the
charging process for another reason that may need to be investigated.
5. To manually STOP charging, tap the Turn Off button on the application Home screen or
unplug the cable from the vehicle (and then from the QUBEV charger if not a tethered
model).
6. When the charging session has finished, loosely coil the cable for storage.
x Tethered cables should be hung on the hanger with the plug securely connected to
the dummy socket that is built into the hanger.
x Plug-to-plug cables used with socket chargers should have their rubber dust caps
fitted and the cable should be stored in a dry, undercover environment.
Schedule Mode
To charge the vehicle it must be connected to the charger ready for the charge session to start.
In Schedule Mode the start and stop times of charge sessions can be set.
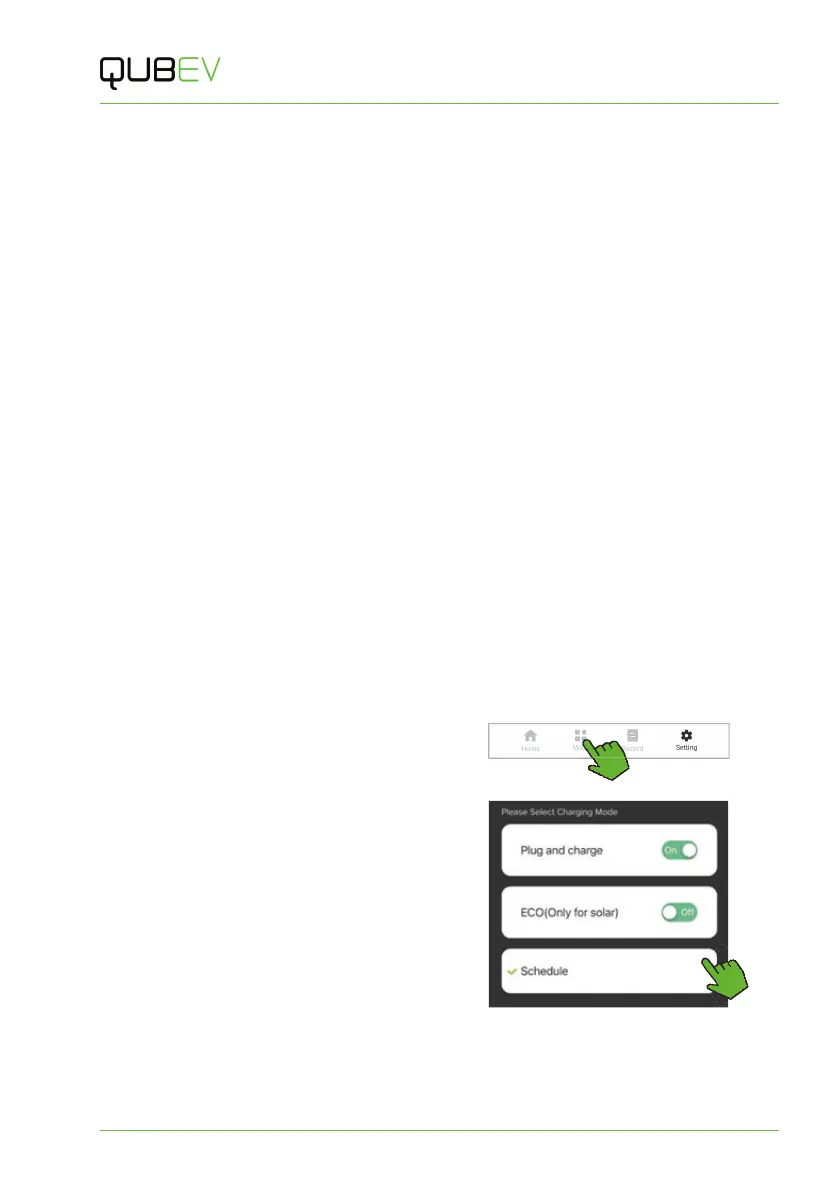
1. Tap the Mode icon.
2. Select Schedule (if not already
selected).
3. Any existing schedules will be shown
as a list. If no schedules have been
saved, you will be given the
opportunity to create one.
Figure 27 Setup a Schedule - 1
 Loading...