Operation
Intelligent Electric Vehicle Chargepoints QUBEVSM-V01-R0 Installation and Operation Manual
Page 37 of 42 February 2023
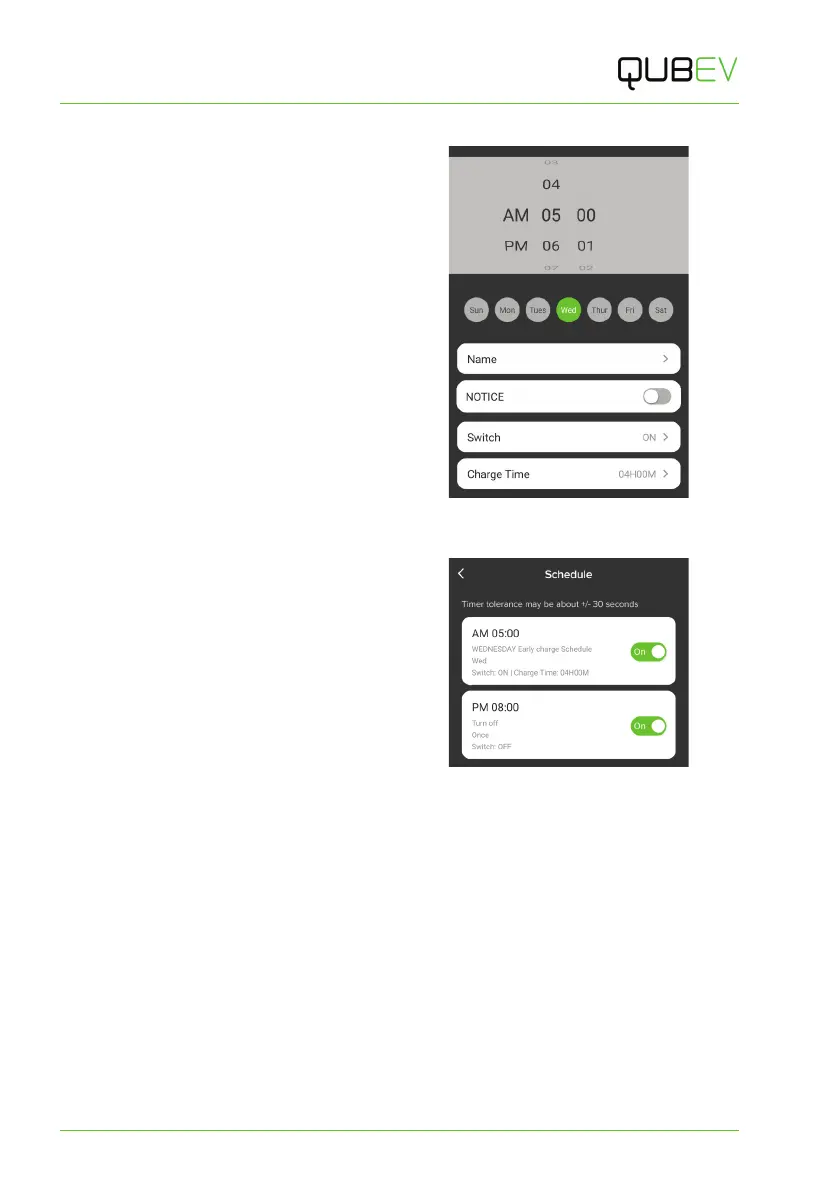
Create a Schedule:
1. Tap the Add timing button. The
scheduling screen will be displayed.
2. Set the time of when you want the
charge to start using the selectors at
the top of the screen.
3. If required, select a specific day of the
week that this charge session will occur.
x If a day(s) is not selected the
charge session will take place
every day at the same time.
4. Enter a name for the charge session
that makes it easy to identify.
5. Set the Switch field to ON.
6. Set how long the charge session will be.
7. Tap Save, at the top of the screen to
save the schedule.
Figure 28 Setup a Schedule - 2
In the example shown above and opposite the
charge session will start at 5AM on
Wednesday and will last for 4 hours. The
schedule will repeat each Wednesday while it
is marked as being active.
If the session is marked as inactive, the
charge session will not take place.
Schedules to STOP a charge session can also
be created in the same way and could, for
example, be used when a daily charging
session needs to end early on specific day.
Figure 29 Schedule Set
8. To configure a ‘stop’ schedule set enter the times as above but set the Switch button to
OFF.
If the vehicle is connected to the charger and you need to start a charging session that is not
scheduled, simply tap the Enable button on the Home screen.
Delete a Schedule
1. Tap the Mode icon then tap the Schedule button to open the Schedule screen.
2. Tap and hold the schedule to be deleted. You will pe presented the option to Confirm
deletion or cancel the action (and keep the schedule).
x Deleted entries will be removed from the screen.
Alternatively, an active schedule can be deactivated by moving the slider switch to the left.
Deactivated schedules will be ‘greyed out’.
 Loading...