Corporate Headquarters | T. +972.3.766.2900 | E. sales@radwin.com | www.radwin.com
Note:
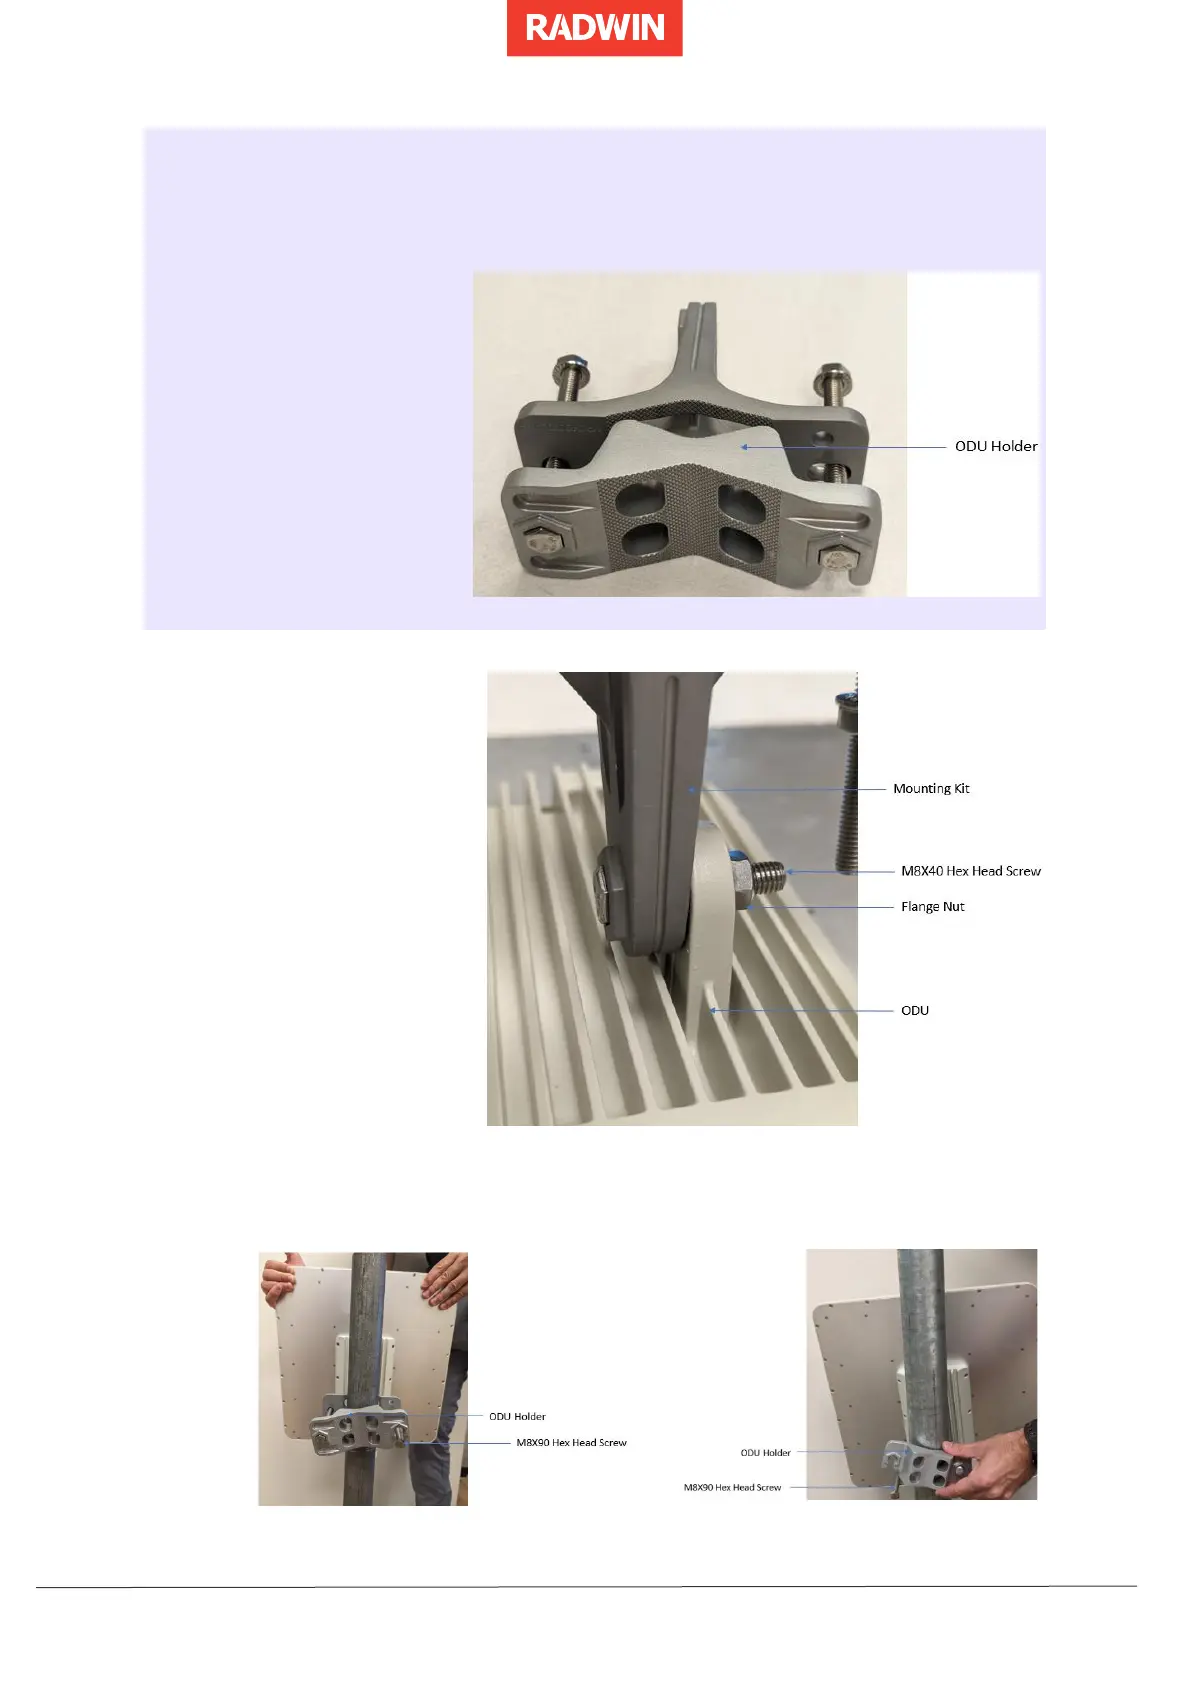
The mounting kit is preassembled for mounting on a 2-3” medium size pole.
If you are mounting the ODU on a small sized ¾ ‐1½” pole, perform the following:
1. Remove the Pole Clamp by
dissembling both M8
Flange Nuts and both
M8X90 Head Hex Screws.
2. Reverse the Pole Clamp
and reattach it to the ODU
holder by reassembling
both M8X90 Head Hex
Screws and both M8
Flange Nuts.
4. Mount the mounting kit
on the ODU by inserting
the M8X40 Hex Head
Screw in the hole of the
ODU.
5. Tighten the M8 Flange
Nut with a torque of 15
Nm until the mounting kit
is firmly on the ODU.
6. Open the Pole Clamp allowing the ODU Holder to attach onto the pole, then close the
Pole Clamp on the M8X90 Hex Head Screw.
Thin Vertical Pole ¾” ‐1½”
Medium Vertical Pole 2 - 3”
 Loading...