Raisecom
ISCOM2600G (A) Series Product Description
Raisecom Proprietary and Confidential
Copyright © Raisecom Technology Co., Ltd.
Step 1 Choose a proper wall-mount height where you can easily observe the LEDs and connect the
power supply.
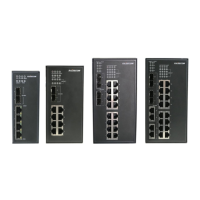
Step 2 Use the M3*6 screws to install the wall-mount brackets to the two sides of the device (Figure
4-5 shows how to install brackets to one side. Do the same on the other side.), as shown in
Figure 4-5.
Figure 4-5 Installing wall-mount brackets
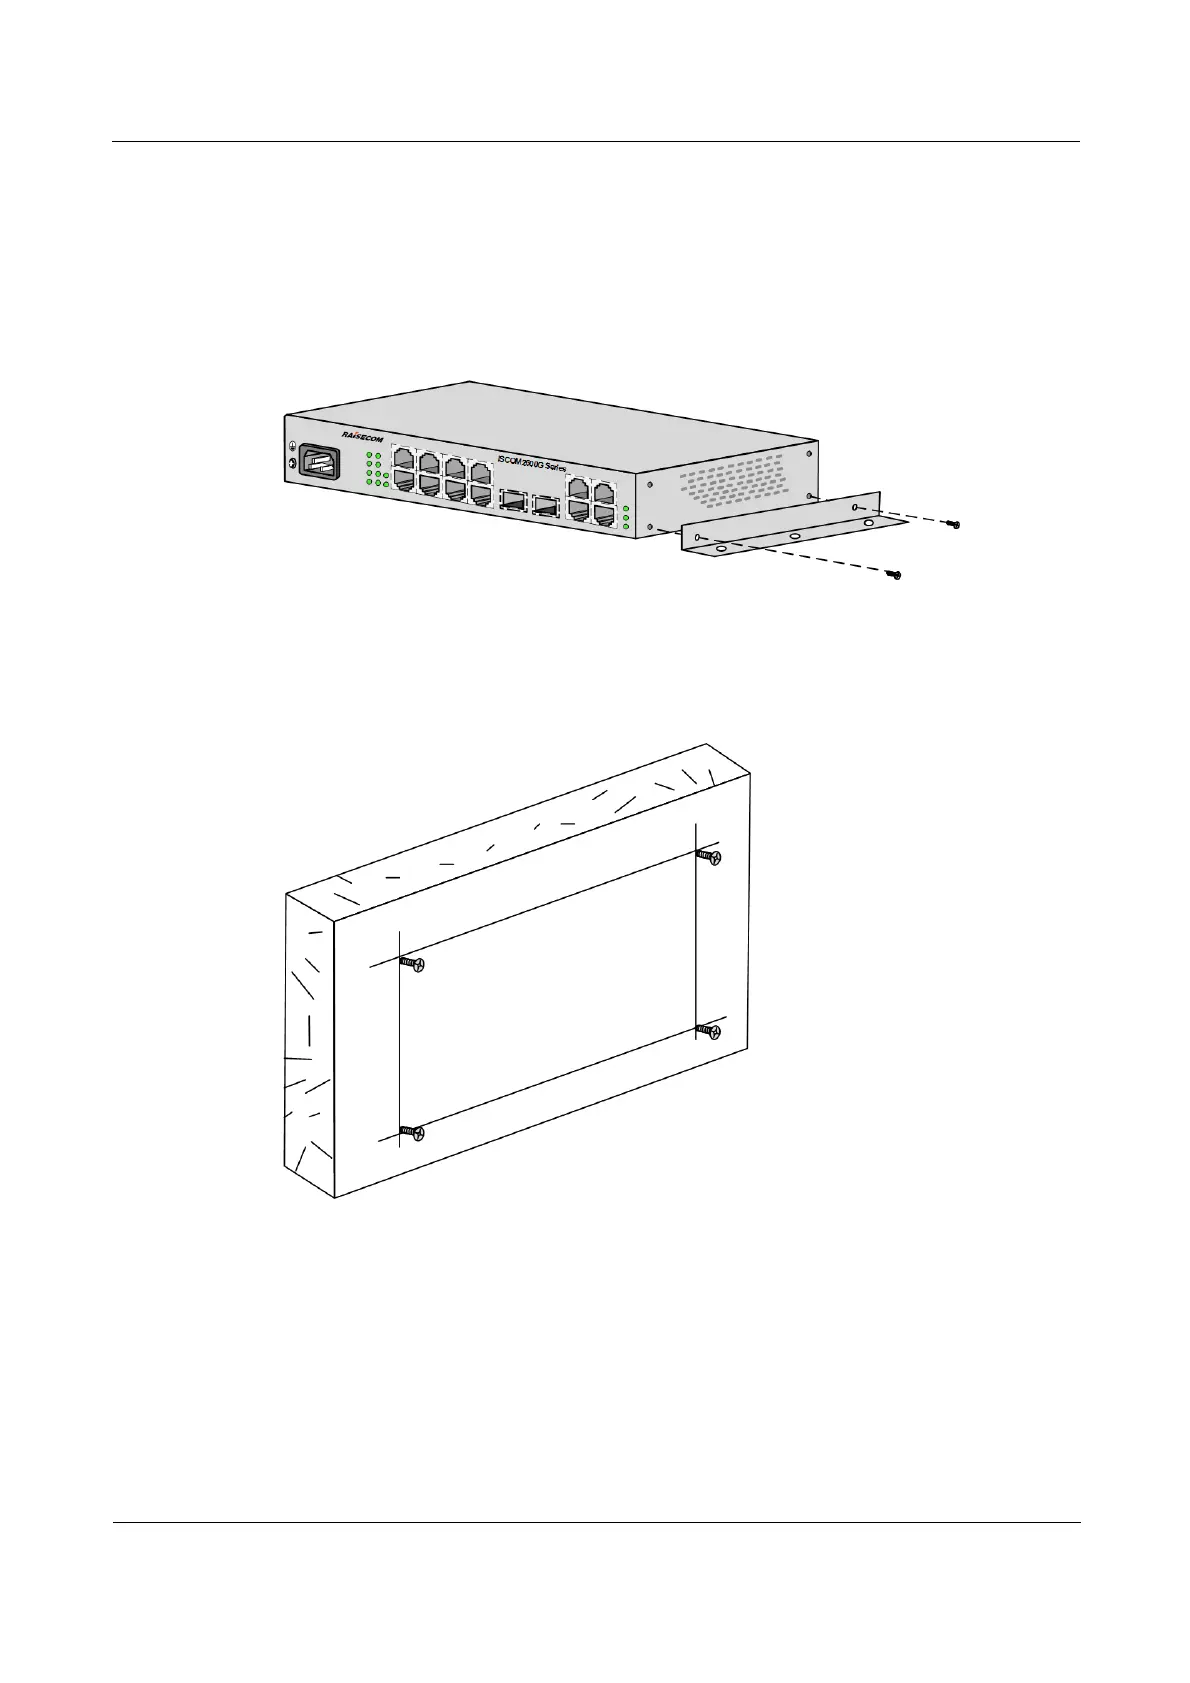
Step 3 Drill four holes on the wall according to the distance of the two holes on the brackets and the
device width. Keep the lines connected by the brackets horizontal and vertical and fix four
screws to the wall, as shown in Figure 4-6.
Figure 4-6 Installing screws
Step 4 Align the holes on the wall-mount brackets with the screws, snap the device slightly, and then
let go of your hands, as shown in Figure 4-7.