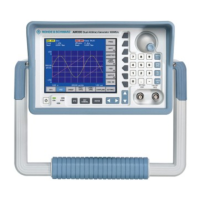
Figure 1-18
Installing the front
panel
1. Place keypad and PCB back into front panel and press into place.
2. Place front unit on front panel and center it with edge of display
window.
3. Fasten with 6 screws (DIN7985 M2.5×5).
4. Plug in keyboard cable.
Caution
Make sure the color marking of spinwheel cable is at the top and the color
marking of keyboard cable points towards the display plug!
5. Secure spinwheel with 2 screws in front unit (DIN7985 M2.5×8).
6. Install rotary knob (see section
1.3.3.4).
7. Mount front unit on carrier unit.
8. Fasten 7 special screws (similar to DIN7985 M3×5). When installing
side special screws, pull front unit forward.
9. Reinstall both cases and rear frame (see section 1.3.3.3).
10. Reinstall handle (see section
1.3.3.2).
11. Reinstall both protectors (see section
1.3.3.1).
1.3.3.7 Disassembled Front Unit with Rotary Knob, Keyboard PCB, Keypad
Removing and
Installing see section
1.3.3.6
Figure 1-19

 Loading...