112
HSB Series Chartplotter
Note: The power cable is fitted with a ferrite clamp to ensure EMC
conformance.
Power Connection
The RED wire must be connected to the feed from the positive (+)
battery terminal and the BLACK wire to the feed from the negative (–)
battery terminal. The shielded wire should be connected to the ship’s RF
ground as previously described in
Grounding the Chartplotter
.
Any unused cores should be insulated and taped back.
Note: If the power connections are accidentally reversed the system will
not work. Make sure that the input power leads are connected for correct
polarity, using a volt meter.
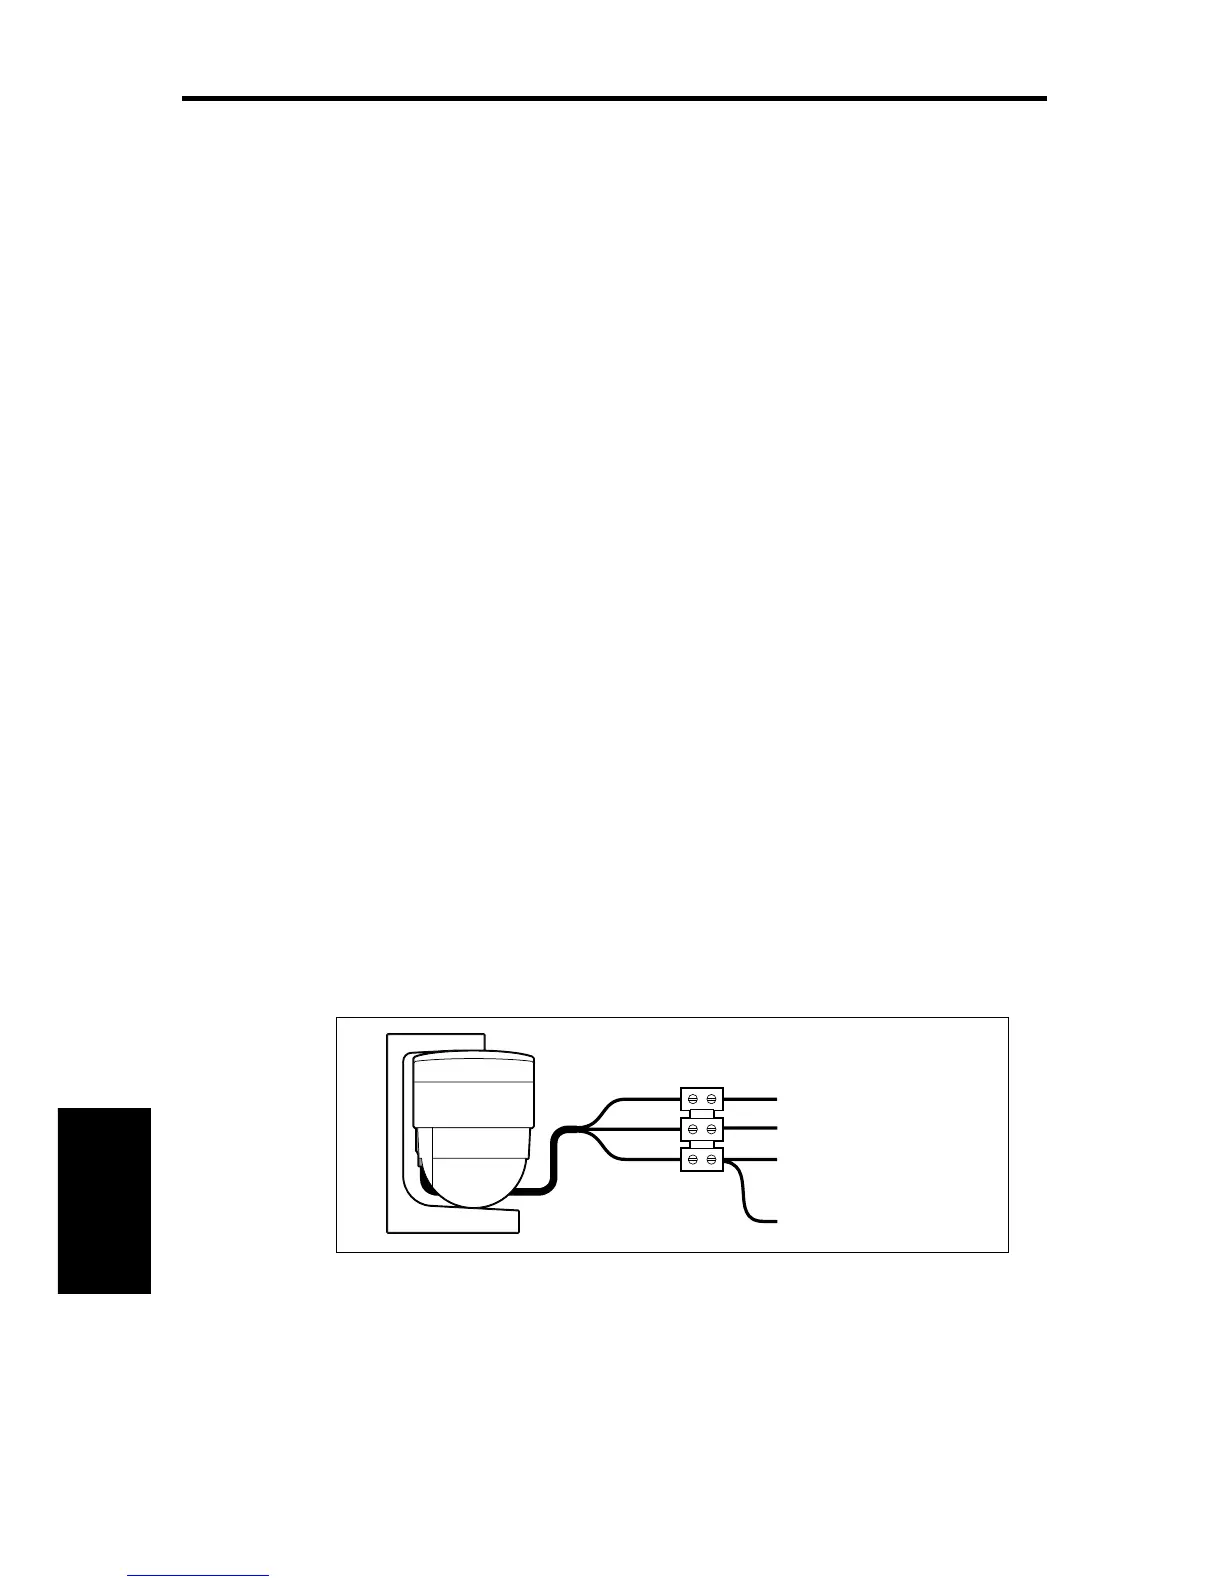
NMEA Connection
An NMEA interface is typically used to connect a non-SeaTalk compass
or GPS system to the chartplotter.
Connect the input(s) to the orange and yellow cores (Channel 1) and/or
the green and blue cores (Channel 2).
Note: Navaids cannot be powered from the radar.
For example, to connect a Raytheon Heading Sensor to the NMEA
Channel 1 input, connect the cables and power supply using a suitable
connector block, as shown in the diagram below. If fitted, it may be
convenient to connect the power to the Seatalk junction box described
below.
+12 V
0V
+ NMEA Data (orange)
-- NMEA Data (yellow)
D3604-1
Red
Black
Yellow
Display Unit
Connections