12 RAYDATA Installation and Operation Handbook
Caution: Make sure there are no hidden electrical wires or other
items behind the desired location before proceeding.
2. Remove the mounting template (located just inside the rear cover of
this handbook), and attach it to the panel. Drill a pilot hole inside the
circular hole.
3. Using a suitable hole saw, cut a 3in (76mm) diameter hole to match
the pattern.
4. Drill four 3/16in (5mm) holes for the thumb studs.
5. Deburr the machined holes, and fix the RayData to the panel using
the four thumb studs and four thumb screws.
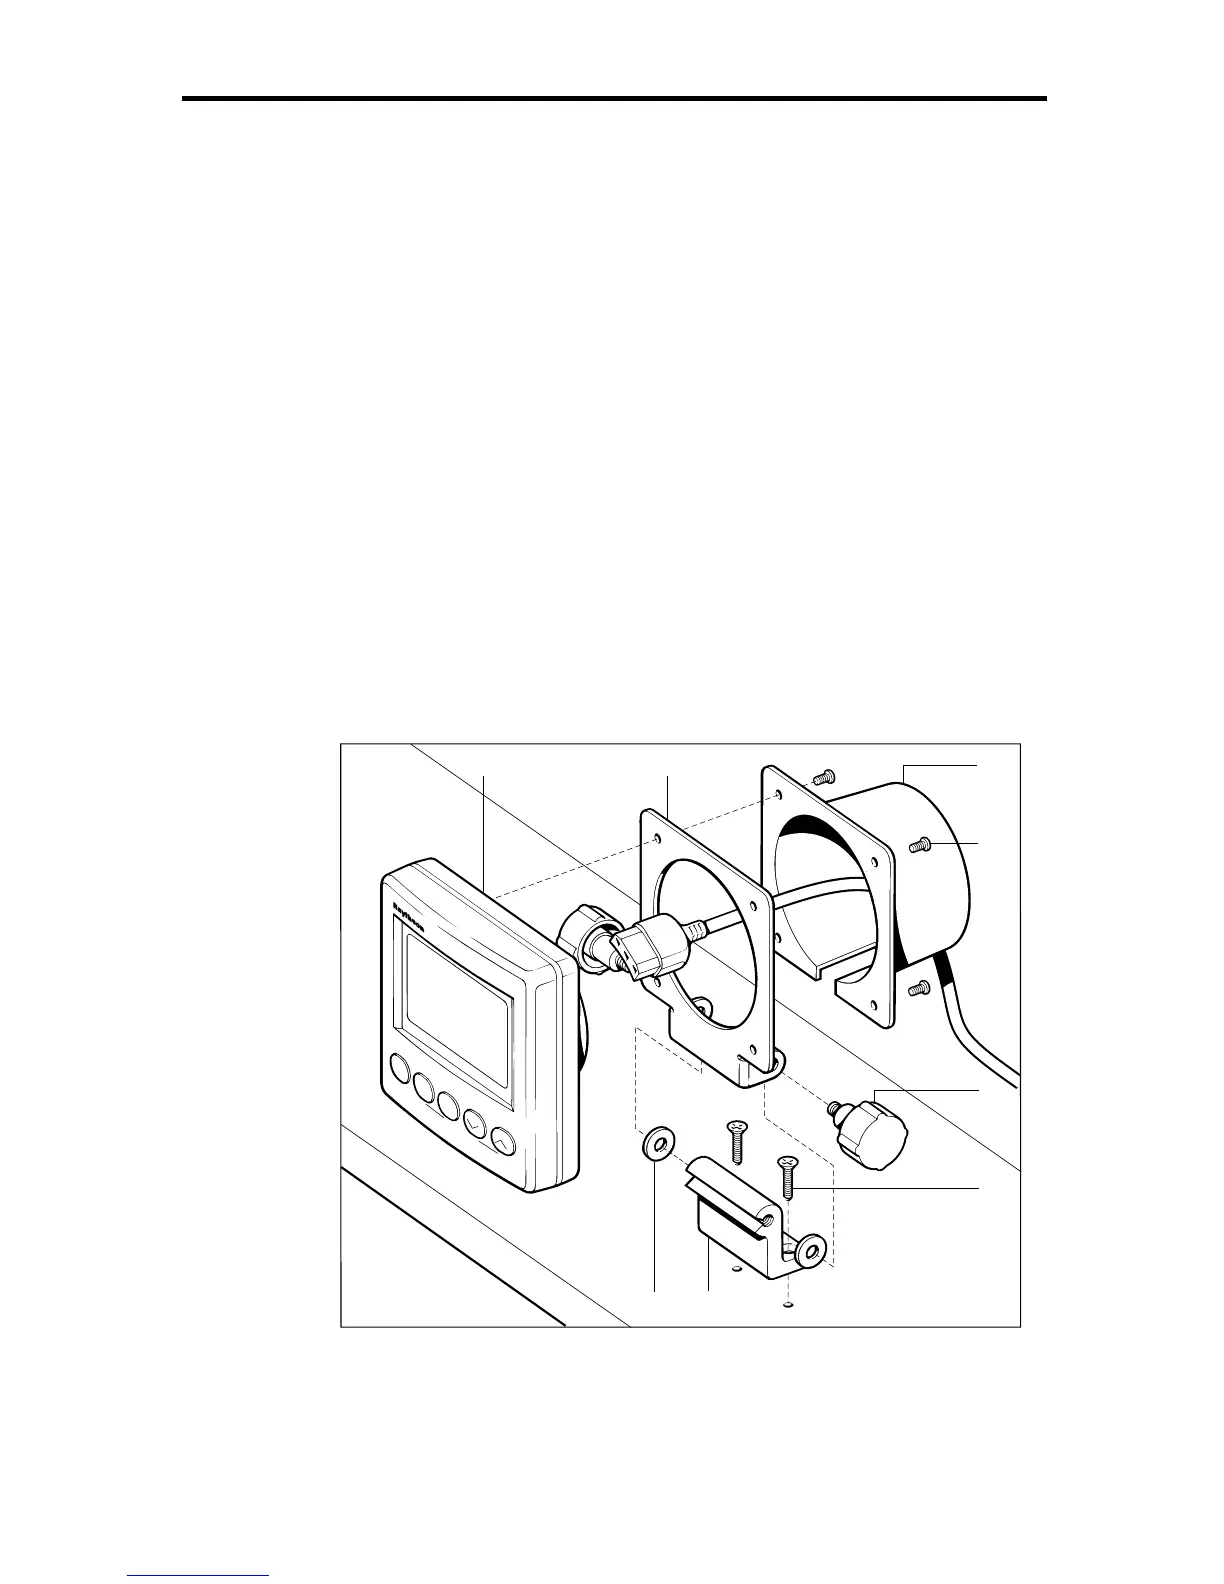
Trunnion Mounting
To mount the RayData using the optional trunnion mounting kit:
1. Attach the trunnion surface mounting bracket (1) to the selected
mounting surface, using the two self-tapping countersunk
screws (2).
D3036-1
SPEED
RAYDATA
DEPTH
NAV
MOB
LOCK
POWER
43
8
17
2
6
5
1 Surface mounting bracket 2 Self-tapping countersunk screws 3 Unit bracket 4 RayData
5 Rear cover 6 Pan-headed screws 7 Rubber washers 8 Knobs
2. Place the unit bracket (3) over the boss of the RayData (4).