Chapter 2: Installation 13
3. Make all the required connections to the back of the RayData, as
described in the following section, “RayData Connections”.
4. Place the rear cover (5) over the cables, and use the four pan-
headed screws (6) to fasten this cover and the unit bracket (3) to the
back of the RayData (4).
5. Attach the unit bracket (3) to the surface mounting bracket (1), with
the rubber washers (7) positioned between the two brackets, and
secure it in position using the knobs (8) provided.
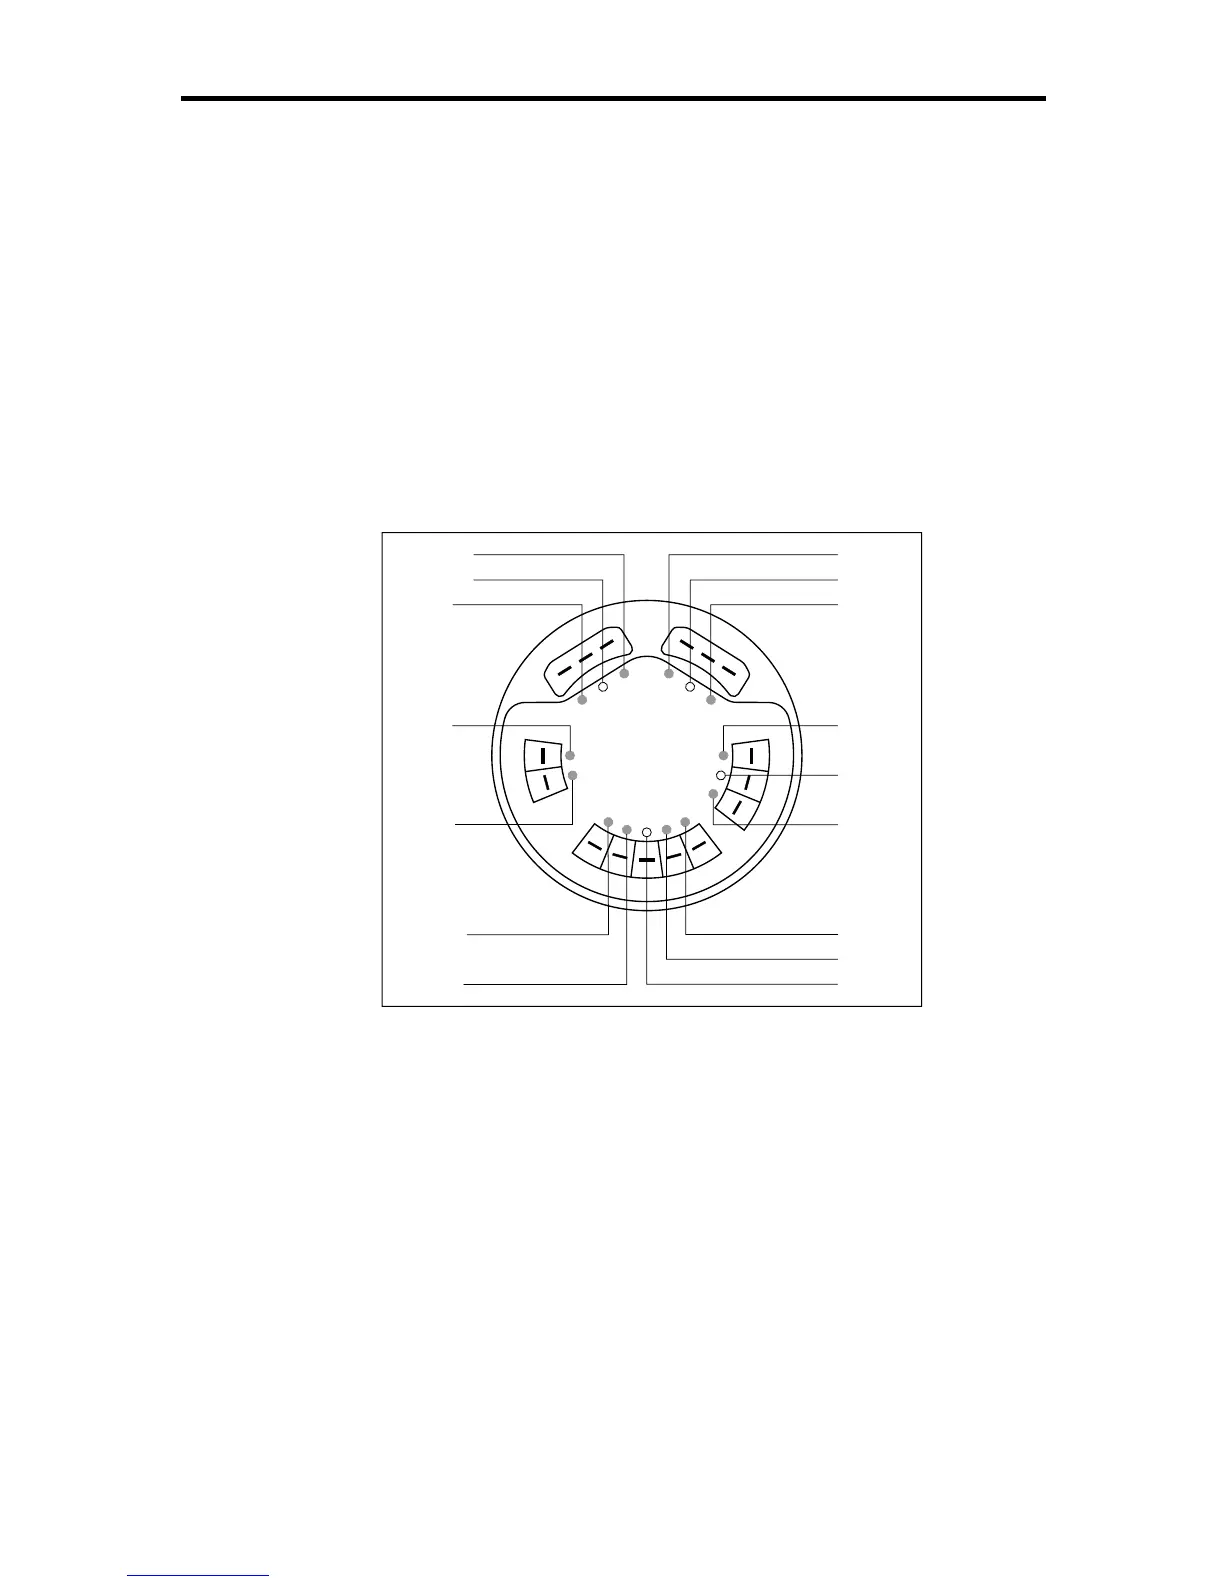
2.7 RayData Connections
D3056-1
N
M
E
A
I
N
S
P
E
E
D
/
T
E
M
P
D
E
P
T
H
SeaTalk
ss
s
s
Red
Screen
Yellow
Blue
Screen
Black
Red
Green
Screen
Screen
Red
Yellow
Red
Blue
Brown
White
The rear panel of the RayData has the following connectors:
1. Depth: 3 lug connectors
2. Speed & temperature: 5 lug connectors
3. NMEA input: 2 lug connectors
4. SeaTalk input and output: 2 sets of 3 lug connectors for power, data
and ground
Stand-Alone System
If you are using the RayData as a stand-alone system, you will only need
to use the depth and speed connectors, together with the SeaTalk input
for power input, as shown in the following diagram.