6.Tightenthenutontothemountingbolt,using2x14mmwrenchesor
adjustablewrenches,untilthetransducerissecure
,butcanstillbe
adjusted(tilted)byhand.
7.Tiltthetransducersothatthebottomfaceofthetransducerwillbe
parallelwiththewaterlineandtightenthenutandboltuntilthetransducer
isheldfirmlyinplace.
R outingthecable
Alwaysusethesuppliedcableclipstosecurethetransducercabletothe
transom.Ifthecablewillberoutedthroughthetransom,usetheescutcheon
platetocoverthehole.
1.PlantherouteyourcablewilltaketotheMFDorsonarmodule.
Forcableroutingguidance,referto:
p.26—Transducercableroutingguidance
2.Ifrequired,drilla25mm(1inch)holeinthetransomatthedesiredlocation
toroutethecablethrough.
3.Ifrequired,drill25mm(1inch)holesthroughanybulkheadsthatyou
wanttoroutethecablethrough.
4.Roundofftheedgesofanyholesusingafiletoavoiddamagingthecable
onanysharpburrs.
5.RoutethetransducercabletotheMFDorsonarmodule,connectingany
necessaryextensioncables.
6.Securethecabletothetransomusingthesuppliedcableclipsandscrews.
Fordetailedinstructions,referto:Securingthecable
7.Whereapplicable,covertheholeinthetransomusingthesupplied
escutcheonplate.
Fordetailedinstructions,referto:Mountingtheescutcheonplate
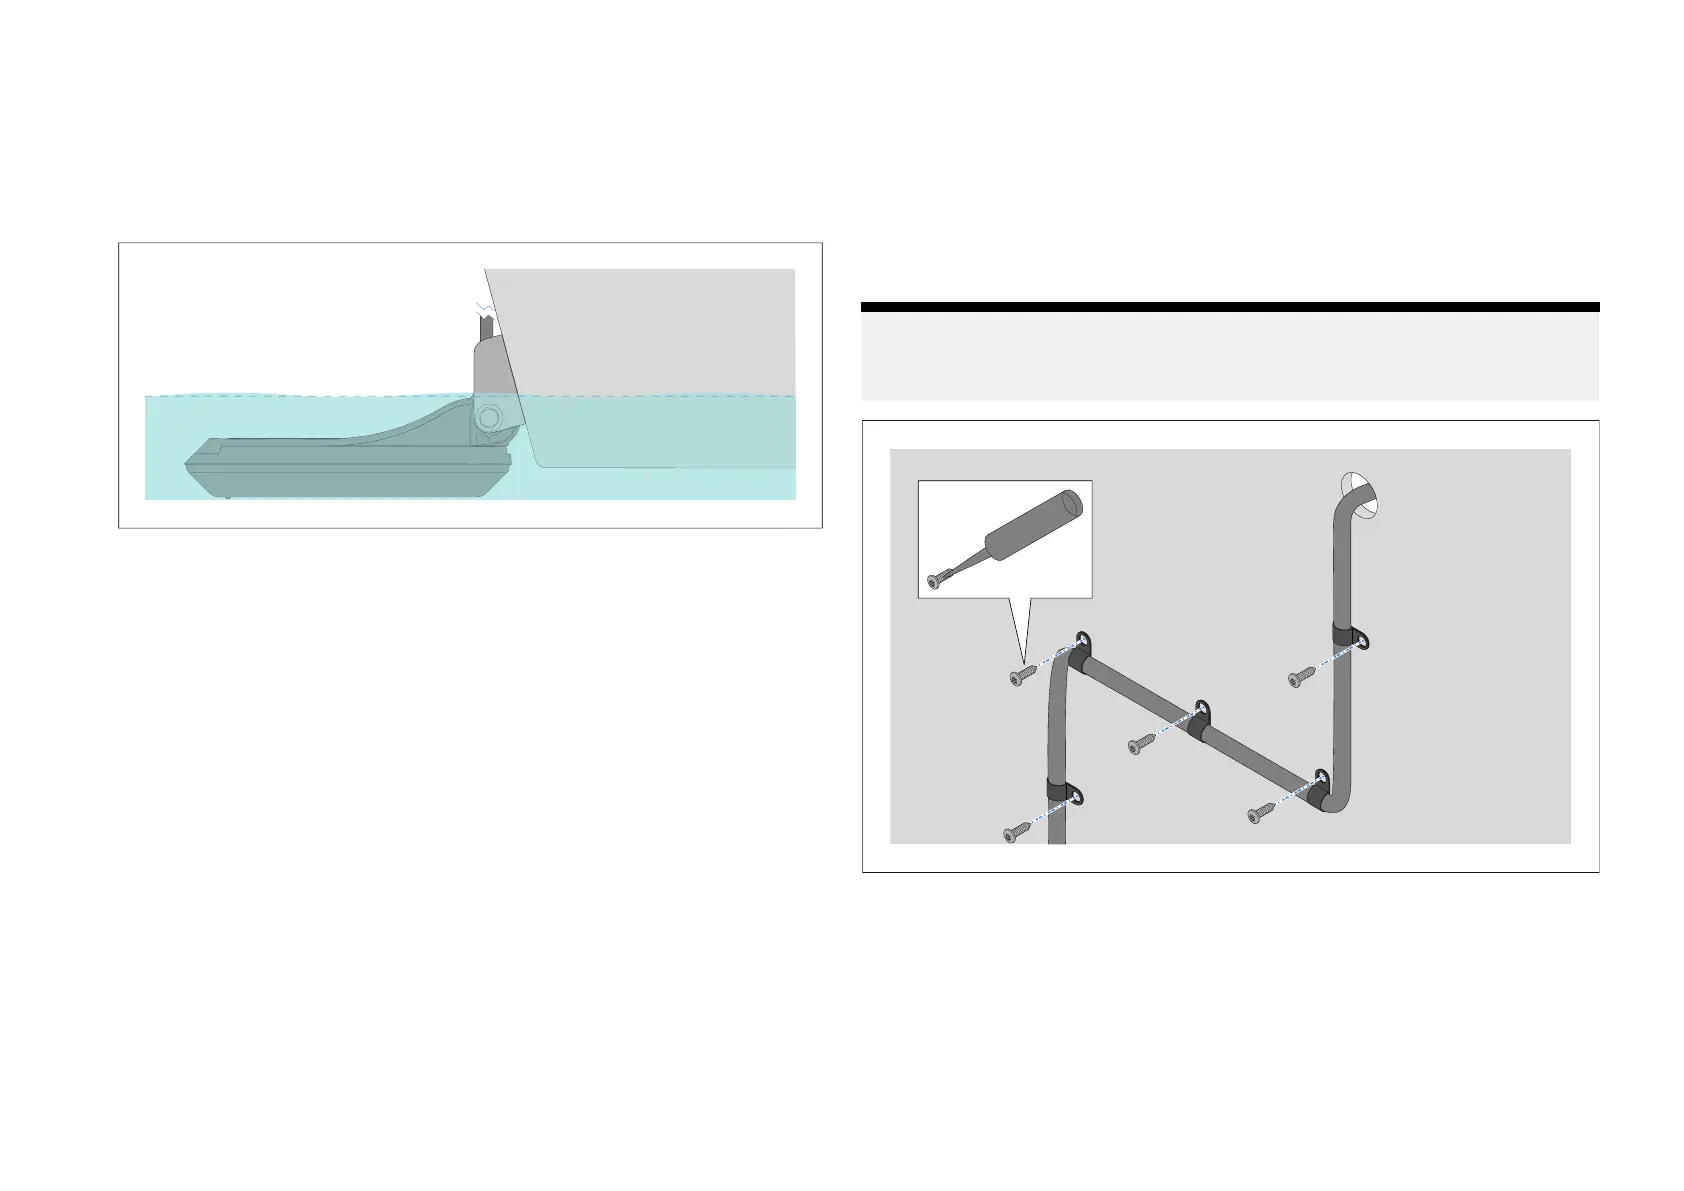
Securingthecable
Usethesuppliedcableclipsandscrewstosecurethetransducercableto
thetransom.
Note:
A
fterapplyingmarinegradesealant,alwaysallowtimeforthesealantto
fullycurebeforereturningyourvesseltothewater.
1.Whenplacingthefirstcableclip,ensurethereissufficientslackinthe
transducercabletoallowthetransducertotiltupanddown.
2.Drillapilotholeatthedesiredlocation.
3.Attachthecablecliptothecable.
4.Applymarinegradesealanttothethreadofthecableclipscrew.
5.Pushthescrewthroughthemountingholeinthecableclip.
6.Insertthescrewintothepilotholeandtighten.
Installation29

 Loading...


