Plug in your Product and Turn It On
Plugtheendof thepowercordintoagroundedwalloutlet.Inserttheplugcompletelyinto
theoutlet.PressON•OFFontheremote,orpressPOWERonthefrontpanel.
Put Batteries in the Remote
• Removethebatterycompartmentcoverfromthebackof theremotebypushingdown
andslidingoff thecover.
• Insert2fresh“AA”batteries.Makesurethepolarities(+and-)arealignedcorrectlytothe
diagraminsidethebatterycompartment.
• Replacethecover.
Note: If you won’t need to use your remote for a long period of time, remove the
batteries to avoid damage due to possible leakage.
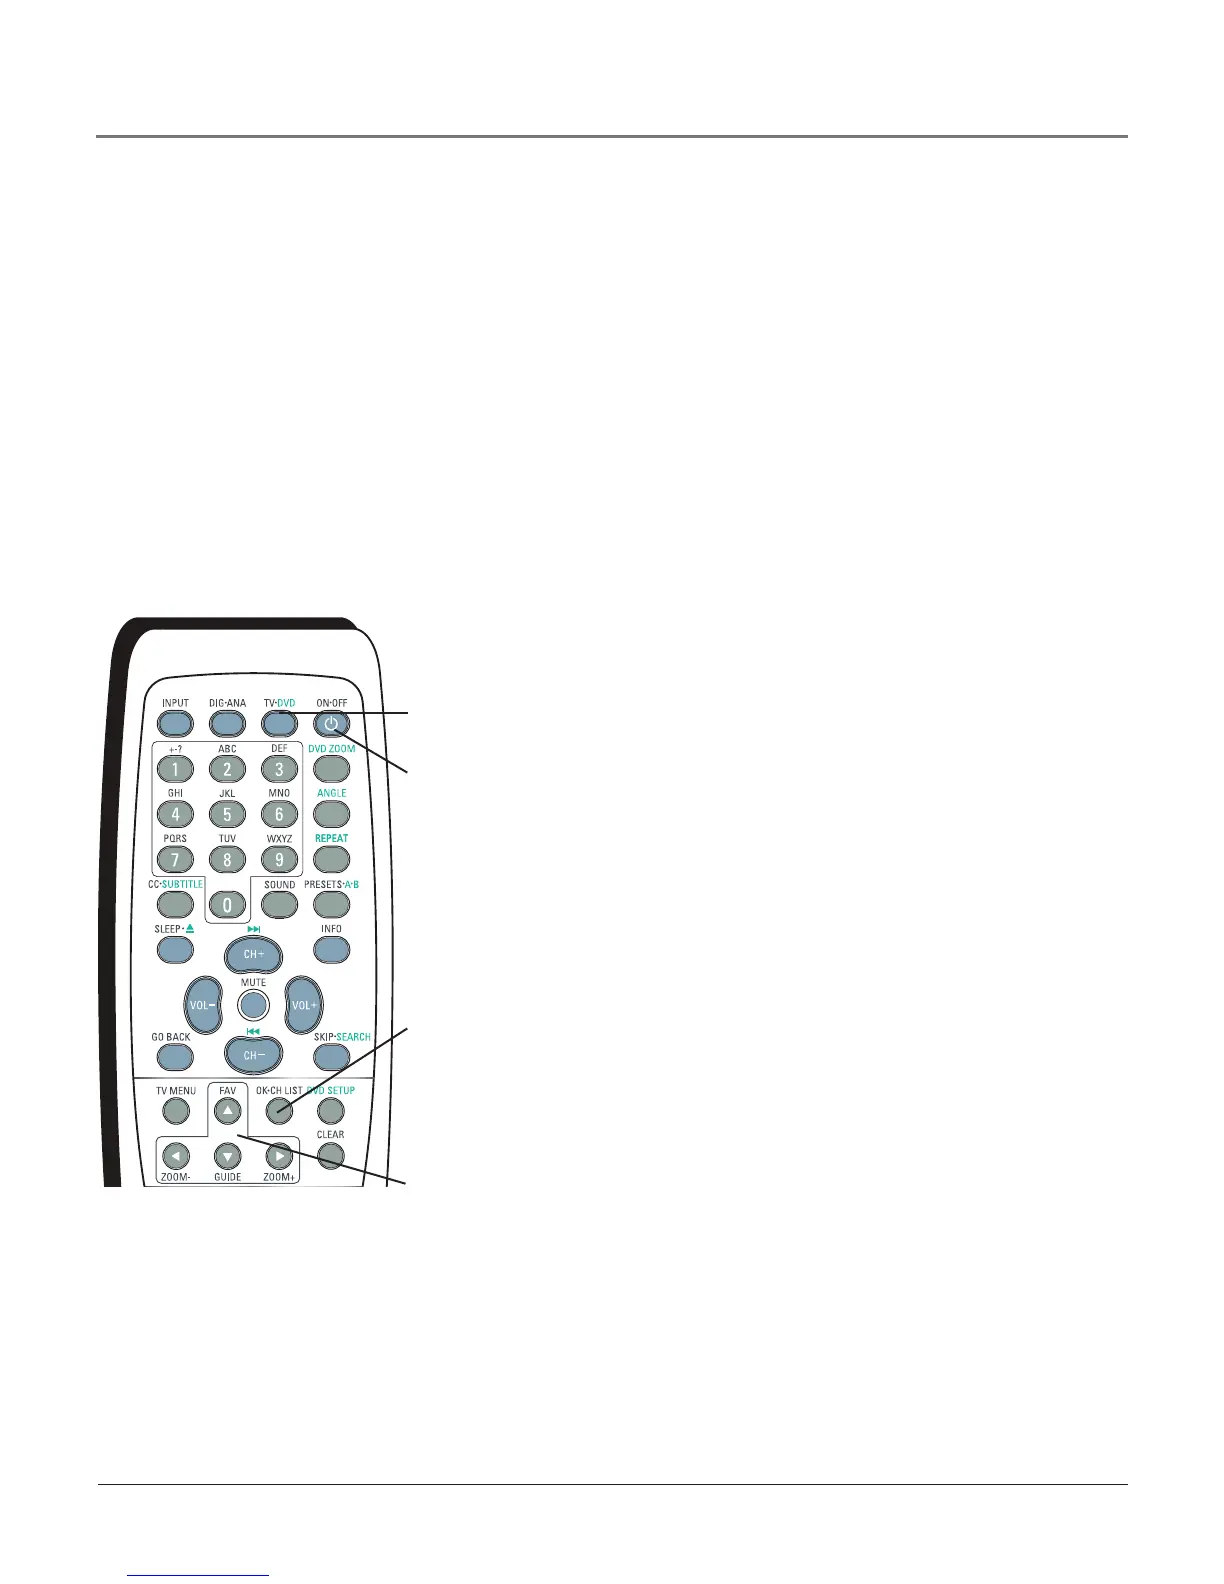
OK
button
Arrow
buttons
Use the Remote Control to
Complete the Initial Setup
Theremotecontrolcontainsbuttonsthataredualpurposedepending
onwhichfunction(TVorDVD)isbeingused.UsetheTV•DVD
buttontoswitchbetweenmodes(forexample,TVmodeorDVD
mode).ThegreenbuttonlabelsareusedforDVDfunctions.
“Navigation”isthetechnicaltermdescribinghowtomovethrough
theon-screenmenus.Themethodisthesamethroughoutthemenu
screens:highlightyourchoiceandselectit.
Tohighlightamenuitem,pressthearrowbuttonsontheremoteto
highlightoneof theitemslistedonthescreen.Usetheupordown
arrowbuttontomoveupordown.Usetherightorleftarrowbutton
tomoverightorleft.Toselecttheitemthatyou’vehighlighted,press
OK.
Note: Highlighted means that the menu item stands out from
other menu items on the list (appears darker, brighter or a
different color).
ON•OFF
button
TV•DVD
button
Continues on next page...
Chapter 1 13
Connections & Setup