919-578 5/26/15
E33-10
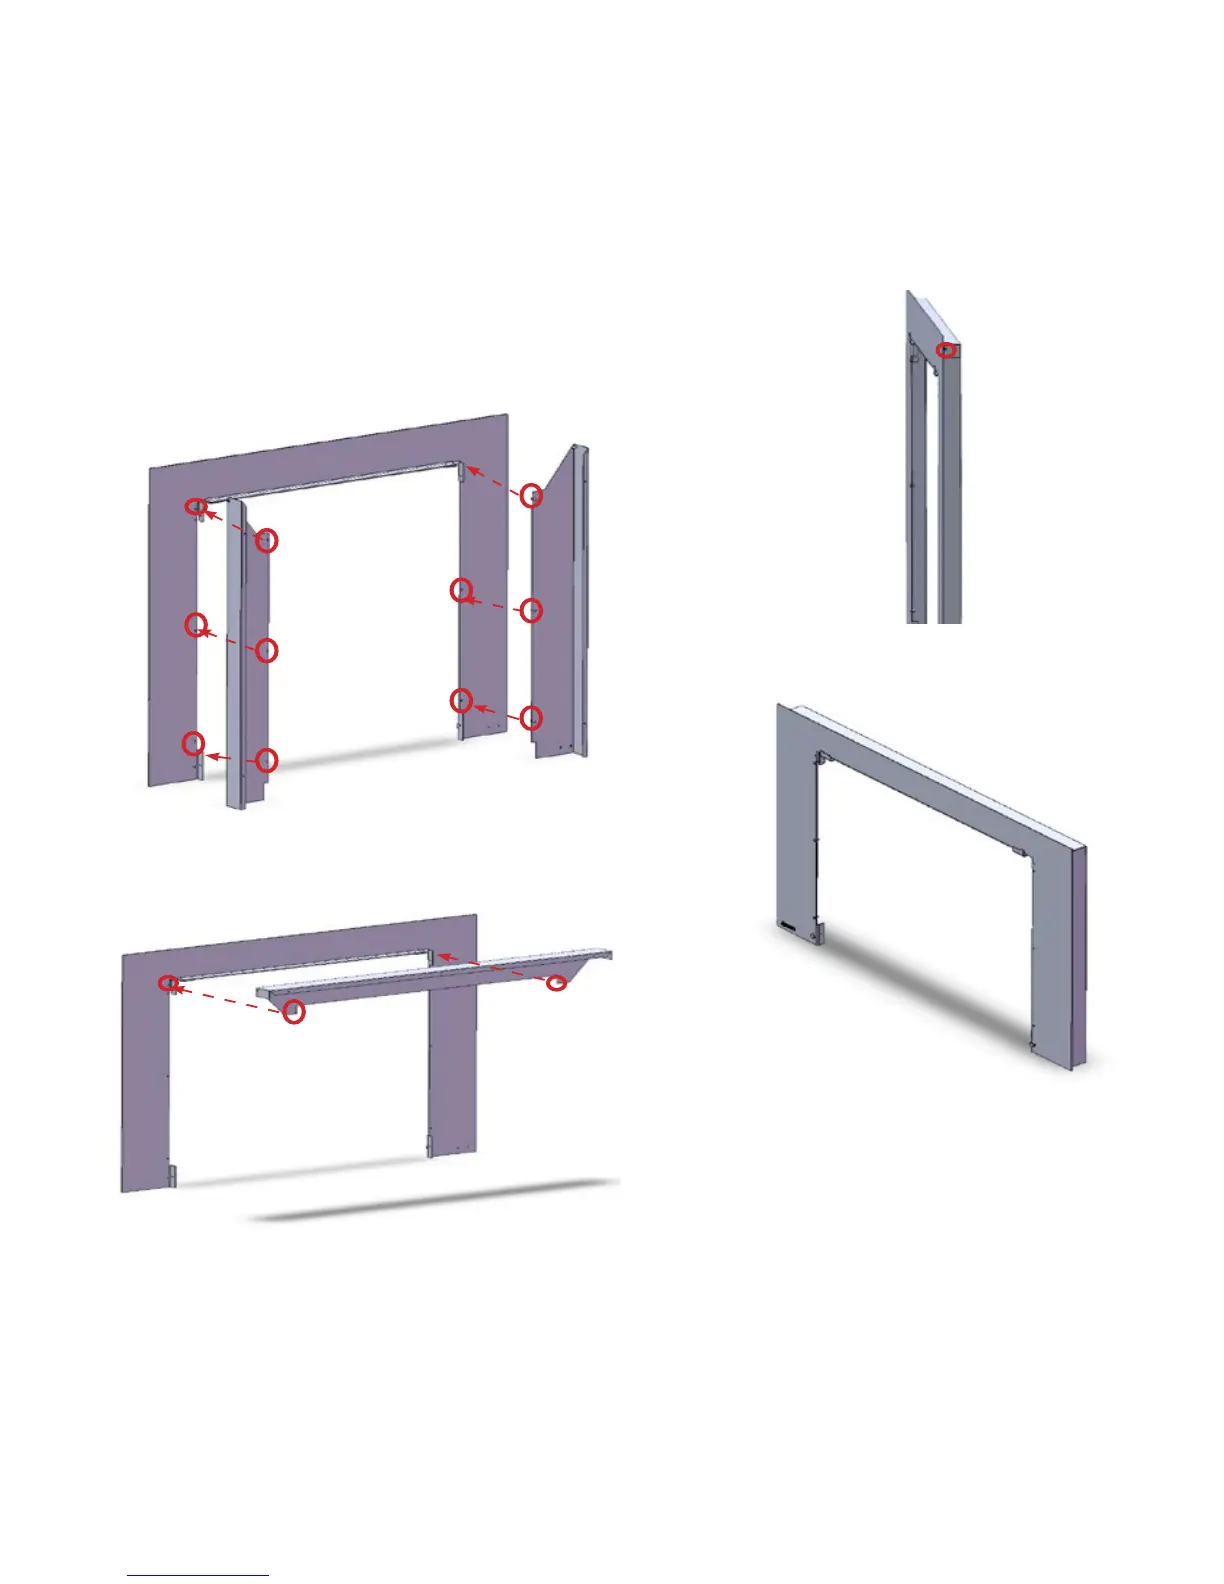
SPACER INSTALLATION FOR 3 SIDED VIGNETTE FACEPLATE
NOTE:
• A spacer can be ordered, if required.
• It is recommended to install spacer to the faceplate
separately and then install both together to the unit.
1. Attach the side pieces of the spacer with 3 screws to both
sides of the vignette face plate.
2. Attach the top piece of the spacer to the vignette faceplate-
with 1 screw on each side.
3. Finally, attach the spacer to vignette faceplate (vignette
faceplate is purchased separately) with 2 side screws
on the top (1 per side).
4) Proceed to faceplate installation- see “Optional Vignette
Faceplate Installation”.
Completed Vignette faceplate with spacer.