28
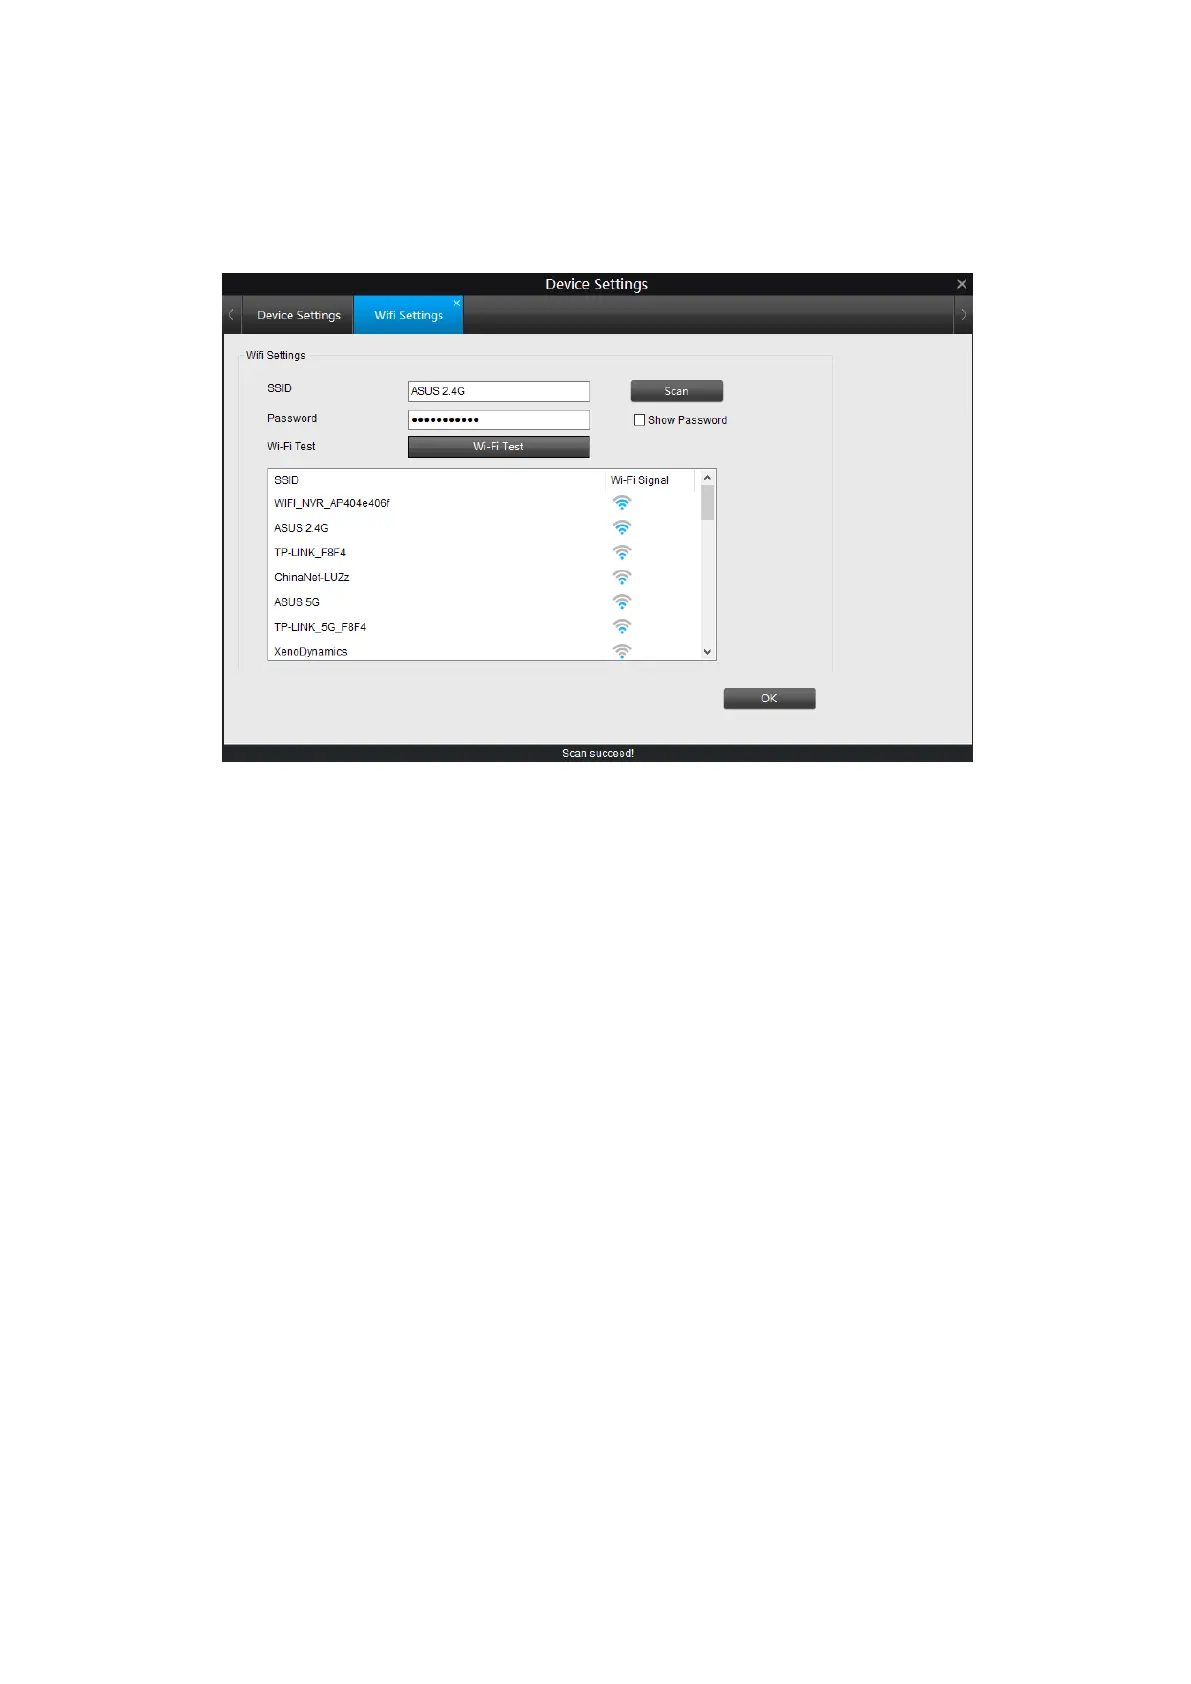
4.3.4 Wi-Fi Settings
You can configure the Wi-Fi settings and connect your camera to a wireless network
on this page.
SSID: Wireless Network Name, it displays the wireless network name you are
connected or prepare to connect.
Password: Input the Wi-Fi password of SSID you choose.
Show Password: Tick to show the password.
How to connect to a wireless network:
1. Click the Scan button, it will show all the SSIDs and the Wi-Fi Signal Strength.
2. Double click on the Wi-Fi network you want to Join, the SSID will show in the SSID
field.
3. Enter the Wi-Fi password of the SSID you choose. Click Show Password to
display the password you entered, double check whether it is correct.
4. Click on Wi-Fi Test to test if the WIFI Setting is succeeded. If Wi-Fi Test Succeed,
click OK to save the settings.
If Wi-Fi Test Failed, please check:
a) if the password is correct.
b) If the Antenna on Wi-Fi Camera connected properly.
c) if the Wi-Fi Router working properly.
NOTE:
1. The wireless network has to be set up by using cable network connection. After setting
up successfully, you can remove the cable and use the camera via Wi-Fi connection.
2. When changing the settings, they should always be made first in the camera and then
in the wireless router. This ensures that the camera is always accessible when making
changes.

 Loading...