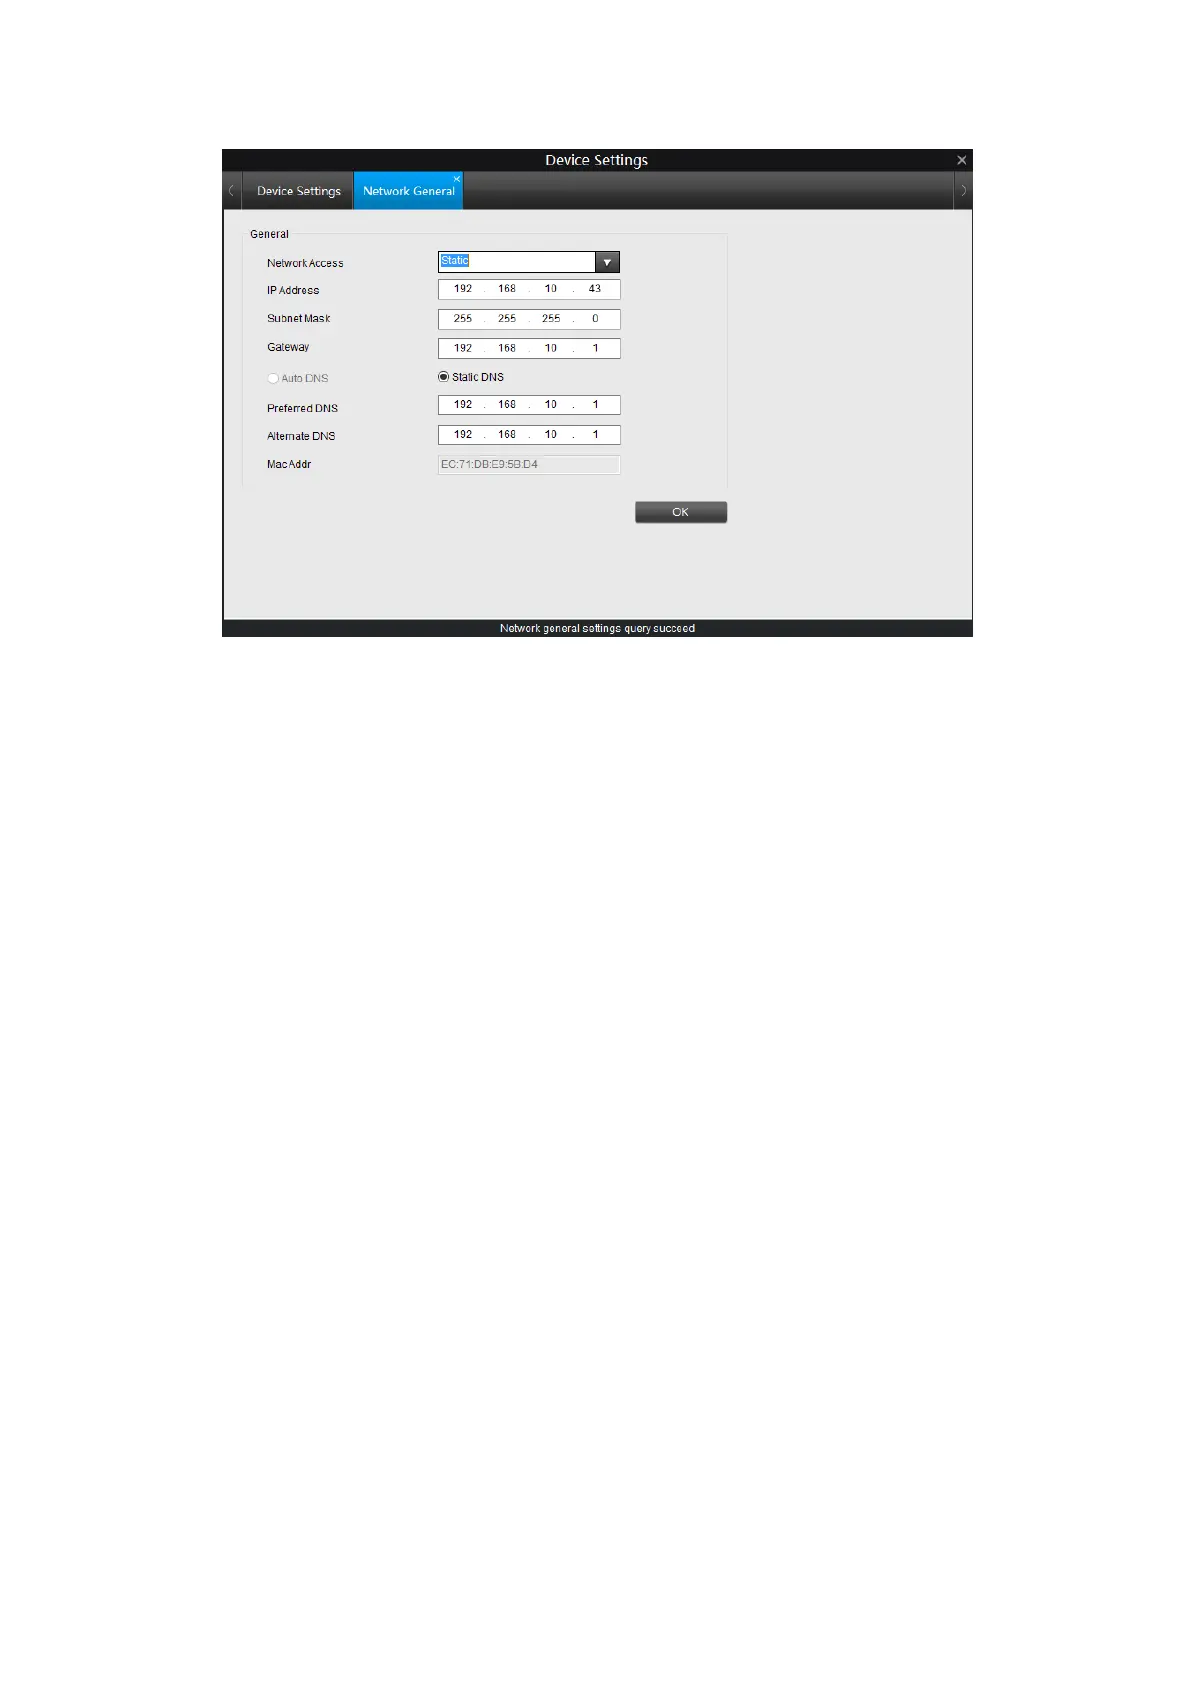
22
Network Access: select how you want the camera to get an IP address.
DHCP: Select this option when a DHCP server is installed on the network, an IP
address will be automatically issued. This is the default way of the camera.
Static: Select this option when a fixed IP address is set. It is suggested to do a IP
reservation on your router for the camera in order to avoid IP conflict.
IP Address: enter a fixed IP address for the camera in dotted-decimal
notation.
Subnet Mask: Enter a subnet mask in dotted-decimal notation.
Gateway: Enter a default gateway in dotted-decimal notation.
Preferred DNS: Enter a DNS address in dotted-decimal notation.
Alternate DNS: Enter a DNS address in dotted-decimal notation
MAC Addr: Displays the MAC address of the camera, The MAC address is read-only.
Click OK to save and enable the settings.
4.3.2 Network Advanced