Ricoma Quick Start Guide
17
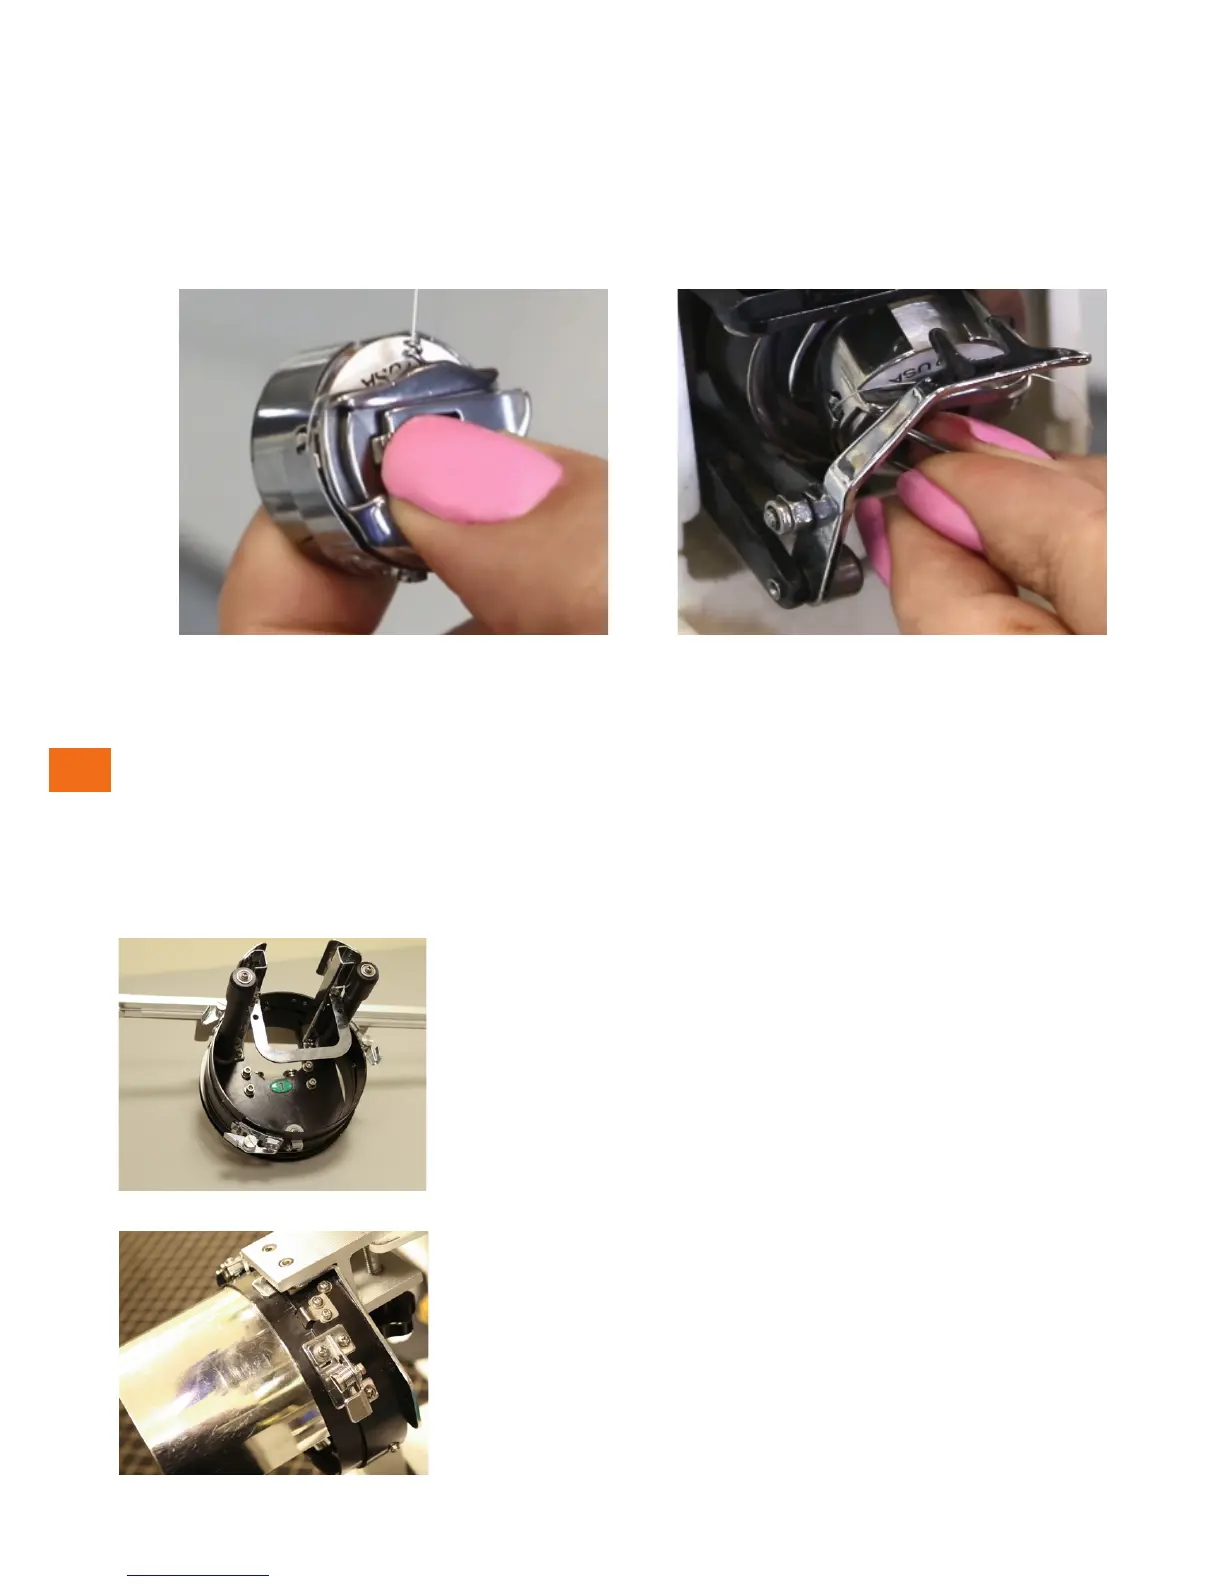
Figure 32 Figure 33
7. Wrap the thread around the small pigtail on the bobbin case. See Figure 32.
8. Grab the bobbin case while lifting the latch, and insert it into the machine. Make sure the thread
tail is no longer than 3 inches. A longer tail can wrap around the shaft and create a build-up of
thread. See Figure 33.
HOOPS AND BRACKETS
Cap rings and cap attachments
When sewing caps, you will need to use the following materials:
the cap driver, the cap station, a cap ring, a blank cap and backing
(usually tear-away).
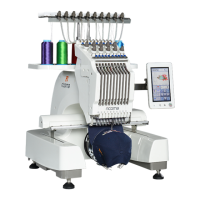
The cap driver is the accessory that is mounted on the machine.
See Figure 34. This tool holds the cap and cap ring during the
sewing process.
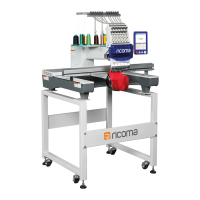
The cap station is the tool that holds the cap ring (the cap hoop)
while hooping. The cap station should be mounted on your
machine stand or on a sturdy table. See Figure 35.
Once you have mounted the cap station, you can attach the cap
ring to the cap station to begin hooping.
The cap ring is the hoop for your caps. See Figure 36. This ring
can be adjusted depending on the thickness of the cap’s fabric.