Ricoma Quick Start Guide30
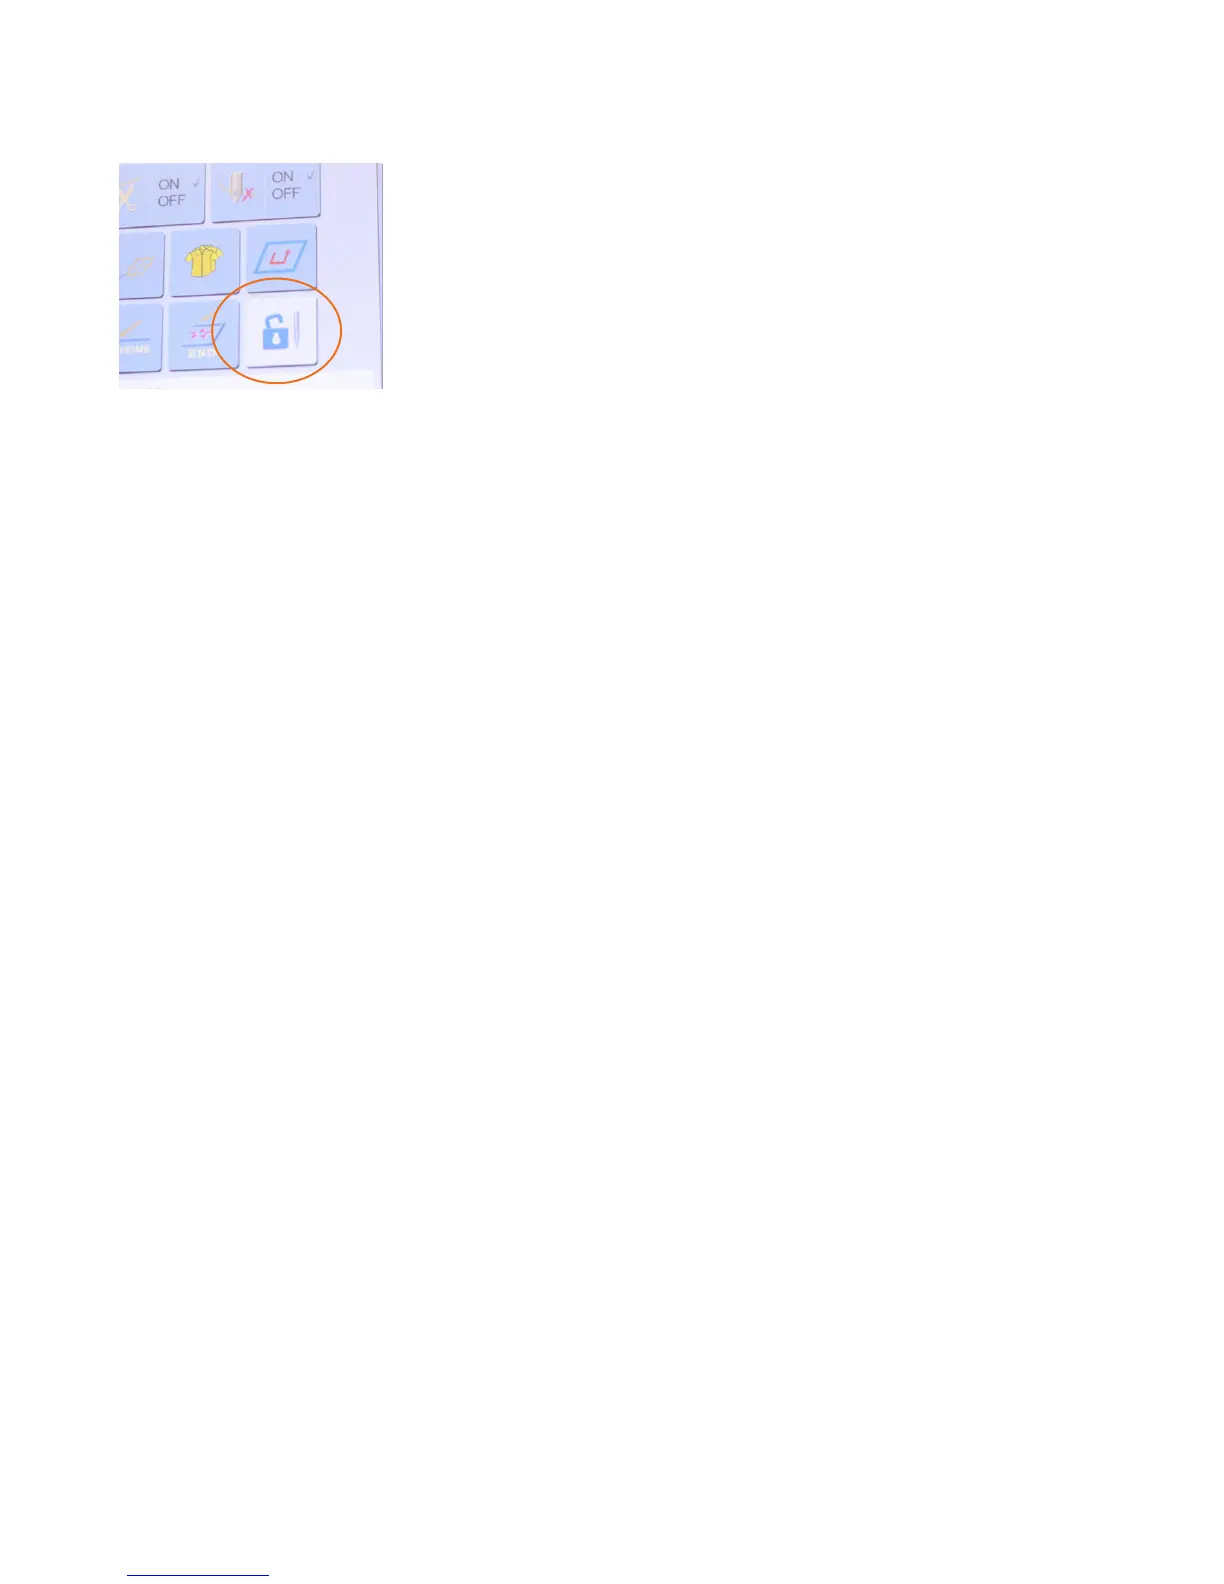
Your embroidery machine has two embroidery statuses: preparation
status (setup mode) and working status (embroidery mode). To
switch from embroidery mode to setup mode, tap the “Embroidery
Status” key to unlock it. This will allow you to access basic panel
functions, such as importing a design.
When you are ready to stitch, you will need to enter working status,
which will display a locked icon on the embroidery status key.
Figure 62
How to change your embroidery status
Design menu
Under this menu, you will be able to perform certain design functions such as:
• Viewing details on your design
• Uploading a design into your machine’s memory
• Selecting a design for embroidery
• Deleting designs from your machine’s memory
• Combining two separate designs
• Dividing a single design
• Adding personalization to your designs
Your Ricoma embroidery machine reads DST les, the most common of all embroidery le types. If
your embroidery le is in another le type, you will need to change the le type by using the software
that comes with your machine. In order to run an embroidery job, you must rst import a DST le into
the machine using a USB. Keep in mind: You can’t embroider straight from the USB, so follow these
steps to upload the design directly to the machine’s memory.
1. Once you have your DST le saved onto your USB, insert the USB drive into the USB port on the
right side of the panel.
2. After inserting the USB, make sure the embroidery status is unlocked. You can do so by selecting
the Embroidery Status key (lock icon) located on your control panel’s main menu. If the Embroidery
Status icon appears to be locked, the machine is on “embroidery mode.” If the icon appears
unlocked, the machine is on “setup mode.” Ensure that your machine is on setup mode before
moving on.
3. Press the Design key to enter the USB/embroidery machine’s memory interface. Select the USB
icon. (The USB icon should be highlighted blue to indicate that it is selected.) See Figure 63.
HOW TO UPLOAD A DESIGN