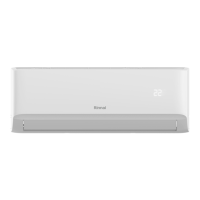
Rinnai 21 Multi Split Type AC
INDOOR INSTALLATION
Rinnai 17 Multi Split Type Air Conditioner
Original concrete bricks
Use an embedding screw bolt, crock, and stick
harness.(Fig.below)
Steel Roof beam structure
Install and use the supporting steel angle.
(Fig. below)
Wood
Place the wood mounting across the roof beam,
then install the hanging screw bolts.(Fig.below)
Wood mounting
Roof beam
Hanging screw bolts
Ceiling
New concrete bricks
Inlay or embed the screw bolts. (Fig. below)
(Blade shape insertion)
(Slide insertion)
Steel bar
Embedding screw bolt
(Pipe hanging and embedding screw bolt)
Hanging screw bolt
Hanging
bolts
Supporting
steel angle
INSTALLATION INSTRUCTIONS
Step 3: Duct and accessories installation
NOTE: 1. Do not place the connecting duct
weight on the indoor unit.
2. When connecting the duct, use an
nonflammable canvas tie-in to prevent
vibrating.
3. Insulation foam must be wrapped outside the
duct to avoid condensate. An internal duct
underlayer can be added to reduce noise,
if the end-user requires.
1. Install the filter (optional) according to the size
of the air inlet.
5. Refer to the following static pressure guidelines
when installing the indoor unit.
Change the fan motor static pressure
according to external duct static pressure.
2. Install the canvas tie-in between the body and
the duct.
3. The air inlet and air outlet duct should be far
enough apart enough to a avoid air passage
short-circuit.
4.
Connect the duct according to the following
diagram:
Canvas tie-in Canvas tie-in
Air outlet
Isolation booth
Isolation booth
checking orifice
Air inlet
Air dust filter
Cut off the roof beam.
Strengthen the point at which the cut
was made. Consolidate the roof beam.
Screw nut
Washer
Hanging screw bolt
Overhang part
Shockproof cushion
NOTE:
Confirm the minimum drain tilt is 1/100
or more.
CAUTION
The unit body must be completely aligned with
the hole. Ensure that the unit and the hole are
the same size before moving on.
2.
Install and fit pipes and wires after you have
finished installing the main body.When
choosing where to start, determine the
direction of the pipes to be drawn out.
Especially in cases where there is a ceiling
involved, align the refrigerant pipes, drain
pipes, and indoor and outdoor lines with their
connection points before mounting the unit.
3.
Install hanging screw bolts.
9. Mount the indoor unit onto the hanging
screw bolts with a block. Position the
indoor unit flat using a level indicator to
prevent leaks.
INSTALLATION INSTRUCTIONS
4. After you select an installation location,align
the refrigerant pipes, drain pipes, as well as
indoor and outdoor wires with their
connection points before mounting the unit.
5.
Drill 4 holes 10cm deep at the ceiling hook
positions in the internal ceiling. Be sure to
hold the drill at a 90° angle to the ceiling.
6.
Secure the bolt using the washers and nuts
provided.
7.
Install the four suspension bolts.
8. Mount the indoor unit with at least two
people to lift and secure it. Insert suspension
bolts into the unit’s hanging holes. Fasten
them using the washers and nuts provided.
MODELS
Static Pressure
DINSD26MB
0~60
DINSD35MB
0~60
DINSD50MB
0~100
DINSD70MB
0~160
Rinnai 18 Multi Split Type Air Conditioner
How to ad
ust the air inlet direction
(from rear side to under-side).
1. Take off the ventilation panel and flange.
2. Change the mounting positions of the
ventilation panel and air return flange.
Air return flange
Ventilation panel
3. When installing the filter mesh, plug it into the
flange as shown in the figure below.
NOTE: All the figures in this manual are for
explanation purposes only. They may be slightly
different from the air conditioner you purchased.
The actual unit shall prevail.
Fresh air duct installation (where fitted)
Dimension :
Duct joint for fresh air
Motor and drain pump maintenance
Motor Access:
Take off the ventilated panel.
Take off the blower housing.
Take off the motor.
1.
2.
3.
(Take rear ventilated as example)
Motor
Blower housing
Ventilated panel
Pump Access:
Remove four screws from the drain pump.
Unplug the pump power supply and water
level switch cable.
Take pump out of unit.
1.
2.
3.
Pump
Air return flange
Ventilation panel
INSTALLATION INSTRUCTIONS
DUCT JOINT
Ø125mm
Ø160mm

 Loading...