MASTER MAKING SECTION
REMOVAL
GR3770 4 - 2
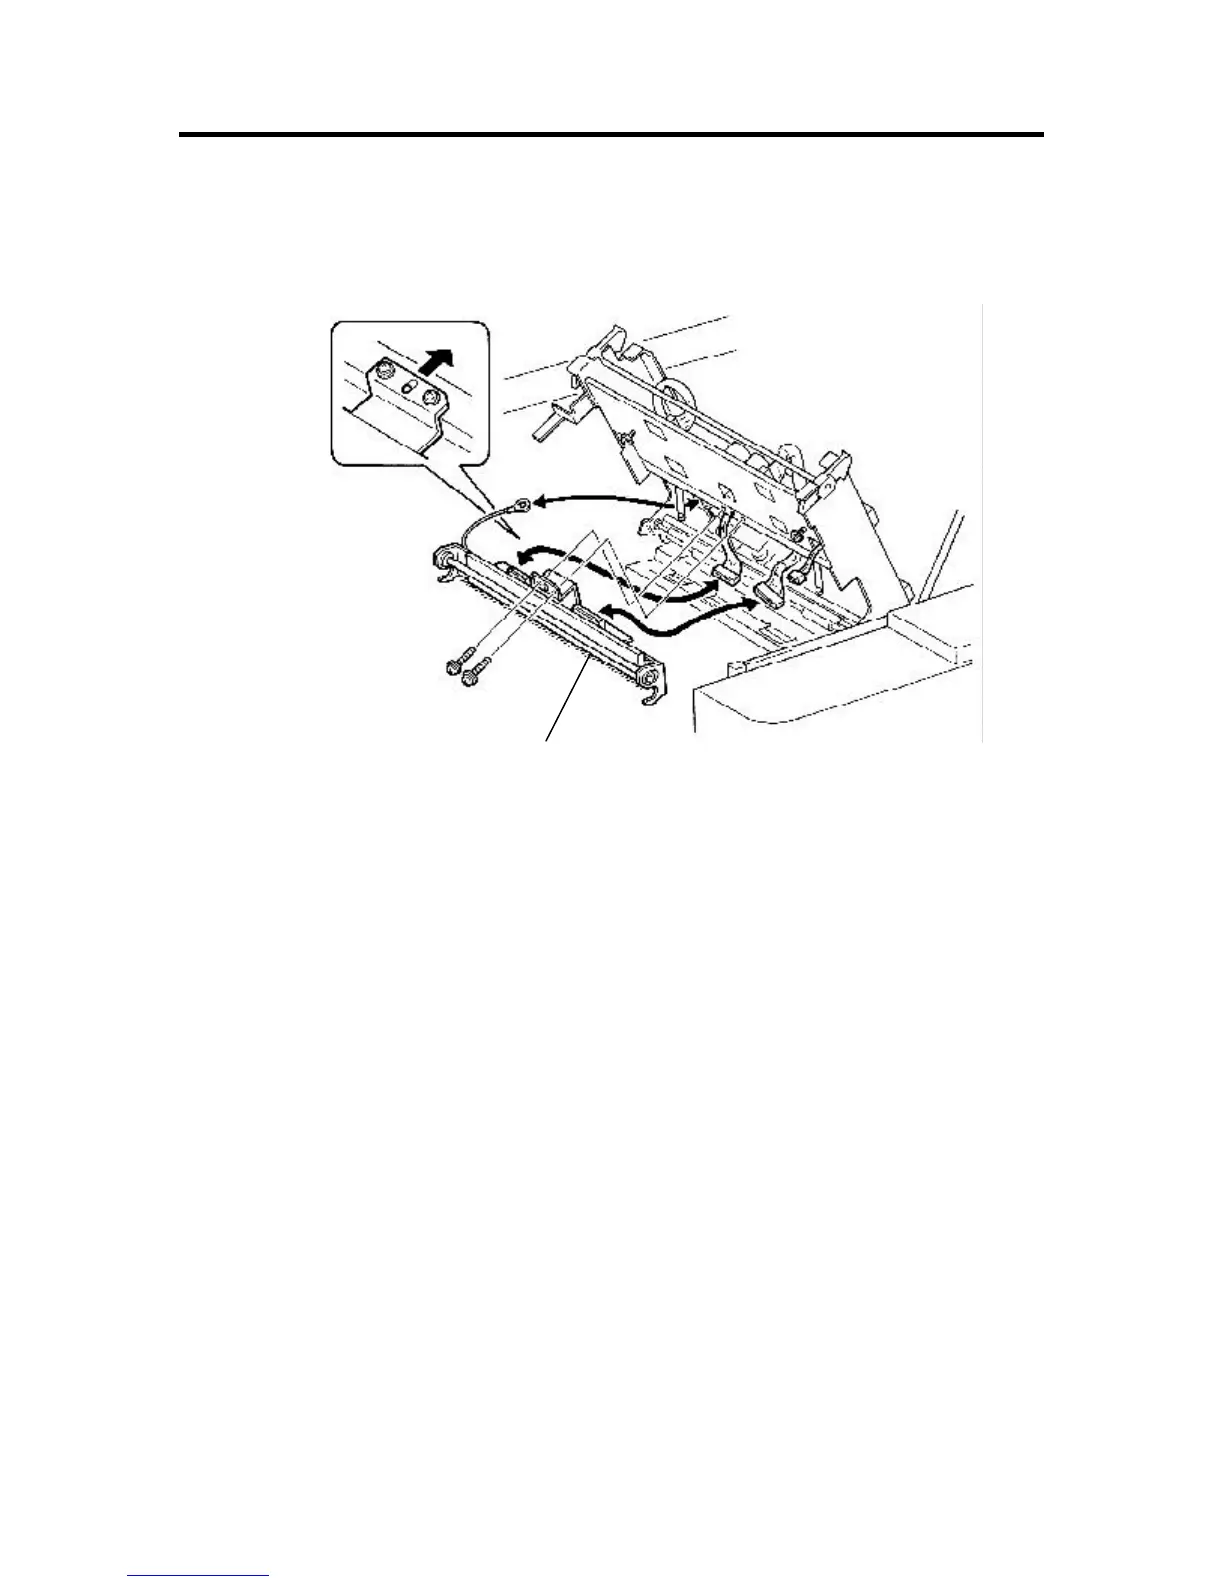
6) Remove mounting screws (× 2) of the thermal print head, disconnect connectors (x 2) and remove the unit.
- Precautions in Removal -
• Be careful not to damage the heating elements of the thermal print head.
• Be careful not to touch the metal pins of the connectors.
Static electricity from your body may damage the thermal print head.
- Precations in Assembly -
• For fixing the thermal print head, first adjusting half-pierce, apply the screw to the frame of the master-making
unit to fasten it. (Fig. b)
• Be sure to adjust the thermal power each time the thermal print head is replaced, referring to the page 4-4.
Fig. b
Pan-head IT M3 × 7 (× 2)
Thermal print head