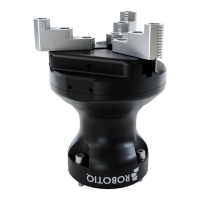
Robotiq Hand-E C10 Gripper Instruction Manual
INFO
The object detection feature remains available with the I/O Coupling.
The position feedback is not available due to the robot tool connector nature.
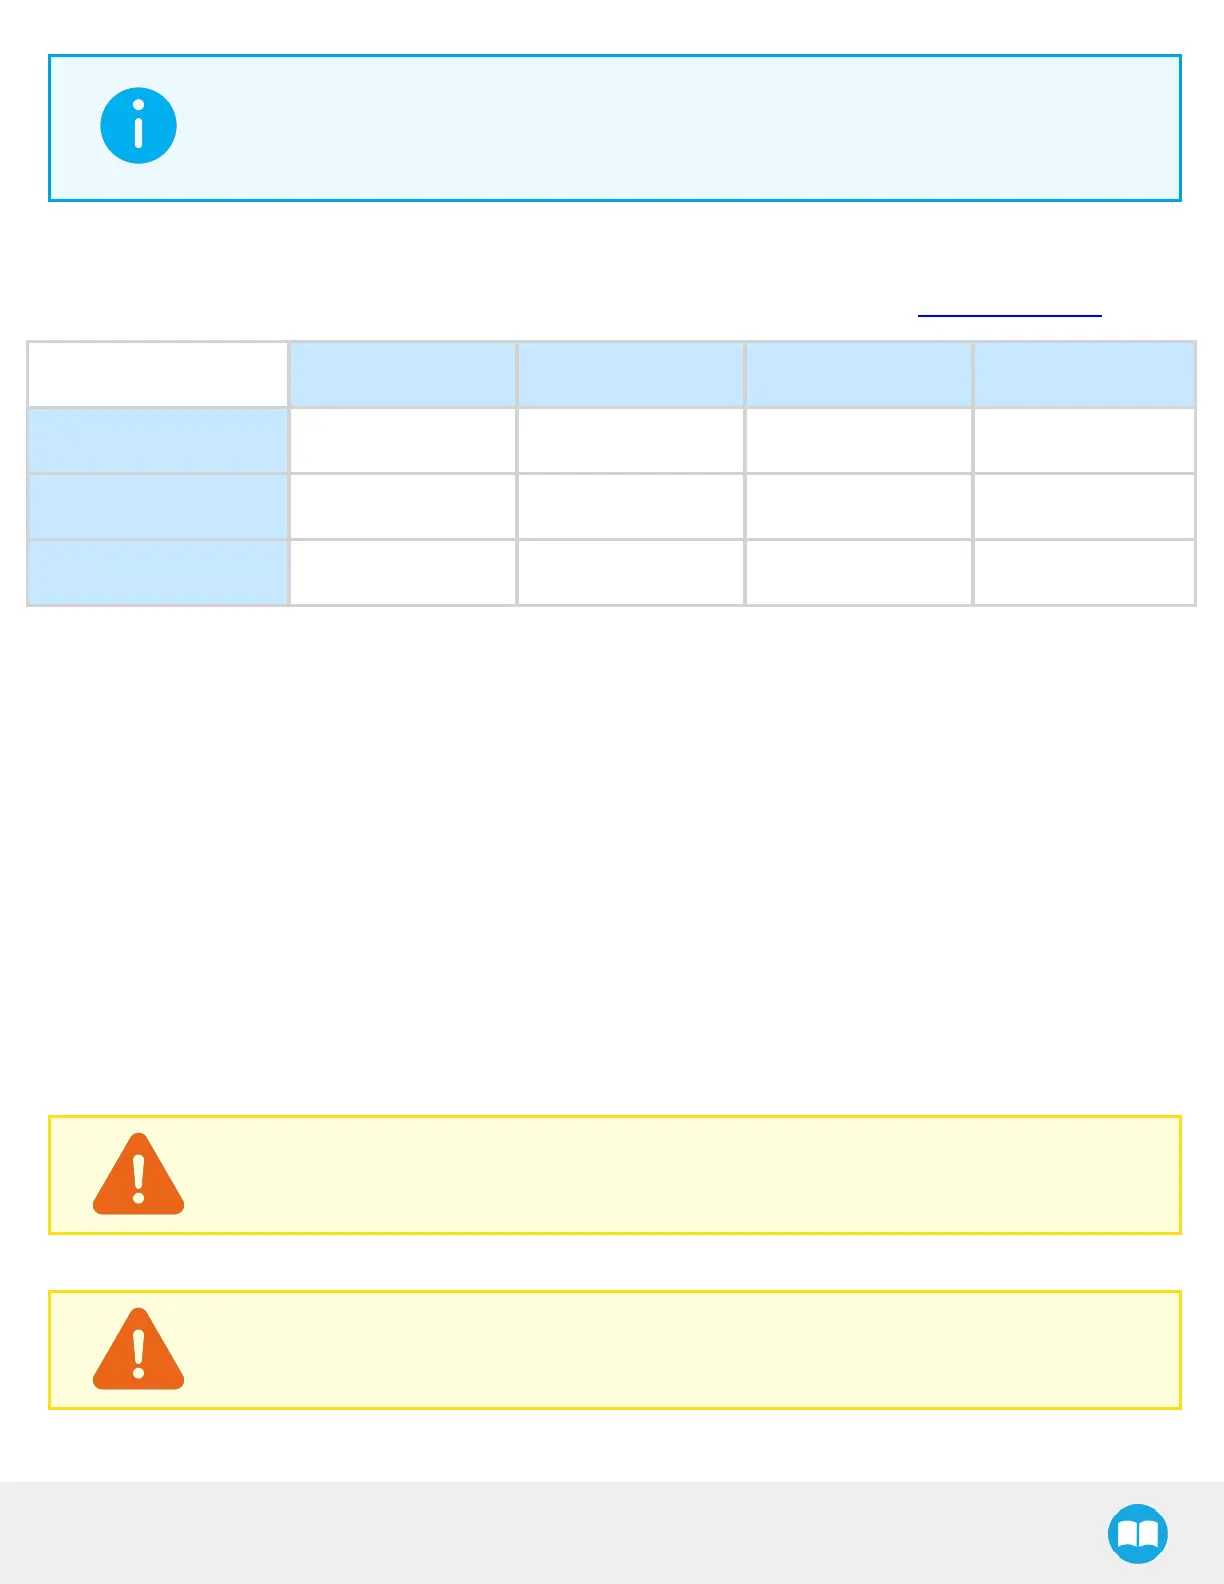
The I/O Coupling comes with four (4) factory presets, as shown in the table below. These presets can be reconfigured on a
computer before using them on a robot.
To configure presets, follow the instructions in the Robotiq User Interface (RUI) manual, available on support.robotiq.com.
Preset 1 Preset 2 Preset 3 Preset 4
Position 100 0 100 0
Speed 100 100 0 0
Force 100 100 1* 1*
*To preserve object lost detection, force is not set to 0.
Table 3-3: Presets for Hand-E GripperHand-E C10 Gripper
Installing the I/O Coupling
Mounting the I/O Coupling
1. Reorient the robot tool flange upwards. Adjust its height to make it suitable for working.
2. Insert the provided dowel pin into the tool flange.
3. Mount the I/O Coupling on the robot tool flange. Align it properly with the dowel pin.
4. Use the provided M6 screws, the M6 tooth lock washers, and the 4 mm hex key to secure the I/O Coupling. Tighten the four
(4) M6 screws to 8 Nm.
Mounting the Gripper onto the I/O Coupling
1. Fasten the gripper onto the I/O Coupling using the M5 screws and the gripper tooth lock washers. Tighten the four (4) M5
screws to 3 Nm.
CAUTION
Pins are fragile. Any abrupt movement can damage them and lead to product malfunction.
2. Plug the I/O Coupling connector into the robot tool flange connector.
CAUTION
Close the silicone door of the I/O Coupling micro-USB port to prevent any dust or liquid infiltration.
19