30 / 44
4.3 On-site positioning
4.3.1 ROBOX DV sizes 2-3-4
For the sizes ROBOX DV 2-3-4 remove the front panel or the front panels
of the noise hood using the key
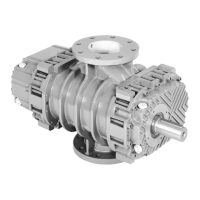
Lift ROBOX DV using a fork lift and respect strictly the lenght L indicated
in the table below
ROBOX DV 2 3 4
L 900 1200 1200
Position ROBOX DV as indicated at paragraphe 4.2
Fig.8.1
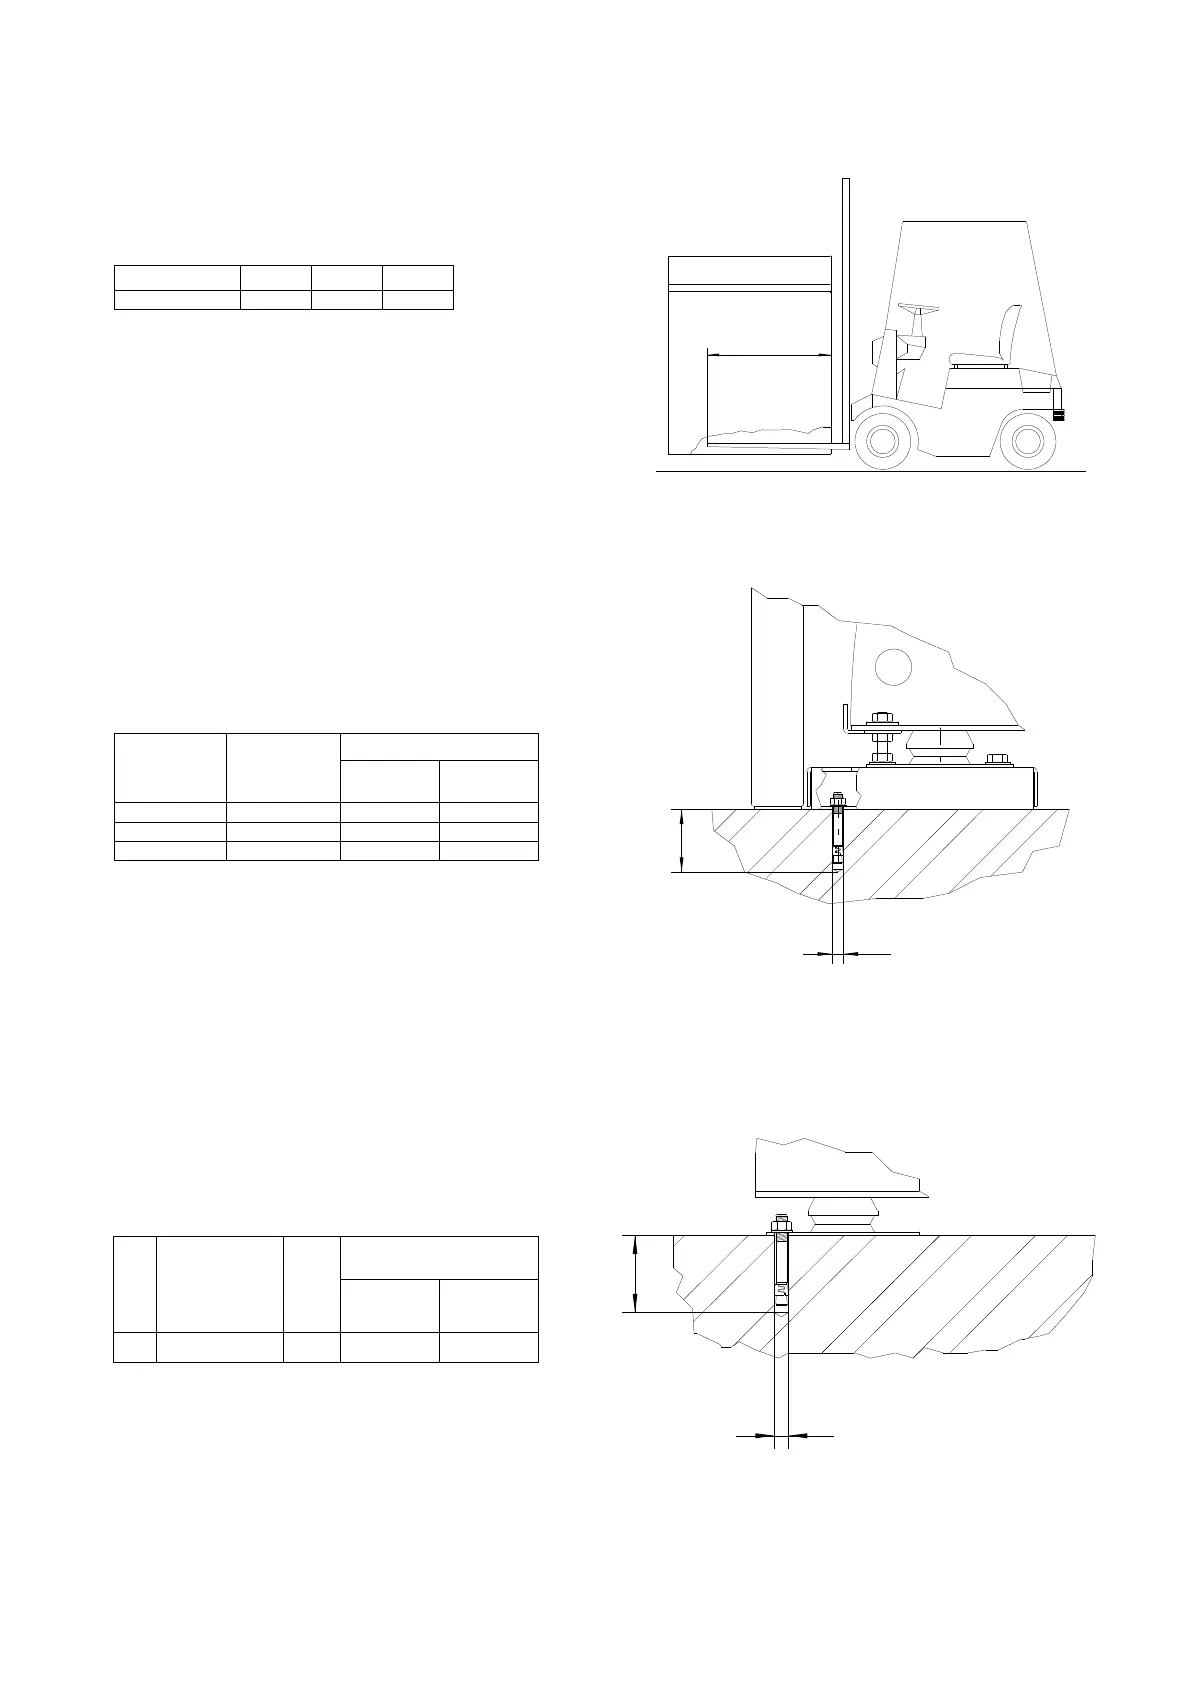
It is possible to fix ROBOX DV on the floor
Remove also the rear panel
Drill the floor as indicated in Fig. 8.2
Fix the feet by expansion bolts
ROBOX DV
Expansion
anchor bolt
Floor drilling
D
mm
L
mm
2 12 x 112 12 105
3 12 x 112 12 105
4 12 x 112 12 105
Fig. 8.2
4.3.2 ROBOX DV size 5
Position ROBOX DV as indicated in paragraph 4.2 and fix
ROBOX DV on the floor by means of anchor bolts as
indicated in figure 8.3.
Install the noise hood following the specific instructions of
the noise enclosure
ROBOX DV
Expansion
anchor bolt
Q.ty
Floor drilling
D
mm
L
mm
5 12 x 12 16 12 105
Fig. 8.3
D
D