8
Getting Ready
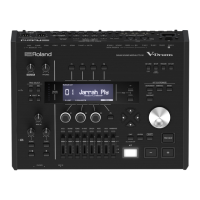
No. Controller Explanation Page
8
KIT CUSTOMIZE
[INSTRUMENT] button
Allows you to specify an instrument (sound).
By holding down the [SHIFT] button and pressing the [INSTRUMENT] button, you can move directly to the instrument edit
(V-EDIT) page.
p. 19
[AMBIENCE] button Allows you to specify the size and resonance of the room in which the drums are being played. p. 22
[MIXER] button Allows you to specify the volume, pan, multi-eect, equalizer, and compressor settings for each pad. p. 22
[SNAPSHOT] button
Temporarily saves the currently-edited drum kit, allowing you to compare it with the current settings or return to previous
settings (snapshot function).
p. 24
9
[SD CARD] button
Allows you to perform SD card operations such as saving or loading data.
By holding down the [SHIFT] button and pressing the [SD CARD] button, you can copy the settings of a drum kit or instrument
(p. 31).
p. 39
[SETUP] button
Allows you to make settings for functions that apply to the entire TD-50, such as output-destination settings (output assign) and
MIDI settings.
By holding down the [SHIFT] button and pressing the [SETUP] button, you can use the user sample function (p. 27) which allows
you to import user samples.
p. 42
[TRIGGER] button Allows you to make trigger parameter settings. p. 35
[SET LIST] button
Allows you to create a set list, or to switch drum kits in the order specied by a set list. When the set list function is on, the [SET
LIST] button is lit.
p. 33
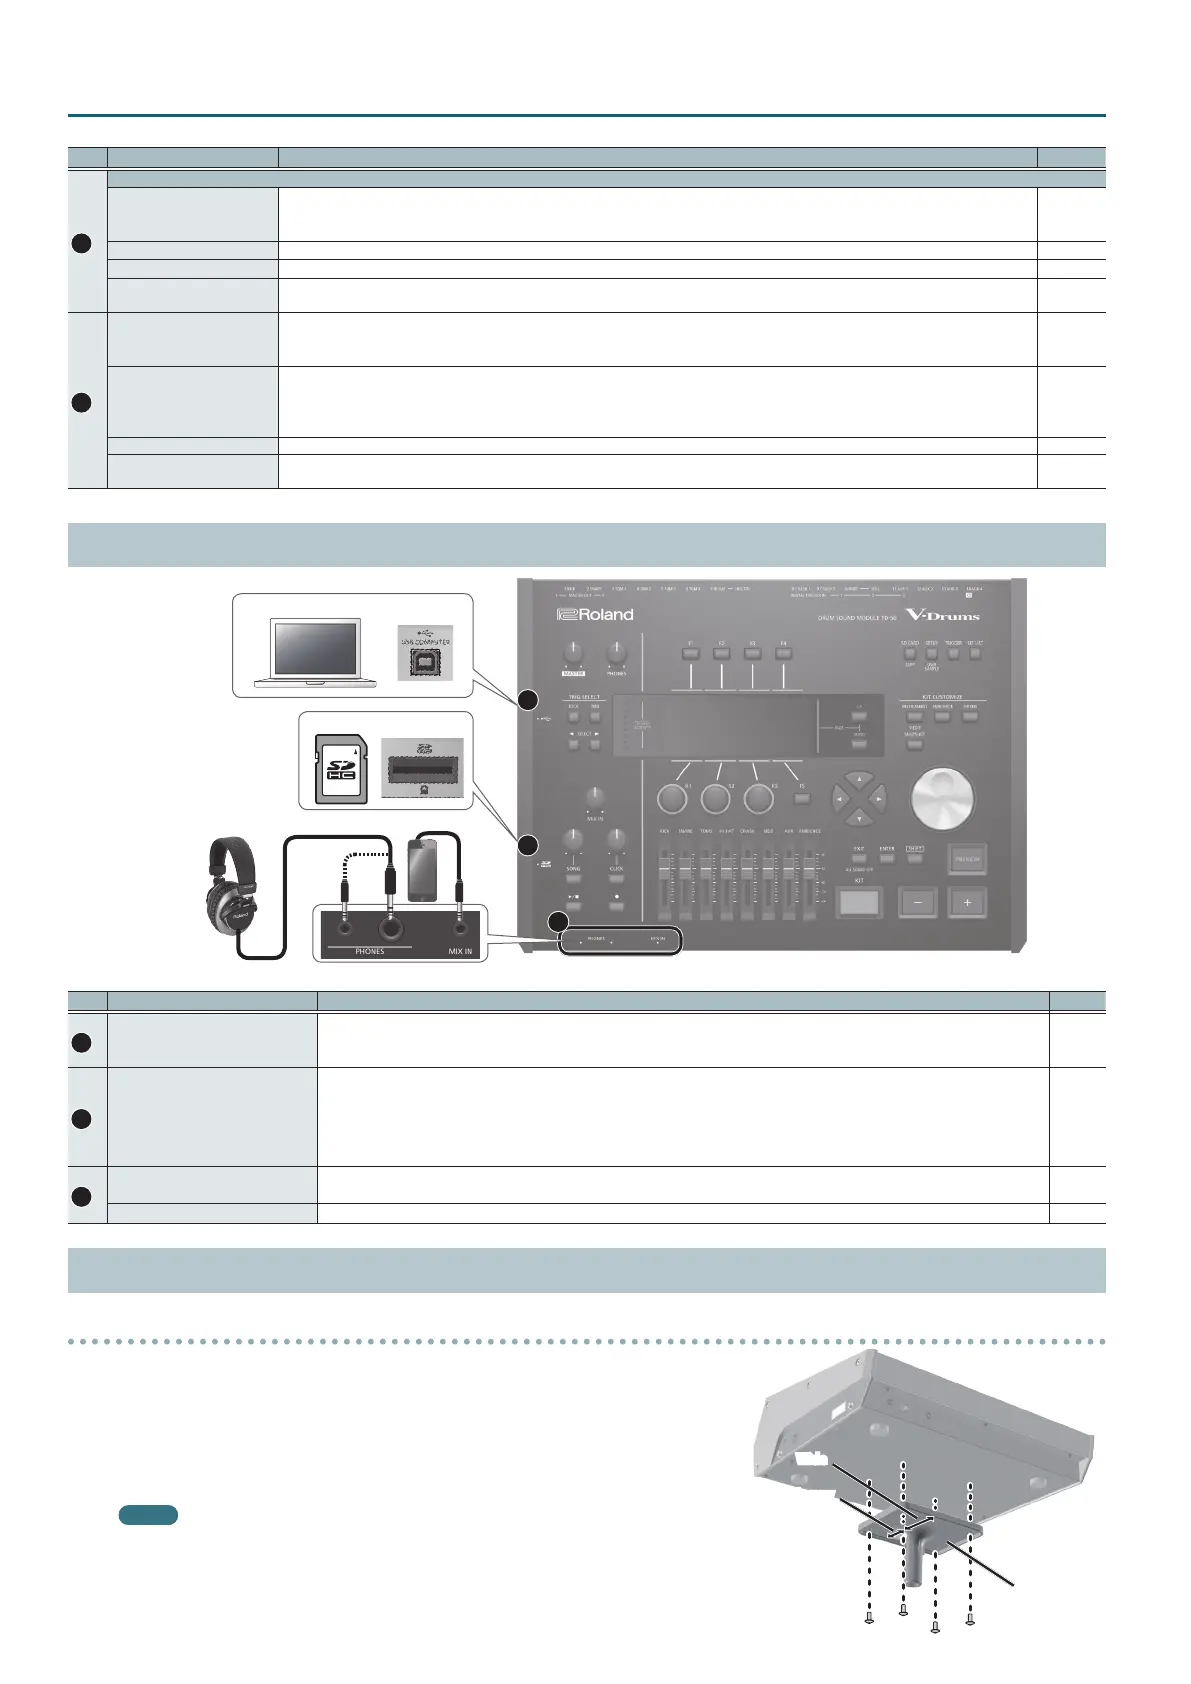
Side Panel/Front Pane
A
B
C
Computer
SD card
Headphones
Audio player
No. Jack Explanation Page
A
USB COMPUTER port
Use a USB cable to connect the TD-50 to your computer.
You can use DAW software to record your TD-50 performance as audio or MIDI, and you can play back sound from your
computer through the TD-50.
p. 30
B
SD card slot
Insert a commercially available SD card (SDHC cards (up to 32 GB) are supported).
You can store songs or TD-50 data on the SD card.
You can also use a card to load user samples or to export a recorded song.
Before using an SD card for the rst time, you must format it on the TD-50 (p. 41).
* Never turn o the power or remove the SD cards while the screen indicates “Processing...”
p. 17
p. 39
C
PHONES jacks
Connect your headphones here.
Even if headphones are connected, sound is output from the various output jacks.
–
MIX IN jack Connect your audio player (smartphone) or other audio playback device here. –
Bottom Panel
Mounting the TD-50 on the stand
You can attach the TD-50 to a drum stand by using the sound module mounting plate
included with the drum stand (sold separately: MDS series).
Using the screws on the bottom of the TD-50, attach it as shown in the illustration.
* Do not use any screws other than the screws from the bottom of the TD-50. Doing so will
cause malfunctions.
* When turning the unit over, be careful so as to protect the buttons and knobs from
damage. Also, handle the unit carefully; do not drop it.
MEMO
The All Purpose Clamp (APC-33; sold separately) can be attached to a pipe of 10.5–28.6
mm radius in case you want to mount the TD-50 on a cymbal stand or other such stand.
Sound module
mounting plate
Wide
Narrow
 Loading...