83
Chapter 2 Making the Settings for Drum Instruments
Chapter 2
Preventing the Settings
Screen from Being Switched
(EDIT LOCK)
When setting instruments, you can keep the settings screen
from being switched, even if you inadvertently strike a
different pad.
No settings screen for any other instrument is displayed until
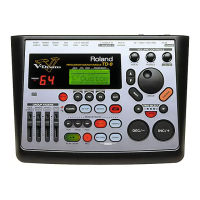
the Edit Lock is released on the TD-8.
fig.08-022
1. Strike the pad to be locked.
You can also do this with [TRIG SELECT].
2. Press [SHIFT] + [RIM].
[RIM] flashes, and the pad’s settings screen is locked.
A lock icon ( ) appears in the “INST” screen.
3. To release the lock, press the [TRIG SELECT] [ ],
[ ], or [RIM].
[RIM] either stays lit or goes out.
Choosing an Instrument
On the TD-8, each sound is referred to as an instrument (INST).
fig.03-001
1. Press [KIT], then [F1 (INST)].
[KIT] lights, and the “INST” screen appears.
2. Strike a pad.
The settings screen for the struck pad appears.
“GROUP”:
The instrument type.
“INST”:
The instrument name.
3. Press [INC/+] or [DEC/-] or rotate the VALUE dial to
select the instrument.
You can select an instrument from the group name by
pressing CURSOR [ ] to move the cursor to “GROUP”
(p. 84).
4. Press [KIT].
The “DRUM KIT” screen appears.
To see which instruments can be selected here, refer to “Drum
Instrument List” (p. 180).
About the Material Used for the Snare’s Shell
(V-SNARE only)
The shell (drum body) material of the instrument being
used for the snare is indicated by an icon at the right of
the screen.
Wood shells (WOOD)
fig.03-001a
Steel shells (STEEL)
fig.03-001b
Brass shells (BRASS)
fig.03-001c
 Loading...
