26 EB 5824-2 EN
Mounting and start-up
Risk of damage to the actuator by turning it
too far.
Only retract the actuator stem as far as the
nal travel value.
3. HoldAllenkeyinplaceandfastenvalve
and actuator together using the coupling
nut(tighteningtorque20Nm).Remove
Allen key and carefully refasten the front
cover.
Retracting the actuator stem electrically
1. Unscrew front cover.
2. Perform electrical wiring according to
Fig.10onpage28andcarefullyre-
fasten the housing cover.
3. Retractactuatorstem:
Switch on supply voltage and set signal
sourceto10Vor20mA.Theactuator
stem retracts until it reaches the end posi-
tion (torque-dependent limit switch
switches off the motor).
Alternatively, set the direction of action
switchinsidethedevice(seesection8.2)
toincreasing/decreasing(<>).Inthis
case,theinputsignalmustbe0Vor
0mA.
4. Fasten valve and actuator together using
the coupling nut (tightening torque
20Nm).
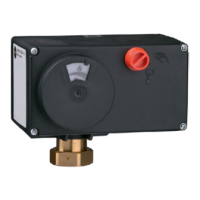
Fail-safe action "actuator stem retracts"
Place the actuator on the valve connection
and tighten coupling nut (tightening torque
20Nm).
5.1.4 Type5825:form-t
attachment
Î For fail-safe action “actuator stem re-
tracts”and“actuatorstemextends”,
mount actuator as described in sec-
tion5.1.2.
5.2 Installing the control valve
into the pipeline
Î Install the valve into the pipeline accord-
ingthespecicationsinthemounting
and operating instructions of the valve.
Î The control valve can be installed in the
pipelineinanydesiredposition.Howev-
er, a suspended mounting position of the
actuatorisnotpermissible(seeFig.9).
0...90°
...90°
Fig.9: Mounting position
NOTICE
!

 Loading...