* Star t capturing of
th e PC1 from the
projector PJ2.
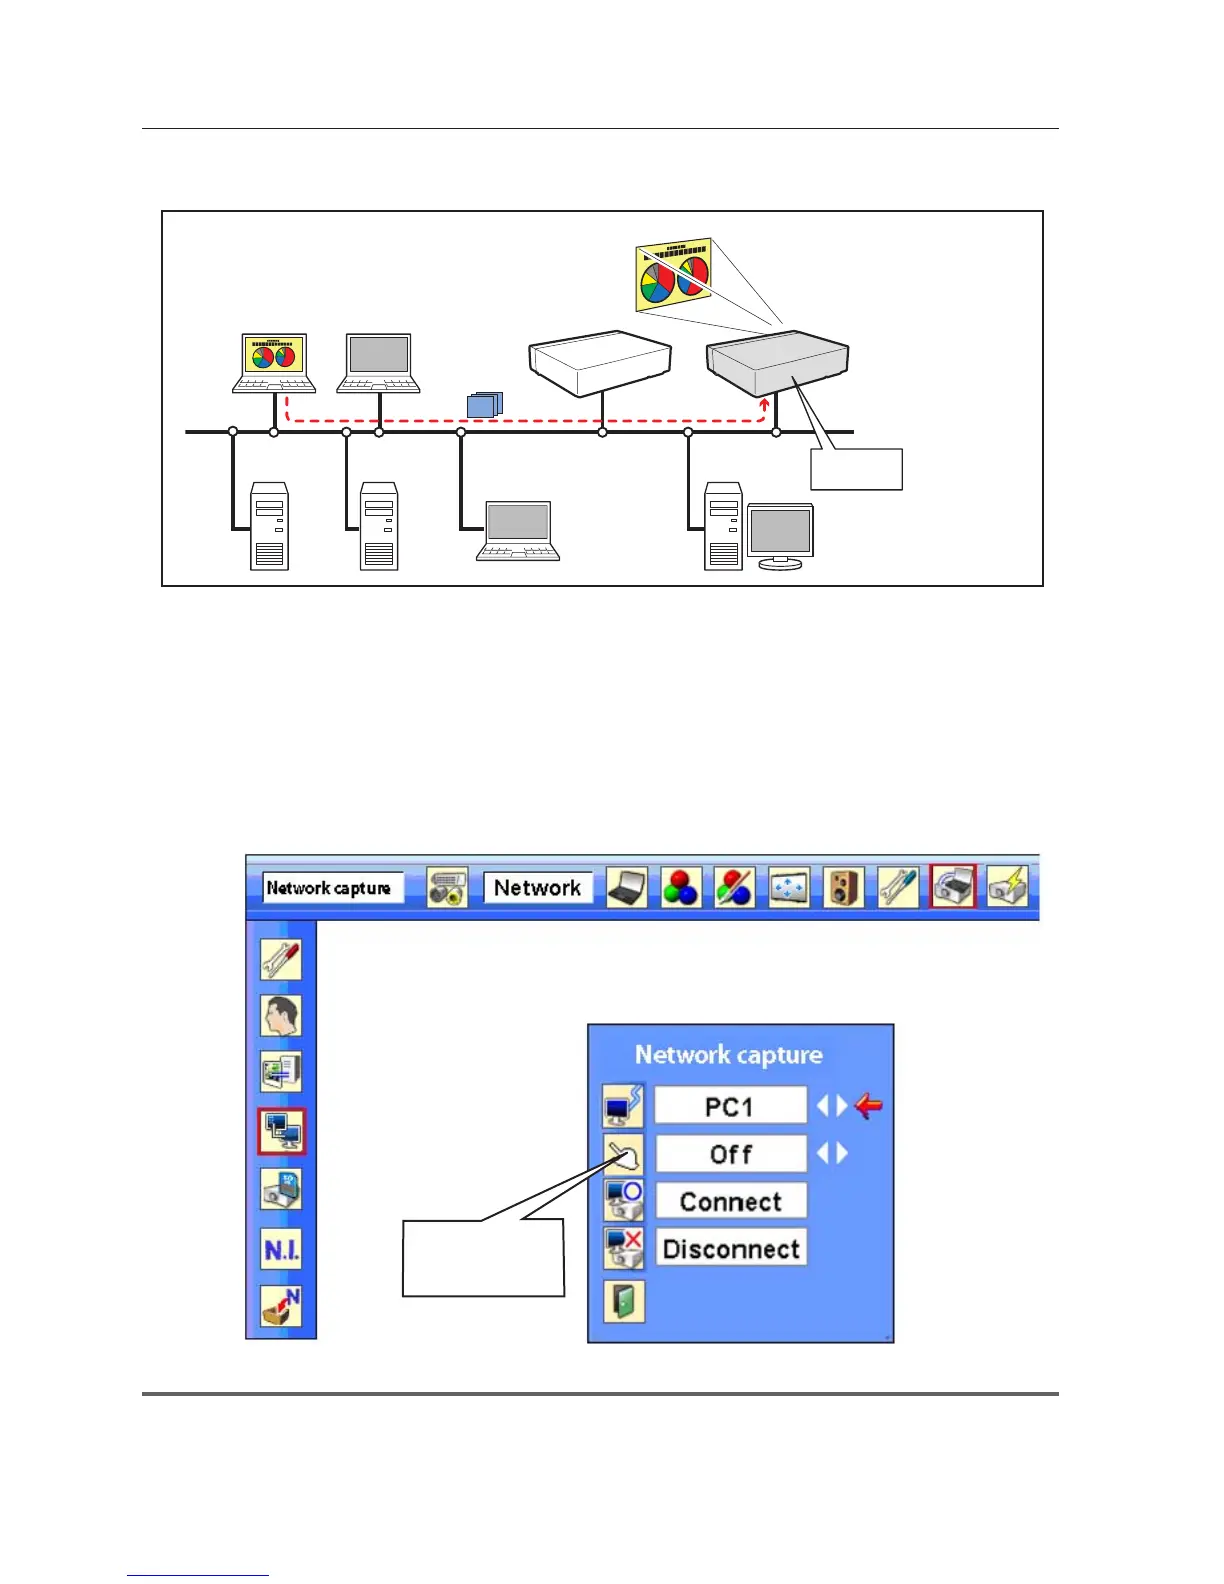
[3] Control by the projector
Select "Network" as input mode previously.
1 Select "Network Capture" icon from "Network" menu. Press SELECT button on the projector twice to
display the network capture setting pallet.
2 Select PC number to connect .
3 Select "Connect" and then press SELECT button to start capturing. The screen image of the selected
computer will appear on the projected screen in real time.
4 To end capturing, select "Disconnect" and then press SELECT button.
✐ The IP address of the connecting PC should be registered previously (+ p.89).
✐ If the error message appears, check item "Parameter set up" (+ p.88).
✐ The projector does not provide the function to register the IP address of the computer and to set the parameter of
the capturing. They should be registered by using the web browser previously (+ p.89-90).
Set "On" when
using the wireless
mouse function

 Loading...