-14-
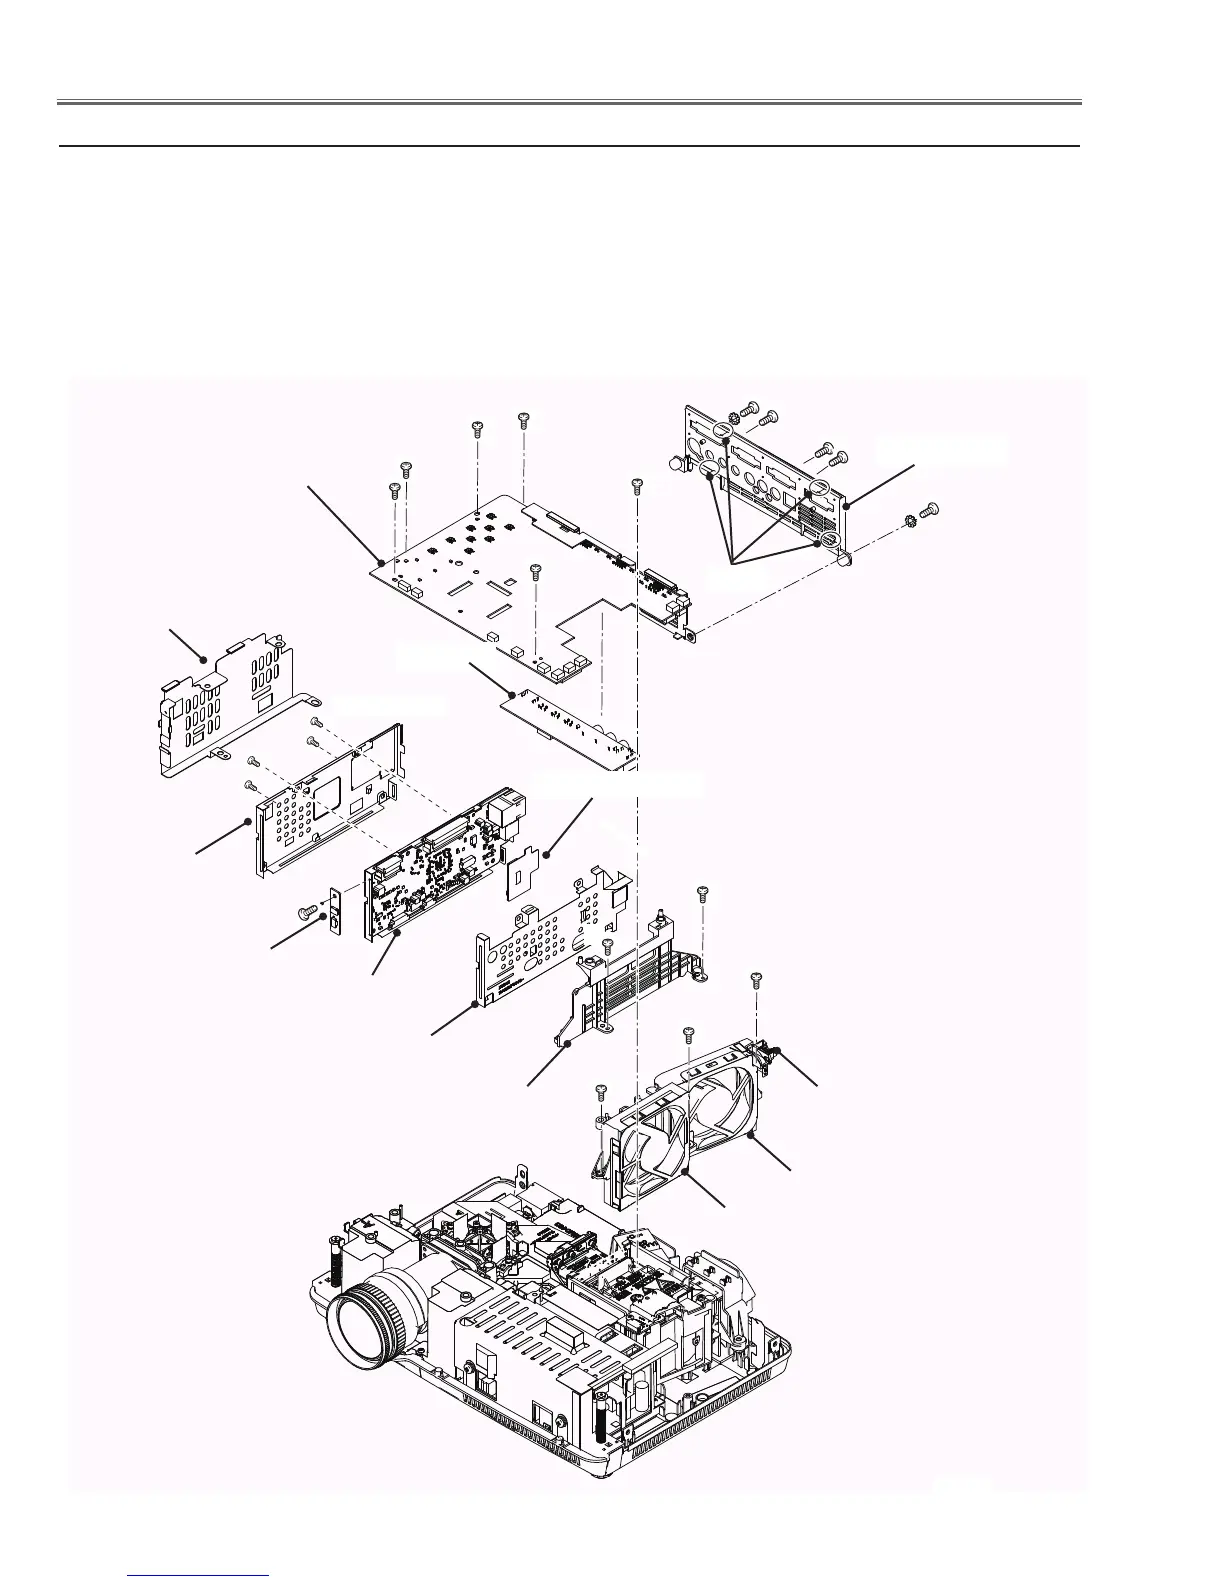
Mechanical Disassembly
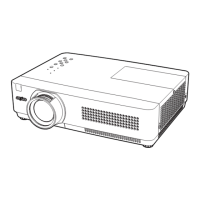
AV Panel
1. Remove 6 screws A (M2.5x6) and 2 screws B (M4x4) to remove the Main Board.
2. Release the hooks to remove the AV Panel and remove 3 screws C (T3x6) to remove
the AV Board.
3. Remove 2 screws D (T3x8) to remove the Network Board and remove screw
E(M2x4) to remove the Antenna board.
4. Remove the Left side shield. Remove 4 screws F (T3x6) to remove the Network
Board Holder. Remove the Network Board left and right shields. Remove the Module Board.
5. Remove 3 screws G (T3X8) to remove the fans (FN902 and FN906).
Fig.2
2. Main Board, AV Panel, Network Board, Antenna Board and Fan removal
A
A
A
A
A
B (M4x4)x2
B
Main Board
C (T3x6)x3
C
C
AV Board
Hooks
D (T3x8)x2
D
Network Board
Module Board
Antenna Board
E (M2x4)
F (T3x6)x4
F
Left side shield
Network Board
left shield
Network Board
right shield
Network Board
Holder
G (T3x8)x3
G
G
Fan (FN902)
Fan (FN906)
SW901
A
F
F
 Loading...