SATEL MICRA 5
A
B
B
A
B
C
A
B
D
A
B
E
A
B
F
A
B
G
A
B
A
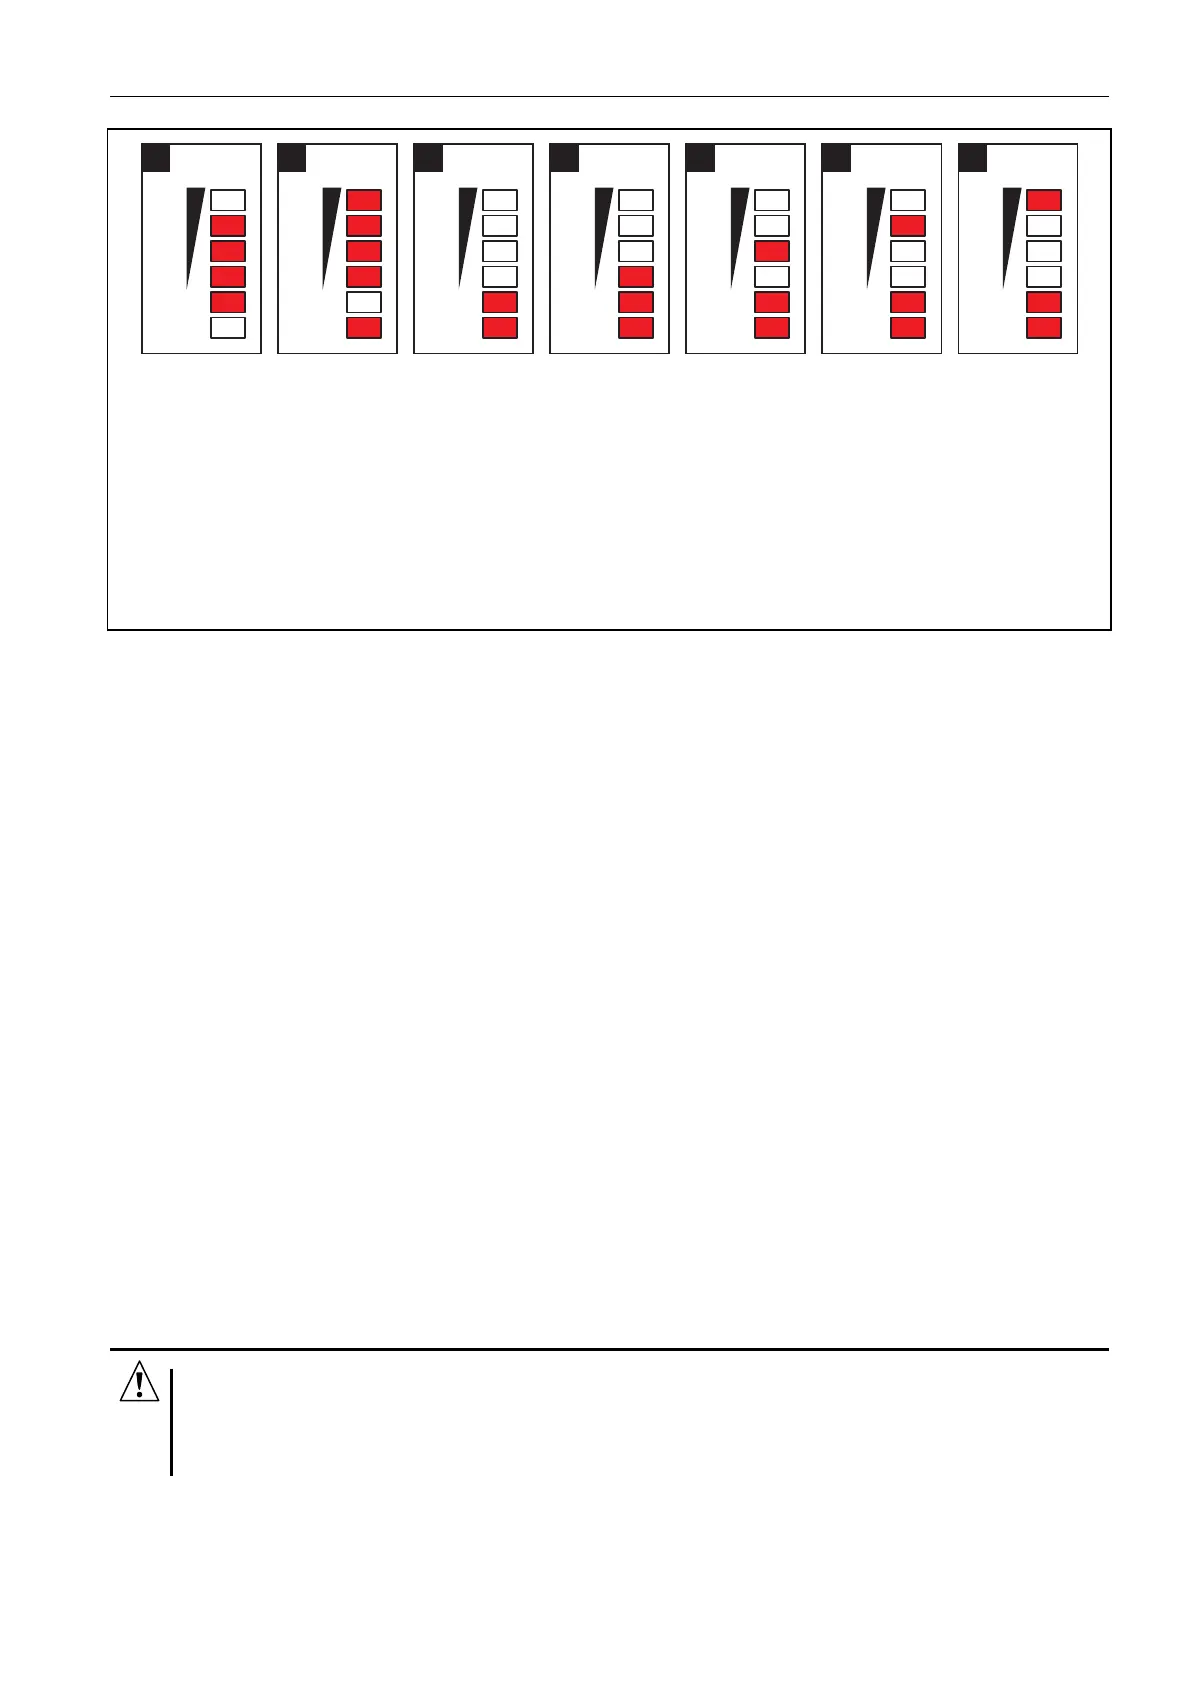
Fig. 2. Examples of LED indicated statuses. A (LED A is blinking, the other LEDs are lit
up) – GPRS transmission is going on; signal level: 3. B (LED B is blinking, the other LEDs
are lit up) – SMS message is being sent or module is calling (CLIP test transmission); signal
level: 4. C (LEDs are blinking) – logging into GSM network. D (LEDs are blinking) –
logging into GSM network has failed; missing SIM card. E (LEDs are blinking) – logging into
GSM network has failed; missing PIN code. F (LEDs are blinking) – logging into GSM
network has failed; invalid PIN code. G (LEDs are blinking) – logging into GSM network has
failed; SIM card has been blocked after three attempts to use an invalid PIN code (PUK code
must be used to unblock the SIM card).
Description of terminals:
AC - power supply inputs (18 V AC ±10%).
COM - common ground.
AUX - power supply output / input (12 V DC ±15%).
FT - OC type output (shorted to ground when active) to work as an indicator of
problems with logging into GSM network (it activates approx. 2 minutes of the
problem occurrence) or an armed mode indicator (with the ARM STATUS ON FT
OUTPUT
option enabled). The problem with logging into the GSM network can
be caused by:
– unavailability of GSM network (out of range),
– missing or damaged antenna,
– entering an invalid PIN code,
– missing SIM card.
Some additional information can be provided by LEDs on the electronics board
(see: Fig. 2).
TMP - tamper zone (it can supervise the tamper contact of module enclosure,
detectors, sirens, etc.).
Z1 ÷ Z4 - zones.
NO1 - relay output terminals 1.
NO2 - relay output terminals 2.
3. INSTALLATION
All electrical connections may only be made with disconnected power supply.
Before connecting the power supply source (battery, alternating voltage from
transformer), you should first complete all the installation work.
The following tools will be useful during installation:
• blade screwdriver 2.5 mm,
• Phillips screwdriver,