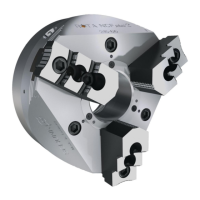
3 Remove the pilot-controlled double check valve system (item
18) by carefully unscrewing the plug screw with the O-ring
(item 13). Check all the O-rings in the valve system for wear
and replace them if necessary.
4 Unscrew the 6 hexagon socket head screws (item 39) at the
chuck mount (item 7), screw in 2 screws into the existing
threaded holes, pushing the mount down
5 Chuck until 2015: Remove the visible snap ring (40).
Chuck from 2015: Loosen radial set screw (34) in the fastening
nut (40). The clamping effect of the copper bolt (33) decreases
and the nut can be loosened with the enclosed assembly tool
(80).
6 Remove the piston cover (6).
7 Screw in the two hexagon socket head bolts into the existing
threaded holes of the piston cover (item 6) and pull out the
piston cover (item 6).
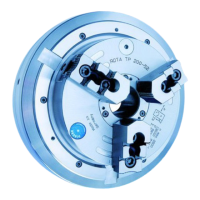
8 Chuck with distributor ring cover: Loosen the screws (item 35)
and remove the distributor ring cover (item 15).
9 On the front of the chuck, loosen the three hexagon socket
screws (36) of the sleeve (4) and pull out the sleeve toward
the front by lightly knocking from the back side of the chuck.
10 Disassemble the sealing disk (item 5) using the hexagon socket
head screws (item 37) and remove the O-ring (item 51) sealing
the pressure chamber.
Note
Do not lose the sealing rings (65) under the hexagon socket
head screws (37)!
11 The piston (item 3) can be pulled out of the chuck body (item
1) as can the base jaws (item 2) from the base jaw guides by
pulling inwards through the piston bore of the chuck body.
The base jaws (2), the base jaw guides and the hardened re-
versible jaws are designated as 1, 2, and 3 so that the same
position and thus the same true running accuracy is achieved
during assembly. The hardened base jaws simply have 1, 2, or
3 notches for marking the T-slots.
12
 Loading...