Page 31
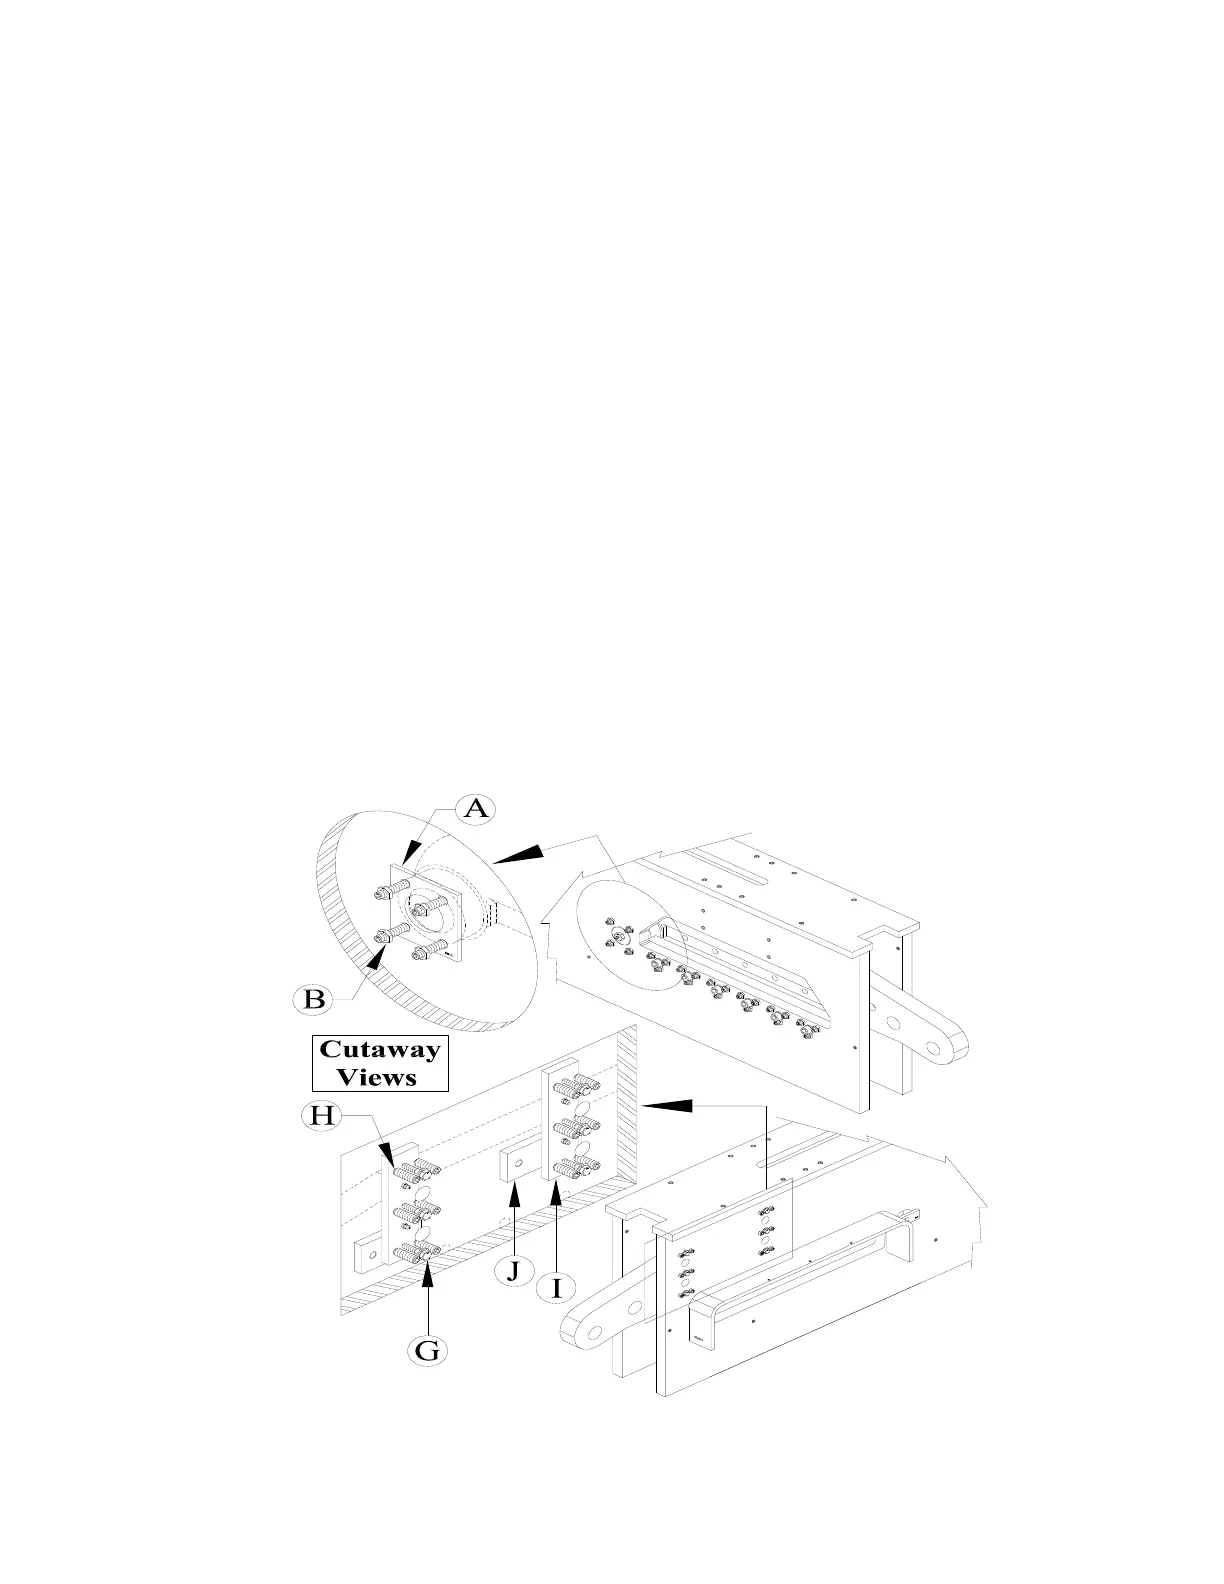
2. Loosen the six adjusting screws (H) in the frame for the rub block (I) and remove the rub block by
taking out the three mounting screws (G). (If excessive concave wear is noted on the rub block, it
can be turned and the back surface used.) Set the pressure plate adjustment before resetting the
rub blocks.
3. For the pressure plate adjustment, loosen the lock nuts (B) on the four adjusting screws that
engage the pressure plate (A).
4. Tighten all four adjusting screws on the pressure plate so that they are "snug" and will force the
shear arm solidly against the rear frame. (Excessive tightening of these screws only increases
wear.)
5. Replace the rub block (I). With the shear arm in the DOWN position, tighten the bottom two
adjusting screws (H) until the rub block comes in contact with the shear arm rub block (J). Raise
the arm about half way and adjust the middle two adjusting screws (H) until the rub block makes
contact. Then, raise the arm completely and adjust the top two screws. (Once again, excessive
tightening will cause unnecessary wear.) Check to be sure that the rub block (I) is in contact with
the shear arm rub block (J) throughout the full stroke.
6. Tighten the lock nuts (A) on the pressure plate adjusting screws.
7. Reset the shear blade adjustment. SEE SECTION 6.2B.
FIGURE 11