• To avoid contamination in the tank, use a screen funnel if possible.
• Fill the tank no farther than to the lower edge of the nozzle.
• Screw on the tank cap tightly again until the overturning protection clearly clicks”.
• After fueling up, clean any splashed operating medium from the power tool.
• Never start or operate the power tool at the site of fueling.
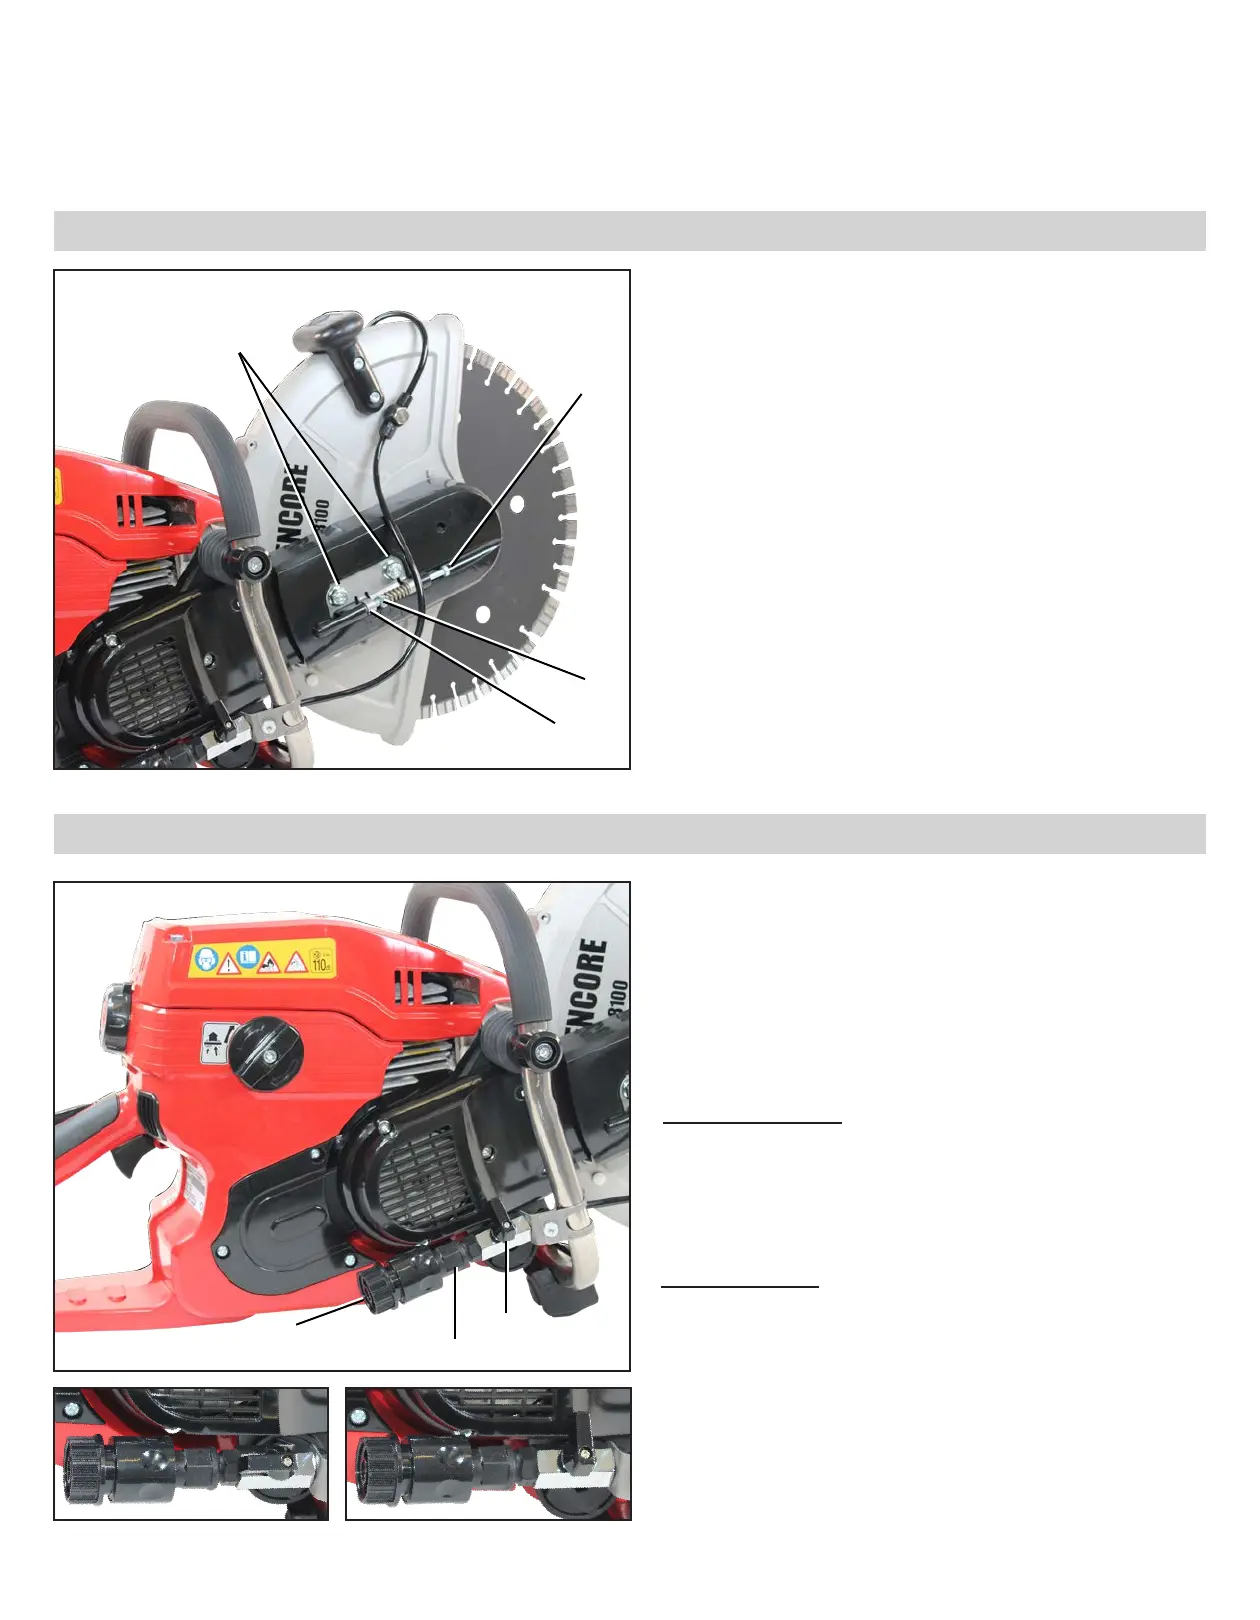
5.6 Adjusting The Ribbon Belt Tension
Generally, the ribbed belt tension must be set correctly
when starting the power tool. At initial starting, at re-
starting after extended stand still, after replacement of
the ribbed belt or after any other assembly work, always
check the tension and set the correct tension if required.
• Loosen both attachment nuts (a).
• Turn ribbed belt tensioning screw (13) towards the
right (clockwise).
Increase ribbed belt tension.
The square nut (b) moves to the mark “+”.
• Turn ribbed belt tension screw (13) towards the left
(counter-clockwise):
Reduce ribbed belt tension.
Thesquarenut(b)movestothemark“−”.
• The correct tension is reached when the square nut
(b)isonthecentermark(c),inbetween“+”and“−”.
• Tighten both attachment nuts (a) again.
5.7 Water Connection For Wet Cutting
Fine dust occurs when cutting mineral materials.
Recommendation: Use the water connection and cut
off wheels suitable for wet cutting when cutting mineral
materials.
When cutting with the water supply connected, the
dust is suppressed, visibility is improved and the cut off
wheel service life is increased by the cooling effect of
the water.
Before wet cutting:
• Connect suitable water line or suitable pressure tank
to the coupling connection (24).
• Operate the valve lever (28) to open or close the
water supply.
After wet cutting:
• Close the water supply, i.e. put the valve lever across
the connection piece.
• Let the cut off wheel run at high speed for another
approx. 30 seconds to completely eject the water.
Cleaning the screenlter insertin the couplingpiece
(27):
Chap. 8.2, page 8.
water supply opened
(valve lever parallel)
water supply closed
(valve lever across)
a
c
13
b
27
24
28
SENCORE S8100 CUT-OFF SAW MANUAL 19